Wednesday, February 29, 2012

Pin 17

Original Pin:

http://recentlytheblog.blogspot.com/2011/05/bookcase-project.html

I am an super-redo mode but have no cash :(  I knew I could get foam board at the dollar store so I decided I could get this done. Actually, quite a few stars aligned to make this one happen. In addition to the dollar store, I am in purging mode as well because we are in the process of getting new flooring and with a newly diagnosed asthmatic in the house I am getting rid of anything and everything that is sitting around collecting dust. The school district is having a book swap this weekend so we took this opportunity to clean out the book shelves. We have two full sized bookshelves that we condensed to one.
I forgot to take a before picture of the actual one I worked on, but this is the matching one. Notice all the books in the left corner on the floor--those were heading out the door.

The first problem I had was that the foam board was not as wide as our book shelves. I guess someday I will learn to measure first. . .

So I had to tape two boards together to get the width. I decided to cover the boards with pretty contact paper instead of paint.

A covered board ready to go in.

Hmmm. Yep, I think I will.

My trusty tape measure I've had since high-school graduation.
The contact paper didn't lay smooth over the tape. This was my first board, I learned to smooth the tape much better with the next ones.

 I ran out of supplies with one shelf left. I had bought all the boards at the dollar store, so I guess I will have to go back another day.

I sorted all the books left by color, just because I thought it looked nice. 

Here is the final product:

 Total cost: $7 currently +$2 to finish =$9

Total time: 2 1/2 hours

Final verdict:I like the look. I want to finish out the last shelf. It looks so much cleaner and sharper than before and I feel fresh for having purged a hundred or so dusty books. (Hello? Ancient nursing textbooks anyone?) But I think it would have been less work to just pop the back off and cover it. The link says "No-commitment" but I don't think I'll be changing it out frequently!

Tuesday, February 28, 2012

Pin 16

Original pin:

Tutorial to refashion men's shirt to peasant blouse at http://www.madebylex.com/2009/07/peasant-blouse-refashion-tutorial.html

After begging my husband for a week to find me an old shirt to have I broke down and spent $2.99 at Goodwill to buy my own. Turns out that was probably a better idea anyway because then I started with a much smaller shirt (I bought M, he would have given me L or XL). I would have had to take in the sides some with any larger shirt. I used some scrap fabric for the sleeve cuffs. Here is what I started with:

I followed the directions which were very easy and 45 minutes later I was done! It surprised me how fast it was. I started with short sleeves so I was able to skip that step which I am sure shaved off some time. This is my finished project!


Not my greatest fashion piece, but it is very comfortable and looks a bit nicer than just tossing on a t-shirt. It is the stripes that aren't speaking to me. Even with the medium shirt it is almost too baggy for my preference in the back. You could put elastic in the sleeve cuffs if you didn't want to put fabric cuffs on and it would still be cute and give them that blousy look.

Total time: 45 minutes

Total cost: $2.99

Final verdict: If I find a shirt fabric that I love, I may do it again.

Pin 15

Original pin:


http://agirlsgottaspa.com/blog/2011/06/review-homemade-deep-conditioning-hair-treatment/

My hair is super dry lately, and very frizzy. I need a haircut in a bad way. Since having my youngest, I have had frizzier hair than ever in my life. In October I tried the Brazilian blow-out, but it didn't work for me. My hair is subjected to all kinds of heat styling and ponytail torture. I decided a nice moisturizing mask would do the trick. This link didn't really go into much detail as to how to actually do it. It was just a list of ingredients and a review of the treatment itself. I have no fear of forging ahead without exact directions so I jumped right in. I did follow the reviewers advice on one thing and used a food processor to blend the ingredients. I used one whole ripe avocado, an equal amount of coconut oil, and whatever amount of olive oil I thought would hold it all together. The coconut oil was still kind of chunky after the food processor, but there were few avocado chunks.

I decided that I should wet my hair first because it just seemed like the right thing to do. The reviewer mentioned having avocado bits all over her house after, so after smearing it in from scalp to tip of the hair I twisted my hair on top of my head and wrapped the whole thing in plastic food wrap. So lovely. The plastic wrap kept the heat in and I figured it helped the mask penetrate. However, as it heated up, the coconut oil melted and the mask began running down my face and neck. I unrolled some cotton and stuck it up under the edge of the plastic, salon-style, to catch the drippings and put a towel around my neck to keep the oil from ruining my shirt. I really looked nice.

After about an hour, I washed it all out and blow dried it. It was amazingly smooth and soft! I don't think I got all the oils out the first time so I rewashed it in the morning. I would recommend a double shampoo in the future. The softness lasted days and the frizziness was drastically improved. One thing I did not expect--my drying time was cut in half! AND I didn't have to flat iron it! So it was like a mini-Brazilian blow-out only much cheaper and with shorter lasting results.

Total cost: $8 because I had to buy coconut oil, but it should last a while.

Total time: Hands on 15 min, soak time 1 hour.

Final verdict: I still need a haircut. I think if my ends were healthier this would have had even better results. I might warm the coconut oil a bit before mixing together to avoid the initial chunks in the mask. I'll do it again--if nothing else to cut down on drying time. Plus, ripe avocados are 3 for $1 right now. Stock up!

Saturday, February 25, 2012

Easy luxe baby blanket

My own project!!

I would rather make presents for new little babies instead of buy them and I know a gazillion pregnant mommies right now! I could go broke buying gifts. This was inspired by Will's favorite blanket. We got it as a gift before he was born and it is now his favorite, gross, overly-loved, cry-by-the-washing-maching security blanket. What better to give to a new baby than a tried and true lovey?

Minky dot on the top, backed with satin, satin trim... couldn't be easier?
My supplies: fabric, thread, blanket binding

I am making this one for a girl. I wanted to make a square blanket with minimal measuring and cutting, so I decided that the best way to accomplish this would be to buy enough fabric to make two blankets. Since I have plenty of babies to sew for I know I will use the second one. So I bought a length of each fabric (minky dot and flannel backed satin) that was the same length as the bolt width (since the fabric is doubled over on the bolt) and then just cut the fabric at the fold. Ta-da! Two squares!

Notice my squares don't line up exactly.
I layed one square on top of the other, wrong sides together, pinned, and basted them together with a wide zig-zag close to the edge. Then, I pulled the blanket binding out of the package and lined it up and straight stitched as I went. I folded the corners around as I came to them and then tucked the edge under. No pinning, no ironing, easy cheesy. My final product. . .

Pretty cute--White minky dot with pink satin backing.

Total time: 45 minutes

Total cost: I can't say because I have two friends getting this! But I will say that it is at least 60% less than what you would pay for Will's version.

Final verdict: Receipient number 1 seemed happy! Now, gotta go make number 2's.

Pin 14

Original pin:


Claim to be Dallas-style Brisket Tacos

I absolutely LOVE the brisket Tacos at Mia's in Dallas. I dream of them. When I was in the hospital laboring with my youngest, my "push present" was Mia's Brisket Tacos. Some women get Gucci bags or diamond rings. I got Mia's. When I found this recipe that actually says it is of Mia's style, I couldn't wait to try it out.

In combining my desire to have brisket tacos with my necessity to keep my family under budget, I had to skimp on the meat and buy a cheaper cut, so they weren't exactly like the Mia's of my dreams. If I closed my eyes, I could taste it there though. Mmmmmm. My husband skipped the peppers and onions, but I really thought they made the dish--adding good flavor where the quality of meat was lost.


Total cost: around $15 to feed four

Total time: Hands on 45 min, 6 hours slow roasting

Final Verdict: Unless I can get a good quality cut of meat, I'll just go to Mia's. It will be worth the drive and then they can do the dishes.

Thursday, February 23, 2012

Pin 13

Original pin:


I bought a men's XL shirt at Goodwill for this project. I always wash these items before starting on them, so I just tossed it in the laundry hamper the day I bought it. Over the weekend, Gene did the laundry and when he pulled this out he just started laughing because he didn't really know what it was for. Then he got jealous of it and wanted to keep it for himself. I had to wrench it away from him because the $2.99 came out of MY special cash stash. If he wants a Fubu shirt he can go to Goodwill himself.

Before:


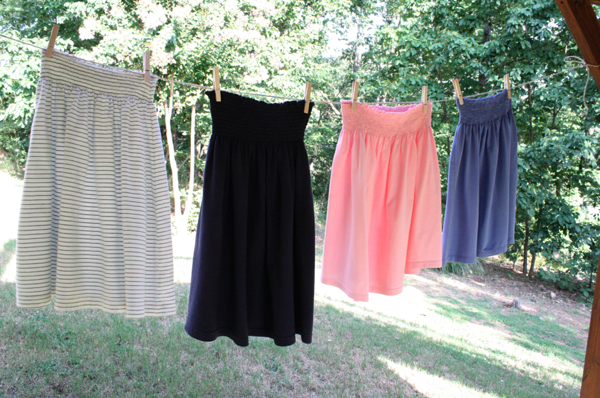
 I've never done shirring before, but after reading the directions on the original pin, it seemed easy enough. I am drawn towards shirred-style clothing so I was excited to try it out and see if it was really easy or one of those things that just sounded good on paper.

Final product:
 Okay, so shirring was super easy. I made this entire skirt in less time than it took me to watch one episode of American Idol--Hollywood Week while playing catch-up on the DVR.

Today was red, white, and blue day in Luke's class and the parents were invited to the last 15 min of class today to see their presentation. I worked last night so I was sleeping all day. When I woke up and checked the weather I was so, so, so happy to see that it was a perfect 77 degrees. I hopped up and tossed on my new red, gray, and blue skirt with a white T and I was off to celebrate my patriotism in style.

It was super comfortable, but a little big/loose and I was nervous one swift tug from a toddler might bring it down. Next time I will go for a smaller shirt. The length was more than enough thanks to my shorty-short legs.
Total cost: $3.78

Total time: 45 minutes

Final verdict: You may see me in this a lot over the hot, hot Texas summer.

Pin 12

Original pin:


http://thepenningtonpoint.com/tag/pinterest/page/2/

Glow stick bath for the kids! Seriously! How fun would that be?? As a kid, I would have thought that was awesome. As an adult, I still think is kinda awesome. I took it one step further and made it a glow stick bubble bath. I told Luke yesterday that I had a surprise for him that he wouldn't get until bath time today and he had been trying to guess for hours. I locked everyone out of the bathroom to get the tub filled to the brim with bubbles and called them in to this:


 Luke stopped in his tracks and just stared, speechless for a few minutes while he took it all in. Will did not hesitate one second to strip down and hop in.
 Luke couldn't let Will have all the fun so he jumped in as well.


They loved it. It was so fun. They stayed in the bath tub for nearly 45 minutes until I pulled them out all prune-y.They are going to be sad tomorrow when they realize their glow sticks have gone dim.

Total cost: $2 for 4 glow sticks

Total time: 5 minutes to draw the bath. 45 minutes of entertainment.

Final verdict: Will be a great thing to do for a treat--maybe on a night when Daddy is out or as a reward for accumulated good behavior or something. Definitely going to keep this one.

P.S. Update to Pin 11, the Pre-K's loved the snack mix. They finished off the leftovers on the playground after school. I had some too and I have to admit, it was a little addicting with the sweet & salty mixing together. . .

Wednesday, February 22, 2012

Pin 11

First--Wow! Thanks for all the positive feedback! I was a little nervous to share my little project, but I am really flattered by the wonderful things you all have been sharing. And I am so happy to hear that I am "pinspiring" you too!

Original pin:

Well, that is a little misleading. Every now and then you find something out there that just won't pin. I don't claim to understand the magic that makes Pinterest work, but this one would only pin in gigantic-bigger-than-life, can't-even-read-the-screen picture size. I am going to make it pinnable to you.

This was some sweet 9th grader's school project titled Invent-a-snack.

http://www.four-h.purdue.edu/foods/Uncle%20Sam%27s%20Patriotic%20Snack%20Recipe.htm

There is the link that I would have pinned if I could have pinned.

Luke needed a patriotic snack to share at school for patriotic week. Let me just tell you--the time period between Valentine's day and Easter is not the time to buy red, white, and blue food items.

I took a few liberties with the recipe due to product availability. For about two weeks I pretty much bought anything snack-y that was red, white, or blue. I bought Valentine's M&M's and regular M&M's and picked out the red, white, and blue ones, substituted Frosted Cinnamon Toast Crunch for Frosted Chex and Gerber stars for Star Cereal, added yogurt covered raisins and picked out the blue and red berries from Cap'n Crunch Oops All Berries (which will always remind me of my college friend and her berries mis-adventure.) Luke helped me mix it all together. (Non-measured, of course)

Here is the pinnable picture for you!

And for quick reference, the ingredients:

Pretzel sticks
Mini-marshmallows
Blue and Red Berry cereal
Gerber Stars
Yogurt covered raisins
Dried cranberries
Frosted Cinnamon Toast Crunch
White chocolate chips
Red, White, and Blue M&M's

Mix together in equal parts or whatever looks good to you.

Luke has kept this a surprise from his class and he said "I hope its a hit! A hit means that there is none left because the hungry 4 year old's ate it all up!"

Total cost: I lost count--I bought things at different times. I am going to estimate probably $10-15 but there are lots of leftover ingredients, and it made a lot! We just kept pouring things in until we filled one of those big plastic cereal containers. Daddy was really happy to finish off the Cap'n Crunch last night.

Total time: 30 min (I separated the M&M's while on the phone with the insurance company.)

Final verdict: Luke and I approve. We'll find out from the Pre-K's tomorrow!

Tuesday, February 21, 2012

10 pins in...

Originally I committed myself to two weeks of five pins each before I could really decide if this was something I could do. Well, those two weeks have passed and I have done my 10 pins. I have really enjoyed this project. Thinking about it today, it has actually increased my quality of life.

When I first cooked up this idea it came about because of Tiny Tower. If you aren't familiar with that it is an iPhone app that is this simple little game. My good friend got me totally hooked on it.  However, it is totally mindless. There is not a whole lot of strategy (that I can find) to it, it isn't a game you win or lose. But it is easy to get totally absorbed in it and pass an hour just piddling around with it. Too many evenings I would sit down and open this app only to look up at the clock and find myself horrified at how long I had been mindlessly sending my "bitizens" up the tower's elevator. No disrespect to it's creator, but my brain was feeling a bit mushy. Other apps I've been hooked on didn't make me feel this way. Words With Friends or even Solitarie require strategy and knowledge so I don't feel quite so numb playing those types of games.

I decided there were better things I could do with my hour of time that didn't involve iPhone or television.

I have been planning my week's worth of pins as I plan my weekly menu so that I can have all my shopping lists in one place and be done. I look forward to each pin and sometimes have to hold back from doing them all at once! (shh! I did three today) I almost want to commit myself to more than five per week, but I am going to take this committment on slowly, so I'll stick to five for now.  Last night I did my own project--non-pinned that I'm going to post about someday. The hardest part has been sitting down to put it all on the blog.  I love that I can look back at all my pins, it is just hard sometimes to sit down and do it.

In conclusion, I am so happy I started this. I feel like my quality of life has increased. I feel my creative soul waking up. I'm going to stick to it a little longer.

Oh, and my pin board is up to 542.

Pin 10

Original Pin:

I whipped these together last night thinking the boys and I could have them for breakfast in the morning. I was a little short on oats (maybe like 1/8c short) but figured it would work with what I had. Unless I am baking, I am a non-measure-er and just estimate quantities. Since this CLEARLY said no-bake, I decided estimation would be the way to go. Who really wants to clean peanut butter and honey out of their measuring cups??

They were super sticky while rolling them into balls, but handling them individually they don't seem to be so sticky. I had to offer one to my husband last night. I was kind of cranky all night so it was something of a peace offering. It worked. I'm not sure how many he had but he came out of the man-cave for seconds.

Luke gave them two thumbs up this morning and has plans to eat them again tomorrow. Will ate about half of his--but you can't really count on him to eat on a regular basis. To that kid eating is at the bottom of his priority list unless it is a cupcake or a lollipop.

I thought they were delicious and have been sneaking them here and there all day. The batch is almost gone and it is only 24 hours later. They are reminiscent of a super-moist granola bar. Guess I will have to add oats to my shopping list so that we can make these again!


Total time:  20 min + 30min chill time

Total cost: $2.19 for coconut. Everything else was already in the pantry.

Final verdict: Yum. I already plan to make them again--but I may hide them for myself.

Monday, February 20, 2012

Pin 9

Original Pin:
I am always looking for cute hair accessories because I wear my hair up a lot! This looked cute and easy enough. I had to buy the combs but was totally set on the embroidery floss! I sat down in front of some good ol' trash TV and worked through it. My ends are a little bit loose but I could maybe improve that with some practice! My finished product(s):


Combs came in a 2 pack so I made 2!

Wore it to work this weekend. My hair stayed put with some help from a few extra bobby pins (It is just too thick!)
Total cost: $2.19 for hair combs

Total time: 30 minutes for both

Final verdict: Happy with the finished product. I'm going to keep a look out for cheap yet sturdy combs that may tame my volume of hair a little better. My combs are a bit flimsy! But I felt that my comb made my quick up-do a little more polished.

Friday, February 17, 2012

Pin 8

Something for our bellies today!

Original pin:


link: http://moneysavingmom.com/2011/06/freezer-cooking-in-an-hour-corn-dog-muffins-chicken-stuffing-casserole-oatmeal-raisin-muffins-italian-pasta-bake.html

My experience:
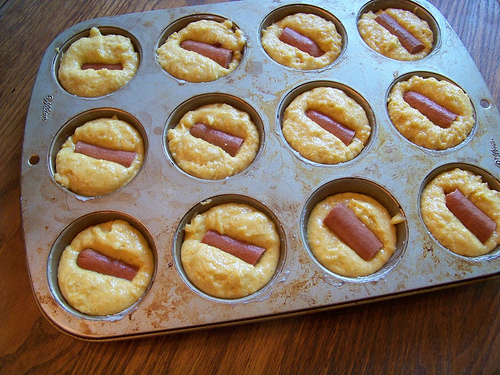
I mixed up a box of Jiffy corn muffin mix--a staple in my pantry. Sliced up some hot dogs and dropped them in. 15 minutes later they were done and we were sitting down with some homemade corn dogs and my favorite from scratch macaroni and cheese. I know that the hot dogs are still a pretty processed food, but I feel better about serving my kids corny dogs that weren't fried. We can't be perfect all the time. And, picky-eater-Will absolutely loves corny dogs. These were gone in a jiffy. The boys each had two and I sent the leftovers in their lunchbox to school the next day. I told Luke they were corny dog cupcakes with ketchup frosting. Gene and I thought they were delicious too. I put really thin pats of butter in the bottom of the muffin tin and melted it in the oven before I put the the corn muffin mix in just to give it a little crispy-ness to the edges. Very delicious.


It actually made more than 8 but we were too busy gobbling them up to take a picture!


Total cost: $2.99

Total time: 20 minutes including baking time

Final verdict: Delicious. Definitely will make again.

Wednesday, February 15, 2012

Pin 7

I predicted to my husband that this would be my most expensive pin project so far--but I promised that it would benefit the whole family. He approved my projected budget of "$15--well, not more than $20."

The original pin:

Pinned Image
(credits to http://mykotori.com/blog/2009/08/27/how-to-organize-your-art-supplies/ but the original link no longer works)

My experience:

Here is the before pictures of the Art Corner in our house:

Our original art bucket overflowing with papers, coloring books, and capless markers

A mess of stuff.
The boys and I took a trip to Lowe's. They love that double cart they have a the hardware stores that lets them face each other so they were very well behaved. In under 10 minutes we located our supplies, paid, and were back out in the rain loading it up into our car. 

That afternoon Luke and I took on the task of organizing it all and here is our wonderful final product:

Luke absolutely LOVES it. He thrives on this sort of organization. A pocket for everything?!? Seriously. This boy is in organizational heaven.  (And I gave this trait to him) He has spent the last two afternoons with this bucket. Our bucket jockey even had a Velcro-closure pocket that I designated as his secret pocket for his scissors so that brother couldn't access them.  When daddy came home that night, Luke rushed to show him our new bucket and his secret pocket.  Even daddy was impressed with this pin. Win-win, two thumbs up all around.

Total time: 20 minutes

Total cost: $10.57 (way under budget so I feel I should treat myself to some Starbucks tomorrow)

Final Verdict: Winning. The art corner is organized. The kids can find their supplies. At least while its still new--Luke is keeping a handle on keeping it all organized and I haven't had to pick up one marker or broken crayon in two days. 

Pin 6

Time for a holiday treat! The original pin:

The Ultimate Spritz

http://www.bettycrocker.com/recipes/the-ultimate-spritz/aa68df04-bd64-4f1b-8421-0df82064bca4

I got a new cookie press recently (which is a story in itself) right near a holiday in which I had volunteered to bring treats for school to Will's class for Valentine's Day. What better time to try it out?

The recipe is basically just butter with a few other items to hold it all together so of course it is going to be delicious.  Since this is not about the cookie press I am not going to go into how it kept flipping the breaker or how my husband kept snickering at my frustration with the dang thing. I think that the dough was a bit too thick for my electric cookie press. It is probably fine for a manual press, but my electric one nearly bit the dust with this recipe.


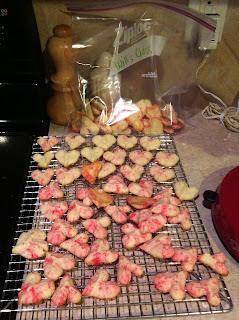
My plan was to make little heart cookies and top with red sprinkles before baking.  However, after finally making a sheet of acceptable cookies the sprinkles wouldn't stick.  I read somewhere that I could lightly brush the dough with water to make sprinkles stick but brushing 90-some-odd cookies with water just didn't sound appealing at 11 pm.  For the second batch I decided to just load the sprinkles into the press with the dough. I alternated while filling the press dough-sprinkles-dough-sprinkles-etc. I was using the colored sugar-type of sprinkles and I wasn't expecting it, but they sort of started to dissolve in the dough while being mashed through the cookie press. It resulted in a marbled effect that I really liked.

I don't really have a good close-up picture of the marble-y finished product but you can kind of see it in the pictures above. 

So after finally pulling together my technique with the cookie press I ended up with a delicious batch of melt-in-your mouth buttery spritz cookies.  I actually made them two days before his party so the giant bag of cookies had to stare me in the face all day Monday every time I walked through the kitchen.  A class of twelve 2 year-olds did not need 90 cookies so of course the boys and I sampled a few here and there.  (We had to make sure to eat all the misshapen ones)

Total time: 1 1/2 hours

Total cost: $2.99 for red sugar crystals. All other ingredients I already had on hand

Final Verdict: Yes! Delicious! But I will only make them when I have an event or person to share them with because I would eat them all!

Sunday, February 12, 2012

Pin 5

Quick and easy because I worked a busy shift last night and got up early today to take Luke to a roller skating party--which was a blast from the past! I used to love love LOVE roller skating.

On to the pin. . . As I teased at the beginning, this was a pin I have actually done before but because it is so terrifically awesome I will do it again and again and again. I will never by fancy foaming soap for the kids bathroom ever again. My boys use a ton of soap in the bathroom when they are washing their hands. Thanks to an experience with some purple soap I have seen where the soap actually goes. I'm not going to name any names here, but a certain company that makes this purple foaming soap for KIDS uses a purple dye that stains. Seriously??!?! Stains?? SOAP that stains??? I don't get it. I now have purple stains on every surface in that bathroom--the toilet, the walls, the cabinets, the doors, the grout. But, thanks to another pinner out there in Pinterest land I will never have that again. And I will save tons of money to boot! Keeping the fancy foaming stuff for myself from now on. 

Original pin: 
Thank you http://www.thefrugalgirls.com/ .

My experience: Awesome. Fast. Easy. Love it.


The recycled foaming dispenser + baby wash I already had on hand for bathing the kiddos.

Like magic I have foamy soap!
Yeah for white soap! Yeah for clean hands! Thanks to this pin I don't really care where the soap ends up anymore--maybe the bathroom will end up cleaner for it!

Total time: 3 minutes

Total cost: $0

Final verdict: Duh. Yes. Again and again.

Saturday, February 11, 2012

Pin 4

I was so impressed when I pinned this. I have been planning this one for a while because I knew I wanted to do it for Valentine's Day. I thought this was a great idea--and apparently everyone else does too! After I was done, I did some trouble-shooting research on the internet and found this absolutely EVERYWHERE!!

What I pinned:
(credit for the photo: http://www.flickr.com/photos/61951289@N08/5672821563/sizes/m/in/photostream/)

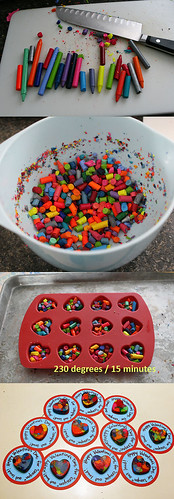
My experience:  I thought these would be fun Valentine's gifts for the boys to take to their friends.  I already had some silicone heart baking trays I bought ages ago. I used them once and haven't pulled them out since, so when I saw this I was excited to get to use them again. We don't have tons of old crayons lying around because I am a thrower-away-er.  If its broken and on the floor it gets tossed.  So instead I picked up a couple of boxes of crayons from the dollar store. Luke helped me peel and break them until he got bored. It took a lot longer than I expected! I packed each heart full. 
Ready for the oven!

They had a lot of oil separated on top when they came out of the oven.  I let them cool and popped them out of the trays.

Cooled and popped out
The oily substance cooled to a waxy substance. I am not sure if it was a particular color that caused this or if it was simply because I bought the cheap dollar store crayons, but it didn't happen to all of them.  The result on about 2/3 of them was this waxy layer that was just around the top edge on some and on others covered the entire top side.  Also, not all of them melted completely so that they were smooth on the top. 

Waxy top layer

Side view of waxy layer
The waxy layer did not leave any color on paper, so I decided it must go.  I took my cheap dollar store knife I had purchased--because I didn't want to ruin any of my good knives with this project, and started shaving off the waxy layers. 

The same heart as above minus the waxy layer
 (What seemed like) hours later, I had uncovered some beautiful, wax-layer-free beauties.  Again, I attribute this to the cheap dollar store crayons, but my hearts disappointingly did not have the shiny exterior of new, quality crayons. After my internet searching of everyone else's crayons, I didn't see anyone else with this problem. Bummer.  Now, minus the waxy layer, they color and are still fun--just not as pretty as I had hoped.

The finished project
Total time: 2 hours (peeling, baking, and removing wax) + cooling time

Total cost: $3 for 2 boxes of crayons and one cheap knife

Final verdict:  I would like to try this with quality crayons and see if I have the same results.  I made 36 hearts with 2 boxes of 48 crayons so it could be done in smaller quantity for just a few dollars more.  I still think its a cute idea and I saw some really fun color combinations out there on other peoples blogs.  I'll be keeping my eye out for fun shaped silicone molds and maybe finding a place to stash those old crayons.