Showing posts with label total bust. Show all posts

Saturday, December 22, 2012

Pin 166 (er. . . 166.5??)

Late edit: I just noticed I have two pin 166's!! I guess this is 166.5? No more drinking and blogging.

Original pin:
Pinned Image
http://www.myrecipes.com/recipe/black-bean-corn-topped-potatoes-10000001895990/

Black bean and corn topped potatoes.

Sounds good and easy for a family dinner. I took another pinner's suggestion and added some bell pepper to the mix. I also prepared my potatoes my new favorite way (Pin 156) rather than the microwave way suggested in the recipe.


I am looking at this picture and noticing that you can't really see that there is anything much more than cheese piled on top of this potato. I promise you it is all there :)
I also snuck in a little sour cream and butter to that potato that you can't see. The items had to be layered appropriately to enhance mixing of flavors. (I'm a little particular about potatoes.) I threw in a little chopped ham on the side for some protein. My men would be bewildered without a little meat on their plate at dinner.

So how was it? It wasn't bad, it just didn't have any wow-amazing-can't-get-enough factor to it. It was not unlike the filling in the wraps from Pin 143--Southwest Chicken Wraps. The topping itself is not too original. Putting it on top of potatoes is the innovative idea. My family didn't care for it. The recipe made a large amount so, unless you have a big crowd to feed, start planning for leftovers. You could serve Southwest Chicken Wraps the next day and add a little shredded or chopped chicken to the mix, serve on top of lettuce as a taco salad type dish, or serve on top of tortilla chips.

Total cost: The only items I had to go out and buy were the bell pepper and the black beans, so I spent around $3.

Total time: Aside from cooking the potato, cooking the topping was quick--20 minutes to chop, mix, heat.

Final verdict: I won't be making this again for potatoes. My family didn't eat much of it and I was stuck with a ton of leftovers to plow through.

Tuesday, November 20, 2012

Pin 160

Original pin:
Pinned Image
http://www.howdoesshe.com/5-ideas-to-keep-kids-entertained-at-a-restaurant/

Tic-tac-toe with sugar packets while waiting on restaurant food.

I didn't plan on doing this one this week so I don't have pictures of my own to share. Guess that is a little what this pin was about anyway. There are actually a few ideas on keeping kids entertained at a restaurant.

My oldest is 5 and in the last six months or so finally figured out the whole tic-tac-toe thing. We tried this out this week as we waited on our food to arrive. It is a clever idea and he was really into it as I set it up. However, my sweet little five year-old does not have the delicate touch required to place the sugar packets without knocking over the balanced knives. We had to reset the game board after each of his moves. We only made it through one game before we both we ready for something else.

If you read the comments on the original post there are some pretty hot opinions about kid's behavior in restaurants and what you should and should not allow your kids to do. I try to teach my kids to be respectful in restaurants and in all honesty, we just don't go out much to restaurants that don't have a playground. A little sad, right??

In the spirit of the original post, here is what I have used to entertain my kids at restaurants:

1. If I am really planning ahead, I will grab our memory card game. (Which happens to be one of our favorite story characters: The Pigeon Wants a Match)


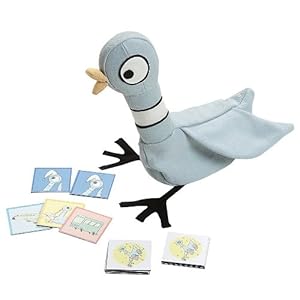
Its fairly easy to clear the table enough to set this one up. Sometimes we half the deck if there is not enough room.  We could just as easily grab any card game--Old Maid, Go Fish, but Pigeon Match is our favorite (and it's all packed in that cute little pigeon bag!).

2. I spy. Big Brother's favorite game. We play this everywhere when we are waiting. The doctor's office is an especially hot spot for this game but it works for a restaurant too.

3. Hot Wheels. I usually have a few roaming around in my purse somewhere. It comes with the territory of having two boys. These usually occupy but you run the risk of having to fish them out from under the table over and over again.

4.  After the tic-tac-toe game we moved on to this one: I had some fruit snacks in my purse but you could do this with anything. Sometimes I use TicTacs, Skittles, or any little reward you can think up. I don't necessarily want to give them a bunch of sugary treats right before a meal so the challenge for me is to see how long I can make a fun size pack last and keep them entertained. I ask them a question and if they get the answer right then they get one fruit snack (or TicTac, or Skittle, etc.) If they get it wrong then they get nothing. There is a fine line between hard questions to make the pack last and easy enough to keep them engaged. You can ask questions that take them time to figure out like, "How many sugar packets are in the dish" and "How many letter "a'"s are on the menu?" My five year-old gets lots of spelling words, math problems, history "Who is the President?", geography "What is the capital of Texas?", while my little one gets questions like, "What letter does purple start with?" and different color, shape, number, letter, relative ("Who is mommy's sister?") type questions.

5. Stacking Cheerios. When my youngest was little my oldest would play this one. Now that my baby is nearly three I don't usually have Cheerios stashed in my bag anymore.

6. If we are starting to fail, we order a bowl of chips and salsa--or whatever appetizer is on the menu that can be prepared in minutes.

Total cost: $0 unless you count the cost of food.

Total time: 30 seconds to set up. Entertained us for 2 minutes.

Final verdict: We'll try it again when he's older but constantly picking up the knives and rebuilding was just a little of a pain.

And since I have no tic-tac-toe picture I'll just share with you some thankful art that came home from preschool this week. I absolutely LOVELOVELOVE this piece. It is going in the safe.

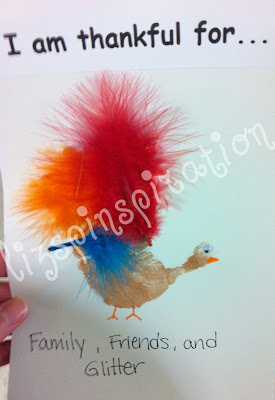
Me too, buddy, me too.

Wednesday, October 10, 2012

Pin 142

Oops! Looks like I can't count lately. I skipped 142!

Original pin:
Pinned Image
http://www.healthylivinghowto.com/1/post/2012/01/detoxification-part-i-healing-waters.html

How to draw a detox bath.

I actually had pinned two different sites for detox bath. Both were the same directions. I guess I think I need a lot of detoxing! Lets explore this. What exactly is a detox bath? From what I can find, it is a bath that draws out toxins from your skin, can help with aches, and can improve sleep and energy patterns.

I love a relaxing bath. My plan was to soak in the bath, candles lit, sipping champagne. Sounds relaxing, right? Then I started reading the directions. Apparently you aren't supposed to take IN toxins (ahem, champagne) while you are detoxing. You are supposed to drink lots and lots of water. Dang. Who would have thought detox would be alcohol-free? Oh. . . never mind. No champagne so I gave up on my candles too.

Instead I gathered my detox supplies.
 And read all the safety warnings. Uh oh. I hope not.
Well, here goes nothing. . .
This was hard. I didn't expect it to be hard. For the first 10 minutes or so it was relaxing. And then it got really, really hot. I was sweating--which is the point. But I still had 30 minutes to go! It was like sitting in a sauna. I drank every drop of my 32 ounces of ice water I had taken in with me.  Due to all the warnings on the website, I had jokingly given my husband a heads-up about this pin. "Ha, ha. If you hear a loud crash you might come check on me. Ha, ha, ha."

When I started whining about the time he came to check on me. At 20 minutes left my husband came in and fanned me with a magazine. This is when I started thanking myself for not drinking alcohol and lighting candles. All that extra heat! No, thank you.

At 10 minutes left he brought me a washcloth with ice cubes to put on my forehead.

At 5 minutes left he gave me minute by minute countdown. It was like he was cheering me on through the finish line of a marathon. And, I DID need help getting out. I was lightheaded after all that heat. Warnings noted.

So did I feel detoxified? I don't really feel any different. I don't know what I was expecting, really, but there were no visible toxins in the water. My skin doesn't look or feel significantly different. I didn't lose any weight. My energy level didn't change noticeably from yesterday. My sleep pattern didn't change.

Total cost: $2

Total time: 40 minutes, to the second.

Final verdict: Unless I notice something dramatic in the next day or so, I won't be wasting my time or energy doing this again. Have you done it? Do you notice anything different?  (And in case you were wondering--no laxative effect. Guess that only works if you DRINK the water you're soaking in. . . )

Wednesday, September 19, 2012

Pin 133

Original pin:
Pinned Image
no source available

Smart idea! Write on the washer lid with a dry erase marker to remind you not to toss your "do not dry" items into the dryer.

I grabbed a dry erase marker on laundry day and went to work. Now, I don't have just a whole lot of fine items that can't be dried, but this week I found at least three.  First item into the washer. . .

I actually wrote instructions on the washer just in case someone else in my house might feel like moving laundry to the dryer. Riiiiggghhht. . .  keeping the dream alive. But, guess what didn't go in the dryer? You got it, that white button up shirt with lace, that's what! I hung that shirt up and wiped off the dry erase with a damp cloth.

Here I am. Feeling so awesome and smart that I find just the right spot to store my dry erase marker in the laundry room where I can reach it and remember it. Next up, two sweaters I picked up a the thrift store for some upcycling later this week. Into the washer you both go! Green sweater, brown sweater scrawled across the top of the washer.

Guess what. Neither of them go in the dryer either! Touchdown dance! Now to just wipe it off. . . maybe this cloth isn't wet enough. . . maybe some Windex? . . . soak for an hour with bleach??!?!?!
After all that I still have this reminder:


Here is my theory:

While I do try to keep a tidy home, I probably only clean the washer top every six months or so. There was probably some degree of build up of lint and detergent, and who knows what else on the top of the washer. The first time I wrote on it the ink stayed on the build up gunk. Then I cleaned it all off. The second time it went straight on the top and apparently soaked in! I can't get it off yet. Same marker, same spot.

Total cost: $0

Total time: 20 minutes if you add in the attempted clean up. (plus one hour soak)

Final verdict: I thought I was smart and clever, but I guess I won't be trying this one again. I'll have to stick to post-it notes. Although, any brown and green sweaters may be safe for life around here.


Tuesday, July 31, 2012

Pin 110

Original pin:
Pinned Image
http://petitelefant.com/how-to-pore-strips/

Homemade pore strips--you know, like those Biore strips? Clever, right?

I'll admit, I don't have horrible skin. But I do have icky pores, for sure. I love pulling out all that gunk with the pore strips. I just love looking at all the gunk pulled out and feeling so refreshed afterward.

And here I am. Braving it all and sharing my personal photos with the world.

The before pores:


Following her directions, I mixed this up and slapped it on, FAST. She really drives home that you need to put it on fast. I had my mirror all positioned near the microwave and spread it on with the back of the spoon. Until it is fairly dry, this stinks!

Biore strips were only made for the nose and chin. I had always wished there were strips for other parts of the face. As she did, I applied it all over.
A few minutes later it was starting to set.
 Roughly 20 minutes later, I started the work of peeling it off. I started at my chin and worked the way up. Immediately, I noticed that there is something missing from the directions. While the mixture is drying, you should drink a very stiff cocktail.

Peeling this off is so very painful. I consider myself to have a rather high pain tolerance. This hurt. My husband asked more than once if I needed to go to the emergency room. In addition to taking off this first layer of skin, it took off every tiny hair. Ouch! I started to get worried when I noticed this giant stray hair that had embedded itself in the mask!


Very worried about this hair.

And I lost some eyebrow.

A chunk of baby hairs near the hairline.
 I did my best to spare the eyebrows and baby hairs by tearing off the mask and leaving the parts that were adhered to hair.

Saving the eyebrows and hairline.

For all the pain, for all the effort, I had one pore out. Seriously, I checked every little chunk that came off. For all the hairs and eyebrows sacrificed, I had one pore.

See my little pore.
And finally, the after picture:
Before on the left, after on the right.

Total cost: $2.29 for gelatin

Total time: 30 minutes including drying time. (Which you should utilize to prepare for the upcoming pain.)

Final verdict: Beauty may be pain, but this pain did not yield as dramatic results as I had wanted. I will not be doing this one again. The recipe made at least enough to cover two faces. I would recommend sticking to the Biore defined areas (nose and chin.) The cheeks, upper lip, and hairline were, by far, the most painful areas to peel this off of. It did exfoliate well and did remove unwanted (and some wanted) hair.

FYI: You can soak off the remaining pieces with warm water.

Wednesday, March 28, 2012

Pin 39

Original Pin:
Top 10 Time-Saving, MacGyver-Style Cleaning Tricks
http://lifehacker.com/5383447/top-10-time+saving-macgyver+style-cleaning-tricks

A washing with vinegar and baking soda to freshen towels and remove residue, and improve drying time. It promised me I wouldn't have to give Target large amounts of money for new towels again.

Meh. I did a whole load of towels and washcloths just as directed. I notice no difference. I actually don't think they smell fresher either. I usually wash my towels, sheets, and anything smelling like a kid with about 1/2 cup of Borax added to the wash with the detergent. The Borax usually kills any funky smells and gets stuff pretty clean. The vinegar & baking soda didn't remove the smell all the way and I think it lightened some of the colors--which would be fine if all the towels were white.

Maybe you are supposed to follow up with a wash with detergent afterwards. This link didn't say. That might make them fresher smelling. I don't use fabric softener so maybe I don't have as much residue.

Total cost: $0

Total time: Usual laundry time.

Final verdict: I'm actually rewashing them with my detergent and Borax because there was still funky smell to some of them. I'll stick with this method.


Monday, March 26, 2012

Pin 38

Original Pin:

http://www.theworldwidegourmet.com/recipes/dried-strawberries-ruscalleda/

Another pinner said these dried strawberries tasted like candy! Yay!

My friend commented on my pin that he had tried it and couldn't get them to dehydrate all the way and that the time and/or temperature needed adjustment.

I had some strawberries that were going to go bad if they didn't get gobbled up soon so I thought this would be a perfect time to try this one out.

My results were like neither the pinner before nor my friends. I followed the directions closely. I actually tossed a few blackberries on the baking sheet just to see what might happen to those. The directions said to halve or quarter depending on the strawberry size. Mine were medium-ish sized and since my friend had trouble getting them to dehydrate I opted to quarter them.

Heading into the oven with a couple blackberry friends
 Within minutes they started to smell delicious and my whole house smelled like strawberries!! The recipe called for a baking time of three hours. At two hours I pulled them out and they looked like this sad mess.

 And some close-ups of the destruction:

What is the funky black-purplish color in the center/

These LOOKED HORRIBLE! Totally unappetizing. They were mostly dehydrated. The bits that weren't had turned to this awful goo-like substance. The outsides were dry and nearly crunchy and the flesh had turned purplish-black. If you attempt this recipe let me give you one piece of advice: For the love of all that is precious--line your baking sheet(and maybe spray some non-stick stuff)!! Some of these were practically cemented to the baking sheet! My husband and I both were brave enough to taste them and they weren't awful. Not like candy, quite, but not awful. Sort of just like a concentrated strawberry. But, gee, they were ugly. Then, good sport that he is, my husband went about the task of cleaning up the carnage and soaking/scraping them from the baking tray, along the way suggesting that we just buy new.

Total cost: It was about 1/2 pint of strawberries so lets say probably around $2

Total time: Prep-5 minutes, cook time 2 hours

Final verdict: Nope. Not even attempting this one again. There is nothing better than a good kitchen gadget unless it a quality tool for the job at hand. In this case, if I want dried strawberries I'll just have to buy a food dehydrator.

Wednesday, March 7, 2012

Pin 22

Original Pin:

Grapefruit_rect540


A cute little natural bird feeder.

I had a few oranges lying around that weren't getting eaten and I thought this would be fun for the boys to help with. It turned into a project just for mommy. I couldn't get either of them interested in mixing birdseed with peanut butter or eating orange slices or anything. They were content to sit at the window watching Daddy walk back and forth with the lawn mower. Seriously? Was it really that boring?

I had two oranges so I made four feeders. I finally got Luke's interest when I went to hang them on our backyard tree. He was good to hang one and then he was off.

Here they are on our still-leaf-less maple. It is always the last one to start budding in the spring.
Overflowing with birdie-goodness

This one wouldn't hang straight so I tucked it into a crook.
And now we wait for little birdies to gobble it up.

And wait.

And wait.

And wait.

Okay, I can't even get the birds interested in these. I thought they would like the colors and the bird seed and the premium JIF peanut butter I gave them. I have yet to see a bird even fly over to check them out. What is going on here?? I'm giving it a few more days and then these are going in the trash before the orange peels start to rot.

Total cost: $0, everything I already had.

Total time: 20 minutes

Final verdict: Total bust. The link has some other ideas I may try in the future, but this one is o.u.t.