Showing posts with label double pin. Show all posts

Monday, May 13, 2013

Pin 204 & Pin 205: Wristlet Key Chain with Hand-stamped Charm

Original pin:

http://prudentbaby.com/2010/11/hot-mess/accessories-hot-mess/how-to-make-a-wristlet-key-fob-2/

A wristlet keychain tutorial from the ladies over at Prudent Baby.

As I mentioned a  few weeks ago, I was putting last minute details together on Teacher Appreciation week. Like last year, I was in charge of putting together gifts for the whole preschool. Since I am on a super tight budget, I am always looking for inexpensive gifts to make for the teachers. Since I have to put together so many, they have to be quick and inexpensive. These keychains seemed to be perfect. I also was able to tie the whole luncheon theme together with the keychains. As I am sure many schools experienced this year, our preschool was entirely rekeyed with strict implementation of renewed security measures. All the teachers are having to carry their keys everywhere. We made keys the theme of our lunch.

I found a super deal on the webbing and picked up some matching ribbon. I had to order the key fob sets from Amazon because I could not find them anywhere locally. Click the picture to see the kit I am referring to:


I used the one inch width.

I brought all these supplies along on my girl's crafting weekend last weekend and went to work.
I actually skipped the step on fusing the ribbon to the webbing. I was feeling a little lazy. Instead I just held it in place and sewed along. Not much later I had this big pile of ribbons and webbing.
Time to start trimming!
I discovered a severe miscalculation at this moment. I needed 21 keychains and had somehow purchased and sewn enough ribbon and webbing to make nearly 80!! I only had hardware for 25 at my retreat so I packed the excess up. Guess I'll be giving a lot of keychain gifts in the near future!! I clamped up the 25 sets I did have and went to work on step two of my project.

Original pin:

http://happyhourprojects.com/jewelry-stamping/

Metal stamping is something I have taken up fairly recently (I asked for my first alphabet set for Christmas last year) and I kind of jumped into it blindly. I need all the help and tips I can get and this tutorial had some good advice. I picked up a few new tricks and learned that some of what I was already doing was on the right track.

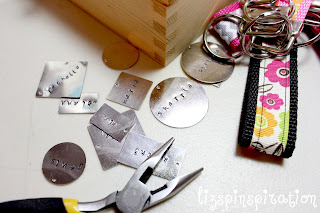
I wanted to do some hand-stamped metal name charms to add to my wristlets. Lucky me! My friend across the crafting table at our retreat had some cuter stamping letters than mine so I borrowed hers and went to work.

In metal stamping, it always takes me a few tries to warm up to good stamping. Here was my first attempt at a charm that night:

I was talking and twirled the L without thinking! oops.
Just like with exercising, I must always warm up my stamping fingers before getting down to the serious stuff!

The rest went much more smoothly.


After my names were all stamped up and stained, I used a jump ring to attach them to the key fob hardware.

My busy, busy work station:
All the important supplies: stamping bench, pliers, nylon hammer, glass of wine. . . 
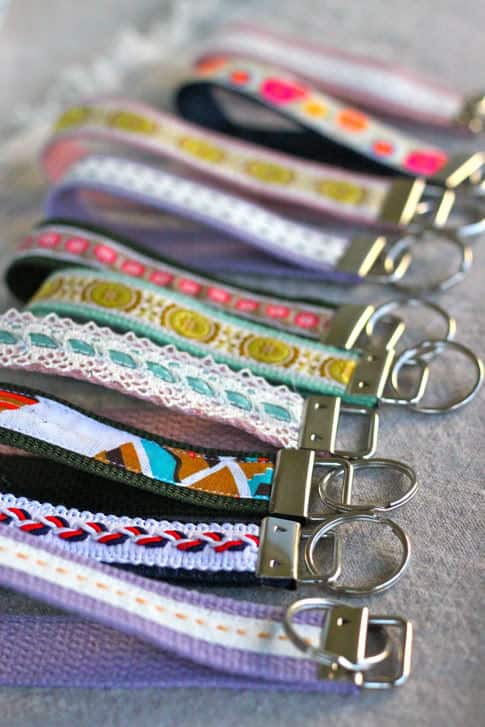
Once they were all put together I had these little beauties ready for all the teachers!


So cute! And fit right in my budget. 

Total cost: Prudent Baby put hers together for less than $1 each, but since I added the charm, mine were closer to $1.50. Still a pretty good price. I found a comparable wristlet selling for $9.99 without the personalized charm!

Total time: These were much faster to put together than I anticipated. Again, however, due to my sweet, sweet crafting scene, I wasn't much paying attention to time. It probably took around one hour to sew all 24 yards of webbing and ribbon together. With clamping and stamping, I would estimate another 2 1/2 hours or so. . . its fuzzy--there was pineapple lush cake involved in there somewhere. . . 

Final verdict: I love the way they turned out. They were so easy! I ordered some additional hardware when I got home from my trip to put together the rest of the wristlets. Hate to ruin the surprise, but if its your birthday. . . or anniversary. . . or if you are graduating. . . . or lonely. . . you may be getting one of these!

Wednesday, February 20, 2013

Pin 188 & Pin 189

I present to you. . . The FIRST CHALLENGE PIN!! (If you have no clue what I mean by "challenge pin, click here)

 Suggested pin:
Pinned Image
http://holidaysparkle.blogspot.com/2013/01/the-fastest-way-to-peel-garlic.html

Suggested by Julie E., a quick method to peel garlic. It looks easy enough so I pulled this trick out for the next recipe I had calling for garlic.

I started with just one small bulb of garlic.
He'll never see it coming.

For my weapon of choice, I chose this pyrex measuring cup because of the handle.

It never knew what hit him.
Step one complete. Now its time to shake, shake, shake!
Things were looking promising, except for two little fellas that looked like this:

If the clove did not detach from the base of the bulb, there was zero peeling action going on. I popped these cloves off the base and gave them a few more shakes.

Voila! Poured the whole thing out and initially they appear to all be peeled.
After fishing them all out, it is confirmed, that they all are peeled!

I will admit, I was a little surprised at the whole thing.

Total cost: The price of one garlic bulb. I bought three for $1.

Total time: 5 minutes including two shaking sessions and picking through the mess.

Final verdict: Cool trick for sure! Worked just as promised. However, I only needed 2 cloves for my recipe. Not sure that it wouldn't have been faster for two cloves to do it the old fashioned way and now I have an extra dish to wash. However, the next time I make 30-clove Chicken, this will be the way to go!

Time to put that garlic to use!
Original pin:
 
http://firstlookthencook.com/2011/11/02/meatloaf-cupcakes/

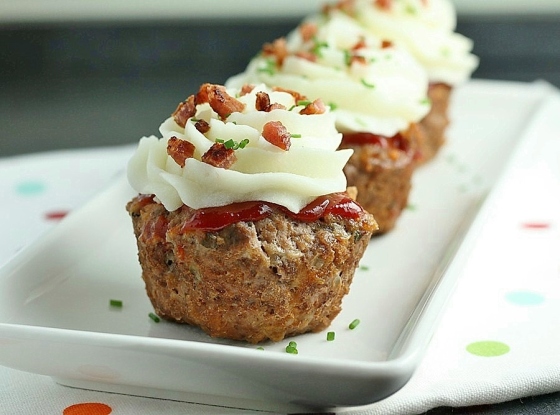
Meatloaf cupcakes!! So cute. I thought I could get my boys to fall for these, just for a teensy little moment. As you may expect, Eating Child likes meatloaf and mashed potatoes. Non-Eating Child sometimes likes meat but flat out refuses mashed potatoes. What kid doesn't like mashed potatoes??  I thought it was all a ruse and that I could prove it with my mashed potato "icing." This kid will do ANYTHING for a cupcake. I have a meatloaf recipe that usually goes over well with my family, but I decided to go with the recipe here to try it out.

Ready for the oven

I thought about skipping the bacon sprinkles but decided to include them in as part of the whole cupcake package. I did skip the chives however. By the way, you may have seen a pin about bacon in the oven. I haven't read it but I have been cooking my bacon in the oven for YEARS! I highly recommend it. I read about the oven method in a home magazine years ago and it totally changed my attitude about cooking bacon because it is just so easy. I just put a couple strips on a baking sheet and tossed it in the oven with the "cupcakes."


I originally planned on making my mashed potatoes from scratch, as suggested in the original post. But when I pulled my potatoes out of the pantry they were a little soft and went straight to the garbage bin. I subbed in the instant variety this time. Soon the meatloaves were ready!
Now comes the tricky part!! After cooling, I transferred them all to a baking sheet and set about icing them. It took a few attempts to get a feel for the mashed potatoes in my icing bag. I wouldn't claim to be a super icer anyway. Some of these came out pretty sad! The bacon finished cooking soon after the cupcakes and I crumbled it up to add sprinkles. Here are a few of my finished creations--the good, the bad, and the ugly. Mostly ugly.


Upon seeing these "beauties" the boys were overcome with dinnertime excitement. Each wanted the one with the most "frosting." I gave L a little taste of the frosting and he just couldn't place it.  He said it was good, and it tasted like . . . something, but couldn't figure out what. I kept giving him little tastes because it amused me to watch him try to figure it out. I sat the boys down and served up their dinner cupcakes.
Their excitement dwindled quickly when they realized the truth about dinner. As would have been the case with regular meatloaf and regular potatoes, Eating Child ate and Non-Eating Child didn't. The recipe itself was good. It had a little too much oregano for my tastes, but that could be easily changed. I liked the carrots inside but a little too much ketchup with the additional on top.

Total cost: I only had to buy meat because everything else I already had. About $6 for ground beef.

Total time: 1 hour 15 minutes including the cooking time.

Final verdict: The kids were underwhelmed and would have eaten/non-eaten with out the grand presentation. I think the presentation is cute and I felt a little like a gourmet chef putting so much effort into my food presentation. However, I probably will not spend the extra time to create an elaborate show. I may use the meatloaf recipe again, I may also bake it in cupcake tins to speed up cooking. The mashed potatoes had to cool quite a bit for me to be able to handle the piping bag so when it came time to eat they were really cold and a little unappetizing.  As I packed up the leftovers into plastic ware I thought about how layering them might make an interesting dish. Layer of meatloaf, spread some potatoes, layer meatloaf on top. Sort of like a mashed potato sandwich with meatloaf bread? The hubs is totally going to dig it.


Want to send me your challenge pin? Send me your favorite, least favorite, most interesting, most failed, skeptical, or any other pin on Pinterest and I'll try it out. Send to lizspinspiration@gmail.com .

Friday, February 15, 2013

Pin 184 and Pin 185

Original pin:
Pinned Image
This is not the link I had originally pinned, but the blogger has updated her site and the best post is here http://eclecticallyvintage.com/2013/02/cupid-float-valentine-drink/#

I needed a fun drink for the Kindergarten Valentine's Day party. I thought these were super cute and would be a real treat for the kids at their party. I bought all the supplies (I actually had a leftover jar of unopened cherries from Pin 163) and bought some fun party cups.

In planning my transportation logistics, I was thinking about getting the ice cream up to the school, keeping it frozen, dipping, dripping, sticking, melting. . .   Back to Pinterest I go. I had this pin filed away:

Original pin:
Pinned Image
http://www.realsimple.com/holidays-entertaining/birthdays/serving-cake-ice-cream-like-pro-10000001189696/page4.html 

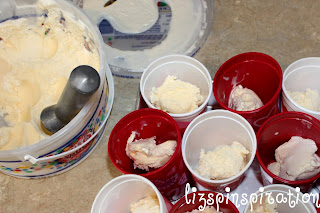
Real Simple suggested pre-dipping ice cream and freezing in paper cups to serve at birthday parties. I modified this suggestion a teensy bit to fit my situation.  The morning of the party, I dipped two scoops into each (clean--I ran them all through the dishwasher the night before) cup.

I packed them into my largest aluminum cake pan (aluminum helps keep things cold).

And then I covered the whole top and sides with aluminum foil. I put it back in the freezer. A few hours later, just before I left the house for the party, I put the whole tray in my large cooler on ice. I left everything in the cooler until just before the kids arrived in the classroom for their party. We set out the cups and, with help from the other mom's, added soda, whipped cream, straws, and, of course, a cherry!


Total cost: I served 22 kids. I used almost two 2-liter bottles of soda and about half a gallon of ice cream. A little over one bottle of whipped cream and a half-jar of cherries. Including the cost of the cups, it was about $12.

Total time: Less than 20 minutes. I think it took around 10 minutes to dip all the cups and maybe 5 to top them off in a team effort.

Final verdict: I love floats! It is such a childhood memory treat for me so I thought it was a fun idea for a classroom party. The pink color was just the icing on the cake for me! Most of the kids seemed to like them--I know mine did! Lucky boy, I have leftovers waiting for him after school today. The predipping trick was awesome. I didn't have to worry about dripping ice cream, forgetting a scoop, or melting leftovers. I just may start doing this for all my parties! And I will probably do floats for school parties again because it was so easy!

Friday, January 18, 2013

Pin 176 & Pin 177

Original pin:
Pinned Image
http://www.familyfeatures.com/feeds/food/FeatureDetail.aspx?ID=4018

Yummy-looking lettuce wraps with apples, grapes, and an interesting combination dressing


Original pin:
Pinned Image
http://www.yummymummykitchen.com/2012/01/superfoods-skinny-tips-lululemon.html

A colorful, healthy salad.

I bought some pomegranates a week or so ago when I found them on sale and had this super-foods salad in mind. However, I had not gotten around to making it and was hoping my pomegranates had not gone bad.

Last night, I opened the refrigerator to start preparing dinner and found a wealth of leftovers and produce needing to be eaten. I had pinned the lettuce wraps recently and my mind went immediately to that when I saw the grapes and leftover chicken. I didn't have everything for the super foods salad, but it was time for the pomegranates to get a crack.

I started with chicken I had cooked the night before. It was diced and cooked in the skillet with a little olive oil and a little seasoning.


Next up came the diced grapes, pomegranate seeds, and a stalk of celery left over from a few dishes in the last two weeks.


Then I threw in some walnuts and diced avocado, followed by almond butter and honey. The original recipe calls for peanut butter, but the pinner tagged it with almond butter. I went with almond butter.

 
All that was left was to spoon it over some lettuce leaves and roll it up. I had some leftover cilantro lime rice that I spooned on top of the lettuce before I topped it with the mixture. Then I had a little trouble with the rolling. Either I stuffed my leaves too full or my leaves were to large, but I could not get them to roll pretty or stay rolled. No worries, I ate it anyway. It was hard to eat with my hands anyway because the filling was sticky.


Oooo, boy! It was delicious. So delicious, in fact, that I had to eat it again for lunch today. Only problem was that there was no more rice or chicken. I substituted in some diced mozzarella and chopped my romaine lettuce. Now I had a chopped salad! I never would have thought to use almond butter as a "salad dressing" but that is basically what it was fulfilling. It was a little hard to coat everything when I made it as a salad today, but it worked well enough.

And here is my confession. . . I keep thinking about it. I want to eat it for every meal. Lucky me, I have two more pomegranates in my fridge right now.

Total cost: $0 because it was left over night!! I may have spent $1 on the pomegranates (for 3!! good price) weeks ago.

Final verdict: Yum. Yum. Yum. Unsuccessful as a wrap but successful in the flavors! A super combined pin recipe that I am going to use again and again. I was surprised that almond butter would even work with these flavors. And knowing I could use peanut butter as a substitute will help when the almond butter is all gone.

Friday, November 16, 2012

Pin 157 & Pin 158

Original pin:
Pinned Image
http://www.eventtrender.com/blog/2011/11/a-is-for-apple.html

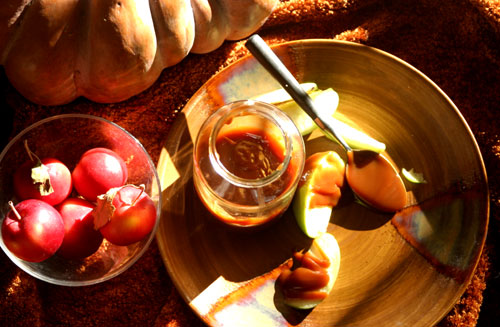
I absolutely love this gift idea! An apple and a little jar of homemade apple dip. Her recipe for apple dip sounds delicious, but I was giving these to some teachers today and I didn't want them to have to refrigerate it immediately. So while I still want to try out her dip (cream cheese. . . Heath bits. . . mmmmmm. . .) I substituted this recipe from DirtyGourmet.

Original pin:
Caramel Apple Dip picnic
http://www.dirtygourmet.com/caramel-apple-dip

While I do cook a lot and am not usually intimidated by new recipes, candy making is not an area I have worked with a lot. I am terrified of burning the sugar! A few years ago I made an attempt at a few Christmas candies that just turned out a mess. I pretty much stay away from boiled sugar. But I was feeling brave so I jumped right it.

Then I jumped right out! Just as the sugar was starting to brown I pulled it off the heat and finished off the recipe and ended up with this:

Doesn't look much like caramel, huh? Let me tell you--it didn't smell much like caramel either. So I took a deep breath and started over. When I was making ice cream over the summer I stocked up on sweetened condensed milk, so I pulled out another can. Before I started to boil the sugar, I got on my frined Google and looked at some pictures of browned sugar. As I had suspected, it turns out it needed to be much, much, much browner. So with the bravery of Google pictures, I started back in. Second batch was a success!
And for comparison:
After it was cool enough to eat I sampled some. Then I let my husband taste some. He is not much of a participant when it comes time to lick the bowl clean, but after one taste of this he came into the kitchen and scraped every last bit off the wooden stirring spoon.

I filled 4 half-pint jars about 3/4 full and let them cool. The next day I packaged them up with a nice fresh green apple and sent them off to school for the boys' teachers. Luckily, I had only three teachers to gift, so I got to keep the last jar for myself. I sat down and had apples and caramel for lunch by myself yesterday! Today after school this is all Big Brother wanted to eat. I'm rationing it out! Looks like I am going to have to make another batch soon. Good thing I have a stock pile of sweetened condensed milk.


Total cost: The only item I had to purchase was the apples, and I actually sent my husband out for them. He didn't report back on the cost.

Total time: It took me about an hour but that was for two batches and a little google searching. Plus I washed and dried all the jars before I started cooking. 15 minutes to package them up.

Final verdict: Dip was very, very good. Better than the store bought stuff. I actually have some in my fridge and taste tested side-by-side. Makes a cute and easy gift as well. L asked if we could make some for the principal, his secretary, the school bus driver, his Sunday school teacher, . . . looks like I'm in the boiling sugar business now.