Showing posts with label cool trick cool trick. Show all posts

Tuesday, August 6, 2013

Pin 211: Homemade Ice Cream in a Baggie

Original pin:
How to Make Homemade Ice Cream in a Bag by familyfun #Ice_Cream_in_a_Bag #KIds #familyfun
http://myroyalkitchen.com/2011/12/homemade-icecream-in-a-baggie/

The boys and I decided we were ready to take on this challenge today--homemade ice cream in 5 minutes using plastic baggies. Seems a perfect summer activity for kids. I had some 1/2 & 1/2 leftover from a soup recipe last week so the only thing I had to buy was rock salt. Fabulously for me, the rock salt was on sale at the grocery today!

After dinner tonight we decided to whip these up. Things did NOT go as smoothly as I had planned. The basic idea is that you put the ice cream ingredients in a small baggie.  Then the small baggie goes inside the larger baggie with ice and salt. Shake a few minutes and, voila! you have ice cream. First problem was when I turned my back for one minute, little bit decided to shake his bag upside down. You can probably guess that ice and rock salt when absolutely everywhere. Refilled his and when I grabbed my camera to get an action shot, we found problem number two. (Thus no action shots.) The ice baggie was getting torn and leaking. Quick fix--double bag the ice bag.  Back to work when almost immediately, the ice cream baggie was ripped and leaking into the ice!
milky, icy, salty mess

Double bagged the ice cream bag and changed strategies.  I sat the boys down in chairs, wrapped the double bagged double bags in a towel and we went for more of an agitation/massage motion than shaking to avoid any more trauma to our baggies.


This strategy did not result in any more tears, no leaking, and we actually did end up with some ice cream eventually. It took longer than five minutes and my kids didn't have the arm strength/endurance to do this alone. I took turns with them agitating there bags. Maybe about 10 minutes after we had fixed all our problems and changed our strategies we decided our ice cream was solid enough to sample.


It probably could have gone an additional few minutes, but it was pretty ice-cream like. The taste was really good--much better than I anticipated. The boys dressed theirs up with sprinkles and I just kept thinking of the delicious candy mix-ins I didn't have.  We made two batches per the recipe. It easily made four servings (two servings per baggie).

Total cost: $2.49 for rock salt

Total time: It took us 25 minutes to solve all our problems and end up with a mostly frozen ice cream. Next time I predict it will be more like 15 minutes.

Final verdict: We will make this again. One of my favorite soups calls for a small amount of half-and-half and the remainder always goes bad in the fridge. This is a perfect solution to using up that left over bit. My recommendations (and plan for next time) double bag from the beginning. Double bag the mixture and double bag the ice. Also, I will stick with the agitation/massage action. It worked and just took a bit longer. The kids were really bummed they didn't get to eat their ice cream out of the bag like the kids in the picture.


Friday, July 12, 2013

Pin 209: Shredded Chicken in the Stand Mixer

Original pin:
???
I really thought I HAD pinned this but after using the pin search and conducting my own, apparently I didn't pin it. I must have just read it somewhere and let my vise-like memory retain it for future use. I searched it on Pinterest and there is a ton of different sources so I can't attribute this to one original.

Anyhoo. . .

One of my absolute favorite slow cooker meals is lime-chicken tacos. Incredibly easy, versatile, and the leftovers freeze amazingly well. The most time consuming part of the whole process is shredding the chicken after it is cooked. I usually use the old two-fork method and spend a good ten minutes or so shredding each piece up individually.

When I recently made this dish, I really did have to weigh the benefits of trying this one out. You may remember Mr. Pinspiration's deep dislike of dish work and I think he secretly believes that I intentionally use more dishes in meal preparation than necessary. He especially hates those "hand-wash only" items, such as my stand mixer bowl and accessories. Pulling this out really had to be worth it if I was going to suffer the sighs and grunts of Mr. Pinspiration at dish time. I figured I could try it once.

I placed my warm, super tender, cooked chicken breasts into the mixing bowl. They were starting to fall apart already!

Locked and ready, I turned the mixer on to watch the magic. 

Holy stand mixer, Batman!! The entire bowl was perfectly shredded in approximately 3 seconds!!


Back into the slow-cooker for the final preparations and then my meal was ready to eat. Just load it into some warm tortillas and dinner was served!


Total cost: $0

Total time: 1 min (It took a few seconds to put the chicken in the bowl, carry the bowl to the other side of the kitchen. . . )

Final verdict: I could not be more amazed at how quickly it all happened. I couldn't even get any in-action shots before it was done! And the shredding was much more uniform than my old fork-on-fork method. Was it worth the extra dishes to wash?? Absolutely! I will NEVER hand shred meat again! I can wash and put away the mixer in less time than I was hand shredding the chicken previously.

Friday, February 15, 2013

Pin 184 and Pin 185

Original pin:
Pinned Image
This is not the link I had originally pinned, but the blogger has updated her site and the best post is here http://eclecticallyvintage.com/2013/02/cupid-float-valentine-drink/#

I needed a fun drink for the Kindergarten Valentine's Day party. I thought these were super cute and would be a real treat for the kids at their party. I bought all the supplies (I actually had a leftover jar of unopened cherries from Pin 163) and bought some fun party cups.

In planning my transportation logistics, I was thinking about getting the ice cream up to the school, keeping it frozen, dipping, dripping, sticking, melting. . .   Back to Pinterest I go. I had this pin filed away:

Original pin:
Pinned Image
http://www.realsimple.com/holidays-entertaining/birthdays/serving-cake-ice-cream-like-pro-10000001189696/page4.html 

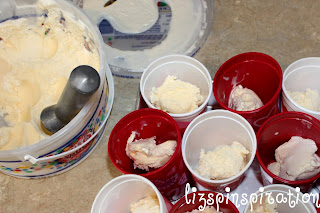
Real Simple suggested pre-dipping ice cream and freezing in paper cups to serve at birthday parties. I modified this suggestion a teensy bit to fit my situation.  The morning of the party, I dipped two scoops into each (clean--I ran them all through the dishwasher the night before) cup.

I packed them into my largest aluminum cake pan (aluminum helps keep things cold).

And then I covered the whole top and sides with aluminum foil. I put it back in the freezer. A few hours later, just before I left the house for the party, I put the whole tray in my large cooler on ice. I left everything in the cooler until just before the kids arrived in the classroom for their party. We set out the cups and, with help from the other mom's, added soda, whipped cream, straws, and, of course, a cherry!


Total cost: I served 22 kids. I used almost two 2-liter bottles of soda and about half a gallon of ice cream. A little over one bottle of whipped cream and a half-jar of cherries. Including the cost of the cups, it was about $12.

Total time: Less than 20 minutes. I think it took around 10 minutes to dip all the cups and maybe 5 to top them off in a team effort.

Final verdict: I love floats! It is such a childhood memory treat for me so I thought it was a fun idea for a classroom party. The pink color was just the icing on the cake for me! Most of the kids seemed to like them--I know mine did! Lucky boy, I have leftovers waiting for him after school today. The predipping trick was awesome. I didn't have to worry about dripping ice cream, forgetting a scoop, or melting leftovers. I just may start doing this for all my parties! And I will probably do floats for school parties again because it was so easy!

Sunday, February 10, 2013

Pin 181

I have an announcement coming soon, but its not quite ready yet, so until then I give you this Valentine's post:

Original pin:
Pinned Image
The pin linked up to http://www.recipebyphoto.com/heart-shaped-carrots-tutorial/ but the original idea and pictures belong to http://www.sophistimom.com/chicken-soup-heart-shaped-carrots/ with a recipe for the soup.

So if you can't tell from the teensy tiny picture, it is carrots that have been cut into heart shapes and tossed into a bowl of love, also known around here as homemade chicken noodle soup. I didn't use the recipe over on sophistimom, but I did love her carrot-cutting. She even said her brother does butterflies!! Wow! I'm impressed.

Last week I cooked up a big pot of chicken noodle soup. In the spirit of our upcoming holiday, I decided to cut my carrots into little hearts. I remembered this pin, but didn't actually go look at it or read it before I did it, so my technique was a little off.

I started with shaving the bottom of the heart. A few swipes on each edge to create a point.

Next came the wedge. I found this to be the hardest part. It was easier once I cut the carrot into smaller pieces (maybe 2-3 inches) and then wedged each section on its own. I made a little v-shaped cut into the carrot, aiming my point to reach in just inside the center ring of the carrot. It is hard to cut straight down, and my carrots weren't perfectly shaped so some of my hearts were not quite centered.
Can you see the v-shaped cut here?

Pulling out the wedge

And here is something vaguely heart-shaped.
Next I used my peeler to try and round out the edges a little to coax a heart shape out of this carrot. Then it was slicing time.
I didn't really want to waste a lot of food just for the sake of cute carrots, so the wedge and the heart were both sliced and into the pan they went.
A variety of heart-shaped resembling things and the scraps that made them.
When the soup was all ready, I ladled up the bowls of love for the boys of the house.

 
They were so incredibly under-impressed with my carrot cutting skills. First, I had to point it out to them.

me: Did you see the carrots??

boy: Yeah, they're good.

me: Did you see their shape??

boy: hmmmm. . .

me: They are hearts. You know, because chicken soup is made with so much love and its close to Valentine's day and. . . and. . . see? Hearts?

boy: Oh. Those are hearts? They don't look much like hearts.

me: (visibly disappointed) Oh, heh heh, yeah. I guess not.

boy: (because he is the sweetest thing ever even if he is a boy) No, mom, I see it! I love my carrot hearts. Yummmm yum.

Total cost: $0

Total time: Way longer than just dicing and slicing like I would normally do to prepare the carrots. Probably twice as long, but if you get a good technique down, it would probably be faster.

Final verdict: Even though my family was underwhelmed, I still think its a cute idea. My technique could use some work, but I'm not sure that I will put in the time or the effort to refine this skill. Although next time everyone will probably complain about there boring old round carrots.

And one more photo just for fun (and because I was playing around in the photo editor)

Wednesday, January 23, 2013

The Stuck Jar

I don't have a pin for this. I don't recall seeing this on Pinterest, but that doesn't mean it is not out there. I don't think I came up with this on my own. I think I MUST have seen this or heard this somewhere and it was one of those thing that was just filed away in the dark, dark, recesses of my brain.
However. . . it. is. FANTASTIC!

Back story:

A long, long, time ago I used to have multiple jar openers. The rubbery disc kind, the weird wrench-like kind, a plastic circle with gear-like teeth. Then I got a husband and I didn't notice as much the gradual disappearance of these said jar openers. Lately, my jars have been so tightly sealed. Even Mr. Muscles has been having such a time opening a particular brand of peaches that I have just stopped buying them.

Yesterday as I was preparing dinner, I needed to open my new jar of minced garlic. It wouldn't budge. I tried tapping, running under water, and any other trick that has worked in the past with no success. I was fearful I was going to break a bone in my wrist as I struggled against the jar, half bent over, clutching it between my knees. Time to stop and think rationally.

Which missing jar opener was my favorite? The rubbery disc.

Why? The rubber really got a good grip on the lid.

How have I opened jars in the past? At work sometimes I use a glove to open tight lids.

What do I have that is rubbery? Well, those big cleaning gloves, but I don't really want those near my food. AHA! I have rubber bands!

So I dug out my rubber band ball (yes, I have a rubber band ball. I save all the rubber bands from my newspaper and stick them on my ball. It is reminiscent of my childhood--but these rubber bands aren't green.) I popped one around the lid and, magically, with almost zero effort at all, that lid gently popped right off. WHAT!?!?! Life changing. I had to try it on other jars--and it worked. Only thing is, I don't have any peaches to try it on! Guess what I'm buying at the store this week???


This is going to be really, really useful in the future! It may put Mr. Muscles out of a job--now he will have more time for those other household chores on his Honey-do list.

Thursday, January 3, 2013

Pin 171

Happy 2013!!!

Original pin:
Pinned Image
http://blogchef.net/baked-tacos-recipe/

When I first saw this pin I thought it would be a great way to prepare tacos quickly--assembly-like style.  After I planned the meal for this week I started to read through it and all the comments. I immediately started to reconsider when I read all the comments stating how soggy the tacos were. But a few comments later people started remarking about how the tacos stayed together so well. They did not break when you bit into them. With young children, crunchy tacos are always a challenge so I decided to go ahead with the plan. If these truly stayed together then this pin could really be something special.

The recipe made 18-20 tacos!! My family of 4 wouldn't eat that many so I halved it. That meant I ended up with a 1/2 can of beans and 1/2 can of tomato sauce leftover, but we can probably find a use for those somewhere. It was easy to mix up. I had a little over 1 lb of meat so I added a little extra tomato sauce to moisten the mixture up a bit to help it combine. I filled 12 taco shells about 1/2 to 3/4 full. I could probably have filled them fuller, but again, I knew my kids would turn up their noses if there was too much meat in their tacos.
 
I even had a little meat mixture left over. Maybe because I had a little more than 1 lb? Or because they weren't full?
 

 I also left out the cayenne pepper because I knew my little ones would not eat it if they were spicy. I underestimated how much Colby jack I had so I topped off mine with a little Colby jack and some freshly shredded Monterrey jack I had. After a sprinkle of chopped cilantro these were ready to go in the oven.


 Ten short minutes later I pulled these yummy-smelling babies out of the oven toasty and melty.


They were really, really tasty. You can see in the pictures that my taco shells were not packed tightly together. They were crispy almost the whole way around. The bottom 1/3 was softer, but not soggy. The ultimate test here, though, is breakage factor since that is what ultimately sold me on this dish. Guess what?? Not a single taco broke. Big L ate a whole taco and not one shred of cheese, crumb of shell, or dash of meat fell out of the taco. He was waving it around as he talked and the thing stayed together. It was slightly amazing. This is life-changing for tacos in my household! Lil W didn't bother to eat that night. He said he didn't like "burnt tacos." That little non-eating child doesn't know what he is missing.

With lean ground beef and fat free refried beans, this dish was filling without being crazy in calories. I also completely forgot to top with all my favorite taco garnishes--lettuce, tomato, sour cream, guacamole. And they were so tasty even without it. I had halved the recipe because I was afraid leftovers would not keep because then the shells really would be soggy. Not to worry now because my husband ate 9 tacos! He thought they were that good.

Total cost: Around $7

Total time: These were fast! Prepped and baked in about 30 minutes. Great for weeknights. If you were really in a hurry you could substitute prepackaged taco seasoning for all the herbs.

Final verdict: Winner, winner, taco dinner! I wish I had known about this "no-breakage" trick when my kids started eating real food. We just may start having tacos more often. The recipe itself was delicious so the breaking thing is just a bonus. And the leftover meat and beans has already been wrapped up in a soft tortilla and devoured so I guess I only have that 1/2 can of tomato sauce to deal with.

Tuesday, December 4, 2012

Last of the Halloween candy

Last week I realized we STILL had some Halloween candy lying around. I have been secretly dumping a handful a day for a few weeks and the bowl was almost empty. I wanted to give my kiddos one last hurrah with the candy before I trashed the rest of it. My favorite way to win the battle of mom vs. kid in the candy department is to find something healthy and stick enough candy/sprinkles/whipped cream on top so that it feels special and indulgent.

Here is how the Halloween candy went out:

2 single serving no-added sugar applesauce cups
1 fun size pack of Skittles
2 small shakes of the rainbow sprinkles

I split the Skittles pack between the two--each child got 8 skittles and gave each a little shake of the rainbow sprinkles. Voila! Super special applesauce for dessert. Everyone wins!
 

And look at these happy faces!

And if you stir it up a little the colors will streak and make rainbow applesauce. . . until you over stir it and then its just that ugly brownish color.

Anyhoo, if you want to be the coolest mom tonight, throw some sprinkles on fruit and call it a treat!

Here are a few of my other special desserts:

Toast with peanut butter and use chocolate chips to make a happy face

Any kind of canned fruit with a squirt of whipped cream

Peel a banana and stick little surprises in it--pretzel sticks, candy bits, chocolate chips

Peel a banana and drizzle with chocolate syrup. Top with a squirt of whipped cream and a cherry--like a sundae without the ice cream.

Yogurt with graham cracker squares stuck in the top for dipping/scooping

Yogurt with a shake of sprinkles

Yogurt "milkshake." I have made these for my kids since they were babies. This is especially good if you need to get yogurt in them for medical reasons (aka, too many antibiotics :) ) Fill a lidded cup halfway with yogurt. Make sure it doesn't have fruit chunks in it. It should be smooth. Fill remainder of the cup with milk. Place the lid on top and shake vigorously until combined. I'm not sure that my kids yet know that milkshakes are actually made with ice cream.

Get creative. My kids will pretty much eat anything if I put a little shake of sprinkles (or anything I call sprinkles. . . hello Parmesan cheese! or Sea salt!) on top. One shake goes a long way so it doesn't take much. 

Tuesday, November 20, 2012

Pin 160

Original pin:
Pinned Image
http://www.howdoesshe.com/5-ideas-to-keep-kids-entertained-at-a-restaurant/

Tic-tac-toe with sugar packets while waiting on restaurant food.

I didn't plan on doing this one this week so I don't have pictures of my own to share. Guess that is a little what this pin was about anyway. There are actually a few ideas on keeping kids entertained at a restaurant.

My oldest is 5 and in the last six months or so finally figured out the whole tic-tac-toe thing. We tried this out this week as we waited on our food to arrive. It is a clever idea and he was really into it as I set it up. However, my sweet little five year-old does not have the delicate touch required to place the sugar packets without knocking over the balanced knives. We had to reset the game board after each of his moves. We only made it through one game before we both we ready for something else.

If you read the comments on the original post there are some pretty hot opinions about kid's behavior in restaurants and what you should and should not allow your kids to do. I try to teach my kids to be respectful in restaurants and in all honesty, we just don't go out much to restaurants that don't have a playground. A little sad, right??

In the spirit of the original post, here is what I have used to entertain my kids at restaurants:

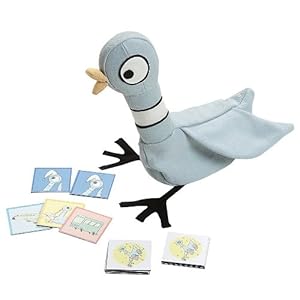
1. If I am really planning ahead, I will grab our memory card game. (Which happens to be one of our favorite story characters: The Pigeon Wants a Match)


Its fairly easy to clear the table enough to set this one up. Sometimes we half the deck if there is not enough room.  We could just as easily grab any card game--Old Maid, Go Fish, but Pigeon Match is our favorite (and it's all packed in that cute little pigeon bag!).

2. I spy. Big Brother's favorite game. We play this everywhere when we are waiting. The doctor's office is an especially hot spot for this game but it works for a restaurant too.

3. Hot Wheels. I usually have a few roaming around in my purse somewhere. It comes with the territory of having two boys. These usually occupy but you run the risk of having to fish them out from under the table over and over again.

4.  After the tic-tac-toe game we moved on to this one: I had some fruit snacks in my purse but you could do this with anything. Sometimes I use TicTacs, Skittles, or any little reward you can think up. I don't necessarily want to give them a bunch of sugary treats right before a meal so the challenge for me is to see how long I can make a fun size pack last and keep them entertained. I ask them a question and if they get the answer right then they get one fruit snack (or TicTac, or Skittle, etc.) If they get it wrong then they get nothing. There is a fine line between hard questions to make the pack last and easy enough to keep them engaged. You can ask questions that take them time to figure out like, "How many sugar packets are in the dish" and "How many letter "a'"s are on the menu?" My five year-old gets lots of spelling words, math problems, history "Who is the President?", geography "What is the capital of Texas?", while my little one gets questions like, "What letter does purple start with?" and different color, shape, number, letter, relative ("Who is mommy's sister?") type questions.

5. Stacking Cheerios. When my youngest was little my oldest would play this one. Now that my baby is nearly three I don't usually have Cheerios stashed in my bag anymore.

6. If we are starting to fail, we order a bowl of chips and salsa--or whatever appetizer is on the menu that can be prepared in minutes.

Total cost: $0 unless you count the cost of food.

Total time: 30 seconds to set up. Entertained us for 2 minutes.

Final verdict: We'll try it again when he's older but constantly picking up the knives and rebuilding was just a little of a pain.

And since I have no tic-tac-toe picture I'll just share with you some thankful art that came home from preschool this week. I absolutely LOVELOVELOVE this piece. It is going in the safe.

Me too, buddy, me too.

Saturday, October 27, 2012

Pin 147

Original pin:
Pinned Image
http://www.madebylex.com/2010/12/how-to-ruffle-fabric-with-your-sewing-machine.html/comment-page-1#comment-9803

A tutorial on how to ruffle using your sewing machine by toying with the tension settings.  Looks promising.

Especially in the face of 25 yards of tulle!!!
This is what 25 yards of tulle looks like when the 17 year-old cutting counter girl doesn't want to wrap the cut on a bolt and just bundles it for you and hands it over.
I'm not yet going to tell you what all the tulle was for, but just know for now that it needed to be gathered/ruffled. I had a few steps and cuts prior to the ruffling stage, but soon got to where this pin hopped in.  My machine is at least 30+ years old. I inherited it from my grandmother and it doesn't have a whole lot of fancy features. I wasn't sure if I had enough options available to make this one work.


This photo is actually about six layers of tulle going in to be ruffled.

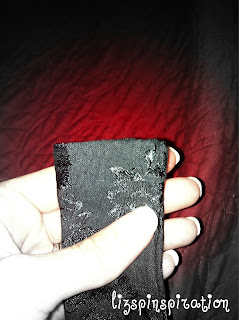
Because it is black, it made the pictures a little hard to see, but look towards the back by the word "ruffles."
Yep, they were there. They weren't nearly as tight as the ones in the tutorial picture but I have a feeling it was due to the fact that I was using tulle and not a cotton fabric. The thread just slides right through the tulle and probably made it a little hard to pull at the ruffle.
Another shot at the fabric coming out the back of the machine.  The picture doesn't really do it justice. There were more ruffles than it appears.

Total cost: $0

Total time: Or should I say "Total time saved?"

Final verdict: The ruffles were not as tight as I was looking for, but I have a strong notion that that is due to the tulle rather than the machine or the technique. Thankfully, due to the tulle I was able to just give the threads a quick tug and tighten them up to where I wanted them. It worked and overall I would call the pin a success. I am keeping this trick around and can't wait to try it on some sturdier fabric.

Saturday, September 22, 2012

Pin 135

Original pin:

http://colbyalmond.com/12-creative-ideas-the-will-change-your-life/

Once again, I am looking for the simple ways to change. my. life. (OMG!!!)
If you remember, I tried the straw-in-the-soda back at Pin 126.  Next up--number 4, perfect jewelry.

At the beginning of September I traveled to Chicago for an educational work-related conference. In packing my jewelry I remembered this trick. Not as easy as it looks.

First, none of the jewelry I wanted to pack fit through normal straws that I had in the pantry.  The clasps were just too large. I must have very tiny straws, right?? I guess that's just what you get when you shop at the dollar store.

See all the clasps up next to that "normal sized" straw.

Lucky me, I save those kid cups with the giant straws from restaurants. Smart, clever me will just use those instead.


Well, that worked for some. . . but not all. Either that clasp in the original picture is super tiny or my necklace clasps are gigantic. I fit the ones I could through the big straws and the rest just got packed in my jewelry case like normal. I even forced one through by smashing the straw a little flat first.
smashed straw

I was a little worried about the excess that wasn't through the straw getting tangled on its own and then having to untangle it WITH the straw complicating the whole mess.

So did it work?? Absolutely! It was so awesome to be able to pull out one necklace at a time.  Not a single snag or knot to deal with.

Total cost: $0

Total time: 10 minutes. Problem solving time here.

Final verdict: I may never throw those restaurant straws away again. They were the perfect size for my jewelry travel case. Even though not all my items fit through them, it was nice to have over half of them contained. The two that didn't fit were nicely separated by the strawed ones so I had zero tangles to mess with. I did have a little trouble getting the one I had forced through the smashed straw out and didn't want to pull too hard. I wouldn't recommend forcing them through like that. Overall, if you can make it work with what you have, I would recommend it.

Tuesday, September 18, 2012

Pin 131 & Pin 132

I actually did these pins a few months ago but am just getting around to posting about them. Who knew that starting Kindergarten would derail me so much!

Original pin:
Pinned Image
http://quilttaffy.blogspot.com/2008/07/invisible-closing-seam-tutorial.html

Invisible closing seam tutorial. I have actually used this a few times since the first , but originally I was using it to finish up a sash. It is really a great tutorial. It has clear instructions and lots of pictures so I had no trouble following along. I don't have too terribly much to say about it since it really was made so simple.


The finished product.
Total time: 5 minutes

Total cost: $0

Final verdict: Guess I already gave this one away when I said that I had used it multiple times already! oops! It is a great tutorial for a very handy stitching technique. I also used it on Pin 114 to close up my little owl.

Original pin:

Pinned Image
http://blog.globalstreetsnap.com/post/23167060192/love-this

Going for this look. . . I pinned it to my "I could make that" board. And so I did. I attempted to make a top, skirt, and sash. And I attempted it without a pattern. I chose a few pieces I already owned to use as guides and worked from there.

The skirt gave me a lot of trouble and, as goes with sewing on the fly, I started to run out of fabric. It ended up tighter across my hips and thighs than I intended and I just couldn't get it to hang just right.

I love the top. It is very light and comfortable and goes well with jeans also.

Here it is:

The original model is much thinner than me and she is wearing the skirt higher at her waist, where I made mine to hit at the hips because that is more comfortable for me.

Total cost: eesh. I forgot. I did these a while ago and I can't find the receipt.

Total time: 4 hours. All three pieces were very basic items.

Final verdict: The top and sash have gotten a lot of use. The skirt--not so much. I have worn it a few times, but like I said before, it is a little tighter than intended and doesn't quite hang right. But I am out of room for more modifications. I might just hike it up next summer and wear it as a strapless dress. We'll see.