Showing posts with label undershot. Show all posts

Wednesday, February 20, 2013

Pin 188 & Pin 189

I present to you. . . The FIRST CHALLENGE PIN!! (If you have no clue what I mean by "challenge pin, click here)

 Suggested pin:
Pinned Image
http://holidaysparkle.blogspot.com/2013/01/the-fastest-way-to-peel-garlic.html

Suggested by Julie E., a quick method to peel garlic. It looks easy enough so I pulled this trick out for the next recipe I had calling for garlic.

I started with just one small bulb of garlic.
He'll never see it coming.

For my weapon of choice, I chose this pyrex measuring cup because of the handle.

It never knew what hit him.
Step one complete. Now its time to shake, shake, shake!
Things were looking promising, except for two little fellas that looked like this:

If the clove did not detach from the base of the bulb, there was zero peeling action going on. I popped these cloves off the base and gave them a few more shakes.

Voila! Poured the whole thing out and initially they appear to all be peeled.
After fishing them all out, it is confirmed, that they all are peeled!

I will admit, I was a little surprised at the whole thing.

Total cost: The price of one garlic bulb. I bought three for $1.

Total time: 5 minutes including two shaking sessions and picking through the mess.

Final verdict: Cool trick for sure! Worked just as promised. However, I only needed 2 cloves for my recipe. Not sure that it wouldn't have been faster for two cloves to do it the old fashioned way and now I have an extra dish to wash. However, the next time I make 30-clove Chicken, this will be the way to go!

Time to put that garlic to use!
Original pin:
 
http://firstlookthencook.com/2011/11/02/meatloaf-cupcakes/

Meatloaf cupcakes!! So cute. I thought I could get my boys to fall for these, just for a teensy little moment. As you may expect, Eating Child likes meatloaf and mashed potatoes. Non-Eating Child sometimes likes meat but flat out refuses mashed potatoes. What kid doesn't like mashed potatoes??  I thought it was all a ruse and that I could prove it with my mashed potato "icing." This kid will do ANYTHING for a cupcake. I have a meatloaf recipe that usually goes over well with my family, but I decided to go with the recipe here to try it out.

Ready for the oven

I thought about skipping the bacon sprinkles but decided to include them in as part of the whole cupcake package. I did skip the chives however. By the way, you may have seen a pin about bacon in the oven. I haven't read it but I have been cooking my bacon in the oven for YEARS! I highly recommend it. I read about the oven method in a home magazine years ago and it totally changed my attitude about cooking bacon because it is just so easy. I just put a couple strips on a baking sheet and tossed it in the oven with the "cupcakes."


I originally planned on making my mashed potatoes from scratch, as suggested in the original post. But when I pulled my potatoes out of the pantry they were a little soft and went straight to the garbage bin. I subbed in the instant variety this time. Soon the meatloaves were ready!
Now comes the tricky part!! After cooling, I transferred them all to a baking sheet and set about icing them. It took a few attempts to get a feel for the mashed potatoes in my icing bag. I wouldn't claim to be a super icer anyway. Some of these came out pretty sad! The bacon finished cooking soon after the cupcakes and I crumbled it up to add sprinkles. Here are a few of my finished creations--the good, the bad, and the ugly. Mostly ugly.


Upon seeing these "beauties" the boys were overcome with dinnertime excitement. Each wanted the one with the most "frosting." I gave L a little taste of the frosting and he just couldn't place it.  He said it was good, and it tasted like . . . something, but couldn't figure out what. I kept giving him little tastes because it amused me to watch him try to figure it out. I sat the boys down and served up their dinner cupcakes.
Their excitement dwindled quickly when they realized the truth about dinner. As would have been the case with regular meatloaf and regular potatoes, Eating Child ate and Non-Eating Child didn't. The recipe itself was good. It had a little too much oregano for my tastes, but that could be easily changed. I liked the carrots inside but a little too much ketchup with the additional on top.

Total cost: I only had to buy meat because everything else I already had. About $6 for ground beef.

Total time: 1 hour 15 minutes including the cooking time.

Final verdict: The kids were underwhelmed and would have eaten/non-eaten with out the grand presentation. I think the presentation is cute and I felt a little like a gourmet chef putting so much effort into my food presentation. However, I probably will not spend the extra time to create an elaborate show. I may use the meatloaf recipe again, I may also bake it in cupcake tins to speed up cooking. The mashed potatoes had to cool quite a bit for me to be able to handle the piping bag so when it came time to eat they were really cold and a little unappetizing.  As I packed up the leftovers into plastic ware I thought about how layering them might make an interesting dish. Layer of meatloaf, spread some potatoes, layer meatloaf on top. Sort of like a mashed potato sandwich with meatloaf bread? The hubs is totally going to dig it.


Want to send me your challenge pin? Send me your favorite, least favorite, most interesting, most failed, skeptical, or any other pin on Pinterest and I'll try it out. Send to lizspinspiration@gmail.com .

Sunday, February 10, 2013

Pin 181

I have an announcement coming soon, but its not quite ready yet, so until then I give you this Valentine's post:

Original pin:
Pinned Image
The pin linked up to http://www.recipebyphoto.com/heart-shaped-carrots-tutorial/ but the original idea and pictures belong to http://www.sophistimom.com/chicken-soup-heart-shaped-carrots/ with a recipe for the soup.

So if you can't tell from the teensy tiny picture, it is carrots that have been cut into heart shapes and tossed into a bowl of love, also known around here as homemade chicken noodle soup. I didn't use the recipe over on sophistimom, but I did love her carrot-cutting. She even said her brother does butterflies!! Wow! I'm impressed.

Last week I cooked up a big pot of chicken noodle soup. In the spirit of our upcoming holiday, I decided to cut my carrots into little hearts. I remembered this pin, but didn't actually go look at it or read it before I did it, so my technique was a little off.

I started with shaving the bottom of the heart. A few swipes on each edge to create a point.

Next came the wedge. I found this to be the hardest part. It was easier once I cut the carrot into smaller pieces (maybe 2-3 inches) and then wedged each section on its own. I made a little v-shaped cut into the carrot, aiming my point to reach in just inside the center ring of the carrot. It is hard to cut straight down, and my carrots weren't perfectly shaped so some of my hearts were not quite centered.
Can you see the v-shaped cut here?

Pulling out the wedge

And here is something vaguely heart-shaped.
Next I used my peeler to try and round out the edges a little to coax a heart shape out of this carrot. Then it was slicing time.
I didn't really want to waste a lot of food just for the sake of cute carrots, so the wedge and the heart were both sliced and into the pan they went.
A variety of heart-shaped resembling things and the scraps that made them.
When the soup was all ready, I ladled up the bowls of love for the boys of the house.

 
They were so incredibly under-impressed with my carrot cutting skills. First, I had to point it out to them.

me: Did you see the carrots??

boy: Yeah, they're good.

me: Did you see their shape??

boy: hmmmm. . .

me: They are hearts. You know, because chicken soup is made with so much love and its close to Valentine's day and. . . and. . . see? Hearts?

boy: Oh. Those are hearts? They don't look much like hearts.

me: (visibly disappointed) Oh, heh heh, yeah. I guess not.

boy: (because he is the sweetest thing ever even if he is a boy) No, mom, I see it! I love my carrot hearts. Yummmm yum.

Total cost: $0

Total time: Way longer than just dicing and slicing like I would normally do to prepare the carrots. Probably twice as long, but if you get a good technique down, it would probably be faster.

Final verdict: Even though my family was underwhelmed, I still think its a cute idea. My technique could use some work, but I'm not sure that I will put in the time or the effort to refine this skill. Although next time everyone will probably complain about there boring old round carrots.

And one more photo just for fun (and because I was playing around in the photo editor)

Monday, November 19, 2012

Pin 159

Original pin:
Pinned Image
http://naptimedecorator.blogspot.com/2011/11/time-for-thanks.html

A little Thanksgiving decor to spiff the place up.

Okay, where to start on this on. . .

My vision for this project was a little different. I liked the "thanks" concept but I planned to use different sized filled jars. And instead of painting on them, I decided to cut out the letter and stick it down in the jar. That way I could reuse it for something else later.

I wanted to fill my jars with fall things of nature--pine cones, acorns, etc. My boys are always picking up acorns around the neighborhood so I we went on a scavenging walk. Do you know how many acorns it takes to fill 6 jars? A lot. A heaping lot. More than I found just taking a quick walk around our block.  So I had been keeping my eye out for some oak trees. A few weeks ago I decided to take little one to a park that had some big oaks. I spent a long time gathering while he played. I seriously gathered at least an hour. I was very indiscriminate in my gathering. I just scooped up anything and everything that seemed intact and uninfested.
The haul.

 I took them home and washed and dried them well. I sorted them into three piles: green acorns, brown acorns, and caps.

Later that night after the little kiddies were in bed I set about the task of gluing acorns to acorn caps. As I worked from my piles spread out on white paper towels, I started to notice something. Little piles of dirt? Turns out my acorns were infested because soon after I saw little white worms poke their ugly little heads out. Okay, that's my cue to wrap it up. I screwed the lids on the jars (very, very tightly) of already glued acorns. The rest of the acorns were quickly shuttled back outside to the patio. 

In the morning, the "t" jar had these little fellas waiting for me:
They make me gag.
Since this is a Thanksgiving project, here are a few things I am thankful for:

1. I started the project the same day I brought home the acorns. They didn't sit in my house releasing worms for days before I noticed.

2. I was working on it at night. Seems that these little buggers are more active at night. I may have never noticed this if I was working during the day.

3. Mason jars with very tight sealing lids.

I did a little googling research and found out that this is very common with acorns. Who knew? I sure didn't. I got a lot of mixed information on how they get in the acorn, what they do in there, how to tell if the acorn is infested, I don't really have any great advice to offer here on this one. I did learn this:
That's how you can tell a worm has come OUT of the acorn.
 Totally disgusted, I had to put this project down for a few days and rethink my methods. There were about five acorns in my stash that we had collected from the neighborhood. These never released any worms. They were bigger and their caps were still on. (One website suggested that acorns that fall before their caps do so because the weight of the worm causes it to release from the tree early. True? I don't know, but a nice theory.) Anyway, I decided I would go find more of these acorns.

After searching all the public neighborhood areas without luck, I found two different neighbor houses with nice big acorns. I tried ringing the doorbell first, but with no response, I went ahead and collected their acorns. Sorry if you wanted those. Blame it on a really hungry squirrel.

I thought back to middle school science lab when we had to stick these bugs into a diorama. We froze them to kill them. I took all my acorns home, sealed them up in a big ziplock bag and froze them for 72 hours. Again, I googled some more avoiding about acorn worms. Some suggested freezing, some suggested baking. I decided to do both. I looked over my first stash as well. The green ones had never hatched any worms, so I decided to try these as well. After a good long freeze, I popped these babies in the oven for a few hours. The green turned brown but I didn't burn anything.

After they cooled, I put them back into a ziplock and sealed it. I watched it for two days to make sure there were no super charged worms that survived the freezing and the baking. Looked good. Back to work.

I still didn't have enough to fill my jars completely. I used toilet paper rolls to fill the back half of the jar. Then I cut out a letter and used a piece of clear tape to hold it in place while I filled the jar with acorns. When full, I pulled the tape off and put the lid on.

Once all the jars were full, I lined them up on my mantel. I popped a few of my leaf flowers from Pin 154 into one of the toilet paper holders. Here it is:


Look! No worms!


Total cost: $0
 
Total time: Days and days and days.
 
Final verdict: My Lu loves it. He asked me to leave it up there forever so we can always remember Thanksgiving. It was a lot of work. But I learned some lessons about crafting with acorns. I may never get rid of my perfectly prepared stash of acorns either.

Wednesday, October 31, 2012

Pin 151 & Pin 152

A trick AND a treat for Halloween!

First, the trick:
Pinned Image
http://becomingbetty.blogspot.com/2011/03/crock-pot-ravioli-casserole.html

Crock pot ravioli casserole.

I have totally over-thought this one. First--where is the ravioli??  This is farfalle. But it looks good and the recipe sounds good. I thought a crock pot dinner on Halloween would be the way to go to avoid the rush that comes in the evening. But when I started reading the directions I had to change my plan. You brown the ground beef and onion and then put it in the crock pot with the canned tomatoes and tomato sauce for 7 to 8 hours?? And you have to precook the pasta too??  That just seems excessive--and a little pointless. What is the crock pot for then if not just to keep it warm? I just couldn't bring myself to chop onion and brown ground beef at 8 this morning so I took a sharp detour on this one.

Ditch the crock pot. I started boiling water for the pasta in one pot and browning the onion and ground beef in the skillet. The pasta and beef finished almost simultaneously. I drained the pasta and added the beef and onion mixture to the pasta. I added the herbs, tomatoes and tomato sauce to the pot with the intent of simmering it together to develop some flavors. There was no where near enough liquid. I only used 1 lb of meat (recipe calls for 1 and 1/2 lb) and 12 oz of pasta (recipe calls for 16 oz) so I can't possibly imagine how this doesn't burn after 7 hours in the crock pot. I even had a little extra tomato sauce I had tossed in since I had two 8 oz cans (recipe calls for 15 oz).  I added an additional can of stewed tomatoes to try and spread the sauce a little. Due to the small amount of sauce, I couldn't really simmer it much so I just left it on the stove on medium-low long enough to heat it through. My grocery store was out of frozen spinach this week so I omitted it. I tossed in the cheese just before serving it up--on special Halloween plates, mind you.

I know that sounds like a lot of negatives for this recipe, but really, it was fairly tasty. I would put this in the category of kid food because it is pretty kid friendly. Not unlike a Hamburger-Helper sort of meal, but with better ingredients (i.e., no powder to mix sort of ingredients).  Both the boys ate it--which you probably know by now means it is a keeper. And it wasn't hard at all. Here is what I would change next time: While the beef and noodles are cooking in their separate pots, I would simmer the tomatoes, tomato sauce, and herbs together in a separate pot so the flavors can mingle before mixing them all together. I would use diced tomatoes instead of stewed tomatoes--mostly for their bite-sized quality and I would increase the tomatoes to at least two cans, if not three.

Total cost: $8 for 6-8 generous servings

Total time: Without using the crock pot I pulled this together in about 30 minutes.

Final verdict: It was an easy weeknight meal. I can't imagine how it would pull together in the crock pot. It just doesn't seem like there is enough liquid. However, it had a good flavor and I think if you allowed the sauce to cook on its own you really could get some nice flavors out of it. When our neighbor came trick-or-treating he said, "mmmm! Smells like spaghetti in here!" to which my husband replied, "Not spaghetti. Almost spaghetti." And this meal may be forever known as almost spaghetti. It's pretty accurate. . . if you changed the farfalle to spaghetti noodles, what would you get?

And now the treat:
 Pinned Image
http://www.navywifecook.com/2012/10/halloween-week-candy-corn-fruit-cups.html

A little "candy corn" dessert. This just looked so refreshing to me! I dished up the pineapple and oranges into cups while the "almost spaghetti" cooked. When the boys saw them they just went gaga over the fact that I was making a dessert! Oh poor deprived children whose mother never makes dessert. Sir Lancelot's eyes lit up, he clapped his hands, and he cried out with glee, "Oh, momma! It's a HEALTHY dessert!!"  Wow. All this and they didn't even know about the whipped cream yet.

So after they gobbled up their plates of "almost spaghetti" with peas they were served up these little delicious items--now topped with whipped cream. Seriously, they were gone in 45 seconds. Before I had even had time to top my serving with a little whip and sit down Sir Lancelot was drinking the juice from the bottom of the glass.


Total cost: For four servings (two child sized, two adult sized) I used two medium sized cans of oranges, one large can of pineapple chunks. $3

Total time: 3 minutes to drain and dish

Final verdict: These were so good. And I don't feel guilty one bit for eating them. Winner. Sir Lancelot, you'll see these again, my dear. We've got a whole can of whipped cream to finish off.

Tuesday, September 18, 2012

Pin 131 & Pin 132

I actually did these pins a few months ago but am just getting around to posting about them. Who knew that starting Kindergarten would derail me so much!

Original pin:
Pinned Image
http://quilttaffy.blogspot.com/2008/07/invisible-closing-seam-tutorial.html

Invisible closing seam tutorial. I have actually used this a few times since the first , but originally I was using it to finish up a sash. It is really a great tutorial. It has clear instructions and lots of pictures so I had no trouble following along. I don't have too terribly much to say about it since it really was made so simple.


The finished product.
Total time: 5 minutes

Total cost: $0

Final verdict: Guess I already gave this one away when I said that I had used it multiple times already! oops! It is a great tutorial for a very handy stitching technique. I also used it on Pin 114 to close up my little owl.

Original pin:

Pinned Image
http://blog.globalstreetsnap.com/post/23167060192/love-this

Going for this look. . . I pinned it to my "I could make that" board. And so I did. I attempted to make a top, skirt, and sash. And I attempted it without a pattern. I chose a few pieces I already owned to use as guides and worked from there.

The skirt gave me a lot of trouble and, as goes with sewing on the fly, I started to run out of fabric. It ended up tighter across my hips and thighs than I intended and I just couldn't get it to hang just right.

I love the top. It is very light and comfortable and goes well with jeans also.

Here it is:

The original model is much thinner than me and she is wearing the skirt higher at her waist, where I made mine to hit at the hips because that is more comfortable for me.

Total cost: eesh. I forgot. I did these a while ago and I can't find the receipt.

Total time: 4 hours. All three pieces were very basic items.

Final verdict: The top and sash have gotten a lot of use. The skirt--not so much. I have worn it a few times, but like I said before, it is a little tighter than intended and doesn't quite hang right. But I am out of room for more modifications. I might just hike it up next summer and wear it as a strapless dress. We'll see.

Wednesday, June 13, 2012

Pin 87

We just got home from our beach vacation so the next few posts will all be pins we did on our trip.

Original Pin:

http://mykindofmakeover.blogspot.com/2011/07/magnetic-puzzles.html

This blogger suggested to place magnetic strips on the back of puzzles to do in the car on a cookie sheet.

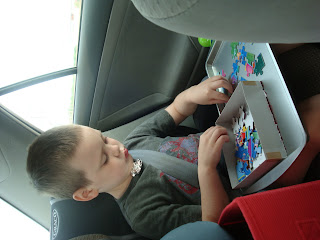
I didn't do the magnets but I did do the puzzles and the cookie sheet. I picked up a dollar store cookie sheet and a dollar store puzzle for big L. He loves doing puzzles and this was actually the first thing he pulled out once we hit the road. Since it had a lip on the edge, I thought it would still work for the car despite the magnetics.

Our dream was shot down pretty quickly when he discovered that the puzzle was too big for the cookie sheet. Bummer. Guess we should have checked that one out before we left.

However, the cookie sheets did come in handy for the car ride. I had picked up two (because you can't just have one item and two boys) and they were awesome for coloring book surfaces and baby mermaid swimming while we were in the car. On the return trip, I used one for my lunch platter. They were great noise makers, too, when the boys were really getting antsy and bored. That's when I snatched them and stashed them under the seat (which, by the way, they are super easy to store since they are so thin.)

Total time: 0 min

Total cost: $3 because we had to have two cookie sheets.

Final verdict: They didn't work out for the puzzle this time. Maybe next time we will make sure to check the finished size of the puzzle first. But they did come in really handy for the long car ride. These will probably make it to future car rides.

Friday, June 1, 2012

Pin 80

Firstly, let me say that I never expected the boys getting out of school to slow down my crafting soo much! Just finding time to go to the store for supplies is a chore! Trying to pick up the pace now. . .

Original pin:

Pinned Image
http://www.michaels.com/Lily-Sugar-'N-Cream%C2%AE-Knit-Duster-Cover/25582,default,pd.html

I decided to work on this little project this week at knitting/crochet circle. Since we installed our new floors we have been doing a lot of "Swiffering" and we are actually low on cloths. Instead of buying more, I thought this would be awesome. To be able to wash and reuse these puppies sounds fantastic.

This was my first visit to the circle. I learned that I can't talk and knit at the same time without making mistakes. I am not a pro knitter. I decided mistakes were fine since this was going to be used on the floor and just plowed through the project, mistakes and all.

Not the prettiest swiffer cover
I finished this in one day and tested it out. It worked almost as good as those cloths. It had trouble picking up the larger small particles--think cracker bits or thick grass pieces--that sometimes the cloths will pick up. It did great with the dust and, more important, dog hair.

 Only one small snag. I didn't have a measuring tape a knitting circle so when the directions said to knit until it was four inches wide, I just had to guess. I was a little off.

Total cost: $3.99 for a skein of yarn that is probably enough to make 5 of these.

Total time: Four hours

Final verdict: Ugliest project ever! But who cares? Its for cleaning the floor and it worked good enough to keep me from running out to buy more covers. You could even dampen this and use it as a damp mop. I am already working on number two--which will be measured :)