Showing posts with label environmentally green. Show all posts

Sunday, January 20, 2013

Pin 178

Original pin:
Pinned Image
http://www.compartmentlife.com/2011/11/the-pinterest-challenge-fall-2011-toilet-paper-or-art/

I am always looking for home decor at affordable prices and free is pretty much up my alley. I informed my family to start saving rolls and very quickly I had more than I knew what to do with. It was eye-opening to see exactly how much toilet paper we use in this house! Then my bag just sat there. . . and sat. . . and sat. . . and sat. . . Until I decided to start up these "unfinished projects." So here we are with the completion of, yet another, unfinished project.

It took me just a few weeks to fill up this bag with toilet paper rolls, paper towel rolls, and any other cardboard roll we might come across.

I fired up my glue gun, parked myself in front of the TV (I had some DVR to catch up on) and went to work. I cut one-inch strips and just started gluing together at random. I didn't really have a plan. I did find a really sturdy roll (I think it came from foil) that I was able to cut with a sharp knife and preserve the circle shape. This came in really helpful because it provided some super-sturdy anchors. Hours later, day one's progress was done and I was off to bed.

I was not able to work on it on consecutive days, so this project was not done in four days total, just four episodes of work on it. A few days later, day two progressed in the same way as day one.

And for some size perspective, those tiles are 12 inch by 12 inch in size. This project was growing fairly quickly!

Day three I was getting to the bottom of my stash of rolls. I had already put my family on alert to refill my bag!


Somewhere shortly before day three ended, the project was starting to look like a giant snow flake. NOT what I was going for, so I had to really strategize to avoid the snow flake look. Worried that it might head back in that direction, I called the gluing stage complete after day three.

I picked up some spray paint at the store last week. I found some metallic style paint in "oil rubbed bronze" for a metal look without being too shiny.

After it dried it was ready to hang up. A year ago I took everything from my mantle and have been trying to figure out what to put there next. I put this in the big empty space. Since packing away the Christmas decorations, I haven't put anything back on the mantle, so it looks really empty in my pictures. Guess I'll have to work on that next.


It is pretty sturdy and fairly light. It is held here with one thumbtack in the center circle.
 
 
Total cost: $5.99 for the spray paint. Otherwise, I used the entire bag of rolls, not sure how many, and about 6 hot glue sticks.
 
Total time: It was a little time consuming to do all the cutting and gluing. I did all the cutting and gluing over three sittings--about eight hours total. Then the spray painting was done over around 20 minutes total, split into three sessions, allowing drying in between.
 
Final verdict: It is an inexpensive way to fill some space. I think I like it. Up close, you can see many flaws--jagged edges, unequal heights and spacing, exposed hot glue. But hanging up so high and being painted so dark, a lot of these imperfections are not as obvious. My husband was a little unsure about the whole project from day one, but now that it is hanging, he admits he is surprised at how much better it looks that he expected. We are not completely sold on it yet, but I'm just going to let it hand there a while longer and see if it grows on us. Another problem is similar to the problem I had with the sock bun--I felt weird that people would know I had a sock on my head. Well, now I wonder if my guests will look up and think about my toilet paper rolls hanging on the walls. 
 

Would you?

Wednesday, January 16, 2013

Pin 174

Original pin:
Pinned Image
http://mollykaystoltz.com/t-shirt-shag-rug-tutorial/

T-shirt rag rug tutorial

As promised, I am wrapping up unfinished projects. As some of my friends can attest, this one has been a looooooong time in the works. I started in in APRIL!! I worked on it pretty steadily April-May, dragging my bag of supplies to craft nights and work days. We got rid of all our carpet in May. I was making this scrap rug for my older son's bedroom. Right around that time we stumbled across this brand-new-in-the-package rug at a garage sale that is the one with the roads and buildings printed on it. He fell in love with it and I picked it up for $2. No need for this one so it was rolled up and put away. It took up a lot of space on my "craft shelf." Haha. I don't have a real crafting area in my home, so I randomly find space to cram my crafting stuff and this found its way onto a shelf--where it repeatedly fell off!

Let me rewind back to April. . .

I wanted this to be larger than the tutorial--which is the size of a t-shirt. So I bought fabric remnants to use instead of gathering a wardrobe's worth of t-shirts. All of my fabric came out of the remnants bin so it was fairly cheap. I chose a large piece of denim for the base because I thought it would be sturdy. Since I was not using knit for the scrap pieces, I cut all the fabric strips using my pinking shears to prevent some fraying. HOURS later, I was suffering from my first real pinjury!!
 
But now that I had all my strips, the real work could begin. I followed the tutorial to cut the base and weave the strips in. My base was so large I could only do about three rows an hour. Days and days later I made it to this point, at which it was rolled up and stashed away for nearly nine months.
 
See how close this was to actually being finished!!!
Yesterday, I pulled it all out and finished the puppy up in about 45 minutes. Seriously, why couldn't I do that earlier?? Here is the finished product:


I didn't go in with a specific pattern plan, it just worked out that I used up all my colors early on and was left with a lot of blue. I started in the middle and worked my way out to each edge. I did the center row and then did one or two above and then one or two below, then back to the top for a few, and so on. . .

Since this doesn't really have a destination in my home any more--thanks to the much COOLER manufactured rug, I just kind of left it lying in the middle of the room where I finished it yesterday. When the boys got home from school I asked them "where do you think we should put it?" secretly hoping they might fight "my room! my room!" but the only answer I got was from super-cool L, "uh, how about on the floor."  They did play on it a little and pulled out a strip or two. Maybe its best NOT to put it in their room because I just may find one of them in a pile of strips with a holey swatch of denim one day as they deconstruct it.

Total cost: I am pretty sure I spent around $17 on fabric remnants

Total time: I am just going to have to do some math here . . . at three rows an hour and 41 rows plus the hours spent cutting strips, I am going to say all together I probably spent somewhere between 18-20 hours on this one.

Final verdict: Its a homeless little rug for now. I am glad to have it finished and off my craft shelf because it took up a lot of room. It was easy enough but I'm not convinced it is going to hold up to a lot. And I am a little worried about washing it and having to rebuild! Time will tell. . . To create another rag rug I would probably find a better way to secure the strips--tying or stitching or something. But I will start much smaller for the first trial.

Wednesday, November 7, 2012

Pin 154

Original pin:

http://www.designsponge.com/2011/10/diy-project-autumn-leaf-bouquet.html

Aren't these beautiful? Roses made from fall's leaves.

I thought this would be a cute, easy, and free little decor item to get us in the fall spirit. We need that since this weekend it was 88 degrees!! Really? The first week in November?

I decided this would be an easy project to solicit the boys help on with gathering leaves and sticks so we took a little "nature walk." Look at our colorful collection:


These should turn out beautiful, right?

It took a few tries to get the feel for how to fold it and how to hold it. The browned edges of the leaves were a little crumbly. I did have to make a second trip outside for more leaves. I had suspected that the brown leaves would be too dry to fold and manipulate, but I had thought that the fallen leaves that weren't yet brown would be okay. Turns out, if they were on the ground they were too dry. I went back out and harvested some leaves off the tree. I chose ones that were changing color and came off without having to tug. Literally I would touch them and they would fall off in my hand. Most of my leaves came from my Autumn Blaze Maple tree (appropriate for the project, right?), but I did manage with some leaves from my Bradford Pear tree also.

I had trouble finding a good place to photo these for you, but here are my best shots:

 Mine are not even comparable to the original. I don't know if it is because her technique is spot on or if she had different kinds or sizes of leaves. My overall presentation was underwhelming and just feels a little sloppy.

 Like I said, these pictures are not great. I couldn't get the right lighting and the right background color to show them off well. But maybe because they just aren't that pretty?

I highlighted my different one here:
 With the Bradford Pear leaves, I didn't fold them like the maple leaves in the tutorial. I just wrapped them around and around each other.

I made a few little buds too. Once the flower started getting full is when leaves started tearing and it started looking sloppy so I tried a few flowers with just three or so leaves.

Total time: 2 hours in collection and manipulation

Total cost: $2.99 for two rolls of floral tape. I probably used 1/2 of one roll.

Final verdict: Mine are rather ugly. I won't be heartbroken to toss them in the trash. I still think it is a neat concept and that the original ones are beautiful. I thought they would be brown and crumbly by the next day but they are actually still the same colors as they were when I made them and that was a week ago now.

Thursday, November 1, 2012

Pin 153

The last of my Halloween posts. . .

Original pin:
Pinned Image
http://www.moredesignplease.com/moredesignplease/2010/6/6/diy-recycled-t-shirt-tote-bag.html

I'm not going to lie to my faithful Pinspiration followers. Here is the truth. I did make these. I did not make these this year. In fact, I made them for last Halloween. When I was pulling out all the holiday decor I came across them and decided to share them with you now. So here they are: Recycled t-shirt tote bags.

This was one of the first projects I ever did from Pinterest. It is really, really easy. Last year I thought I could make some really cute upcycled trick-or-treating for the boys. Daddy had this bright orange Halloween shirt that was just begging to be turned into a candy sack. I dug another orange shirt out of his drawer and went to work. In no time at all I had two trick-or-treat sacks ready to go.

The jack-o-lantern shirt was a men's XL and the elephant was a men's L. These made really, really large bags. The boys, then 4 and 22 months, were too small to carry them without dragging. Older brother carried the jack-o-lantern bag trick-or-treating, but it wasn't easy. The bag stretched with the weight of the candy and made it harder for him to keep from dragging. The main difficulty with using these as trick-or-treat sacks was that it was hard for little hands to manipulate the handles to open the bags.


On the flip side, their stretchiness makes them perfect for when you are at the market and need to cram just one more thing in. They are fairly sturdy. Since the armholes are the handles, it is easy to slide the bag all the way up on my shoulder to carry multiple at a time.

Total cost: $0

Total time: I think I made both of these in less than 30 minutes.

Final verdict: Great for shopping, poor for trick-or-treating with little ones. I just may start using them to give gifts in though. It would be really easy to make a bunch in lots of colors or thrifted shirts. Also, you could make them in all sizes based upon what size shirt you buy. Hmmm. . . I have an idea growing. . .

Tuesday, September 25, 2012

Pin 136

Original pin:

http://www.thecountrychiccottage.net/2011/10/how-to-make-sweater-pumpkins-no-sewing.html

Getting in the fall spirit around here. Since it is still in the 90's I need something else to do around here with all those sweaters. Sweater pumpkins it is!

Last week, I hit up a couple thrift shops looking for some pumpkin-y sweaters. I had a little trouble at first finding orange AND in my budget. I was looking around for more like the dollar-a-piece type of items, and all the sweaters were clocking in around $3-4. Time to get creative. So I came home with one child's sized sweater, one adult sweater, a stocking cap, and a lap afghan. Today I swung by the dollar store to pick up a grapevine wreath to make stems.

The loot.
I made my little orange one first. I followed the directions exactly. Time to shake it up to make the stocking cap.

I didn't want to cut open the hat anywhere since it only has the one opening.  I stuffed the hat to my liking and then decided to close it up a little differently than the first one. This time, I wrapped my grapevine stem piece in a little yarn and then used the tail of the yarn to sew around the rim of the cap.
I left the stitches loose until the end where I stuck the stem in and cinched it shut, tucking in the loose edges. A little hot glue held everything in place.

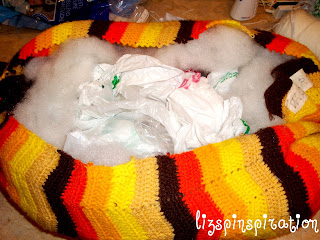
For my third pumpkin, I decided to take on the afghan. I really wanted the chevron pattern to show on my pumpkin so I was going to have to make it big. I started by cutting the afghan in half and working with one half. I ran out of stuffing so I started grabbing other things to stuff it with. There are some giant pieces of foam left over from an old, old, OLD project and then a ton of empty shopping bags.


When it was time to start gluing the edges shut on this beast I decided to skip the hot glue. I wanted to match up the stripes and I kept burning myself trying to do it so I decided to sew this one shut with some yarn. I ended up having to adjust the top a little as well to get the pumpkin shape I wanted. I tucked the excess down in the pumpkin and sewed the top shut using the same technique I used on the cap.

Since I was out of stuffing, and now nearly out of shopping bags, I decided to quit at three. We'll save the extras for something else. I posted this tease picture on facebook earlier today and all your guesses have inspired me. Looks like I will have plenty to work with.
My pumpkins!


Total cost: $10

Total time: 2 hours

Final verdict: A little bummed I ran out of stuffing so soon. They weren't as easy as they looked at first. I don't think I would hot glue again. I would sew the side seam and bottom seam shut. Personally, I think it is just as easy and looks nicer. Plus, if you mess up, it is so much easier to rip out stitches than hot glue. Stuff through the top, and cinch the top shut. If you don't sew, however, you'd better stick with her method. Cute idea, will add a nice festive touch to the house. You could make fabric stuffed stems to make them into pillows too.


Wednesday, September 5, 2012

Pin 129

Original pin:

http://www.aprettylifeinthesuburbs.com/2011/06/kitchen-kapers-diy-fruit-veggie-wash.html

Vinegar and water fruit wash to kill mold and extend the freshness of produce.

I bought some fresh fruit at the farmer's market last week and decided to try out this wash to see if it really makes a difference.  I usually give the fruit a good rinse with water, let it dry, and then put it in the fridge. I had grapes, strawberries, and grape tomatoes. And before you even ask--I disinfected the sink prior to doing this.

I brought them home and dumped them in.


The website promised me filthy water when I was through. This is a sample of what I had. A little turbulent, solids that settled to the bottom. Nothing I would want to drink, but not really filthy either. Mostly it was those little hairs off the strawberries and little grape leaf remnants.

Did it fulfill it's promise? My strawberries lasted only four days before they showed signs of mold. The grapes showed mold in two days. Both of these seem earlier than usual when I wash with just water. Plus, the strawberries seemed to have soaked in the solution because they oozed watery fluid out of them and they didn't taste very sweet. Can I attribute this to the vinegar wash versus produce quality to begin with? No. I only did it once so I don't have anything else to compare it to. But I do shop at this farmer's market every week, and these were the poorest tasting strawberries I've had all summer. 

One thing it did do was cause me to immediately sort out any suspect items that may contribute to mold earlier--there were a few icky grapes in the bag and one strawberry was mushy on one side.

Total cost:$0

Total time: 10 minute soak, then a rinse, dry, and sort of the fruit. 20-ish minutes total

Final verdict: Seems that a good wash with water is working fine around here. Probably won't spend any time on this one again.

Tuesday, August 14, 2012

Pin 119

Original pin:
Pinned Image
http://www.thethriftyhome.com/2009/05/power-of-vinegar.html

"Soak paper towels in vinegar and wrap around faucets. Wait an hour and wipe off. Cleaning power of vinegar!" says the previous pinner.

We've got some hard water out here in funky town. I have tried all sorts of products to remove it and some work a little more than others. Nothing has removed them completely.  I was in a major kitchen cleaning funk this morning--seriously, I was climbing up on things to dust the tops of cabinets, the refrigerator top was disinfected, I even cleaned the vents on the front of the oven with alcohol and q-tips. I thought this would be easy enough to set and let it work while I obsessed over other things.

The kitchen faucet before:

I wrapped it with soaked paper towels and then just dumped more vinegar on top for good measure.

One hour later:
Still some small spots left.
So I rewrapped it with the same paper towels, dumped a little more on and then let it continue to soak.

Three hours later:


This is probably as good as it will ever get. It is the best I have been able to get with any cleaning product so far. In the middle picture you can see some leftover rings, but you can only see them well up close. I was pretty happy with the results. Maybe if I had grabbed some of those q-tips and started scrubbing I could get those pesky rings off.

Total cost: $0, I keep that vinegar around here in bulk.

Total time: 5 minutes hands-on, total soak four hours.

Final verdict: Easy enough and did a good job. I will do this again when the water stains have built back up. Oh, vinegar. Is there nothing you can't do?

Friday, June 1, 2012

Pin 80

Firstly, let me say that I never expected the boys getting out of school to slow down my crafting soo much! Just finding time to go to the store for supplies is a chore! Trying to pick up the pace now. . .

Original pin:

Pinned Image
http://www.michaels.com/Lily-Sugar-'N-Cream%C2%AE-Knit-Duster-Cover/25582,default,pd.html

I decided to work on this little project this week at knitting/crochet circle. Since we installed our new floors we have been doing a lot of "Swiffering" and we are actually low on cloths. Instead of buying more, I thought this would be awesome. To be able to wash and reuse these puppies sounds fantastic.

This was my first visit to the circle. I learned that I can't talk and knit at the same time without making mistakes. I am not a pro knitter. I decided mistakes were fine since this was going to be used on the floor and just plowed through the project, mistakes and all.

Not the prettiest swiffer cover
I finished this in one day and tested it out. It worked almost as good as those cloths. It had trouble picking up the larger small particles--think cracker bits or thick grass pieces--that sometimes the cloths will pick up. It did great with the dust and, more important, dog hair.

 Only one small snag. I didn't have a measuring tape a knitting circle so when the directions said to knit until it was four inches wide, I just had to guess. I was a little off.

Total cost: $3.99 for a skein of yarn that is probably enough to make 5 of these.

Total time: Four hours

Final verdict: Ugliest project ever! But who cares? Its for cleaning the floor and it worked good enough to keep me from running out to buy more covers. You could even dampen this and use it as a damp mop. I am already working on number two--which will be measured :)