Showing posts with label cool mom. Show all posts

Monday, April 1, 2013

Pin 196: April Fool's Day Prank

Original pin:

http://mrsgoffskinders.blogspot.com/2012/03/best-april-fools-joke.html

A fun little April Fool's Day prank--a homemade batch of "brown-e's"!! Love it! (And by the way, this blog it is from has some really cute ideas for the pre-school/early elementary crowd. I'm going to have to spend a little more time digging around out there.)

I spent last night at work (my "real", paying-sort of job) so this morning and early afternoon were spent sleeping. Big El was at school and Lil' Dub was off at Grammy's house for the day. After I picked Big El up from the school bus, we hopped in the car to head out to pick up the brother. We were talking about April Fool's Day and what sort of funny things we could do when I remembered this fun idea. I LOVE a good pun. I hadn't intended on making any stops, and money has been tight the past month (thanks to birthdays, dental work, home repair, more birthdays, more dental work, more home repair. . . ), so I didn't have any cash on me. I have strictly forbidden myself from charging or debiting anything other than true necessities. However, one of my favorite dollar stores was on our way and we started digging change out from all the little storage spaces in the car.

We managed to pull together a few dollars and stopped in for our supplies. With our change, we bought foil, a brownie pan, some brown lunch sacks, and an Orange Crush (because hard work made us thirsty and we had a couple extra coins.) As any good crafter (or nurse), I always have a few tools with me, so I pulled out my suture scissors and went to work making some "E"s while Big El went to work on the Orange Crush. Moments later, we had a pan full of Es ready to present to Grammy and Pops.

He was so excited as we met them at the door bearing our special holiday brownies. When Grammy peeked inside and found the surprise, Big El burst into giggles.


We were able to pull it again on Pops and then again on Daddy. Good clean April Fool's Day fun!

Total cost: $3 (unless we add in the Orange Crush.) I could have put this together for $0 if I had had the clear brain to think of it before we left the house. Oh, the woes of working the night shift.

Total time: 5 minutes (plus baking time. . . hehehe)

Final verdict: I love it because it is a good pun. The kid's loved it because it was fun to play a prank on April Fool's Day. Now how are we going to top this next year??

Friday, February 15, 2013

Pin 184 and Pin 185

Original pin:
Pinned Image
This is not the link I had originally pinned, but the blogger has updated her site and the best post is here http://eclecticallyvintage.com/2013/02/cupid-float-valentine-drink/#

I needed a fun drink for the Kindergarten Valentine's Day party. I thought these were super cute and would be a real treat for the kids at their party. I bought all the supplies (I actually had a leftover jar of unopened cherries from Pin 163) and bought some fun party cups.

In planning my transportation logistics, I was thinking about getting the ice cream up to the school, keeping it frozen, dipping, dripping, sticking, melting. . .   Back to Pinterest I go. I had this pin filed away:

Original pin:
Pinned Image
http://www.realsimple.com/holidays-entertaining/birthdays/serving-cake-ice-cream-like-pro-10000001189696/page4.html 

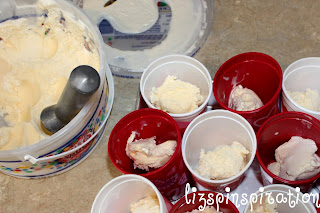
Real Simple suggested pre-dipping ice cream and freezing in paper cups to serve at birthday parties. I modified this suggestion a teensy bit to fit my situation.  The morning of the party, I dipped two scoops into each (clean--I ran them all through the dishwasher the night before) cup.

I packed them into my largest aluminum cake pan (aluminum helps keep things cold).

And then I covered the whole top and sides with aluminum foil. I put it back in the freezer. A few hours later, just before I left the house for the party, I put the whole tray in my large cooler on ice. I left everything in the cooler until just before the kids arrived in the classroom for their party. We set out the cups and, with help from the other mom's, added soda, whipped cream, straws, and, of course, a cherry!


Total cost: I served 22 kids. I used almost two 2-liter bottles of soda and about half a gallon of ice cream. A little over one bottle of whipped cream and a half-jar of cherries. Including the cost of the cups, it was about $12.

Total time: Less than 20 minutes. I think it took around 10 minutes to dip all the cups and maybe 5 to top them off in a team effort.

Final verdict: I love floats! It is such a childhood memory treat for me so I thought it was a fun idea for a classroom party. The pink color was just the icing on the cake for me! Most of the kids seemed to like them--I know mine did! Lucky boy, I have leftovers waiting for him after school today. The predipping trick was awesome. I didn't have to worry about dripping ice cream, forgetting a scoop, or melting leftovers. I just may start doing this for all my parties! And I will probably do floats for school parties again because it was so easy!

Thursday, February 14, 2013

Pin 183

Original pin:

No source available. If this is your sweet creation, let me know so I can give you credit!!

Happy Valentine's Day! I caved at the last minute and decided to craft up some Valentines for the kids. I had already even spent my $1 for the easy boxed kind. I'm not against those, I have used them plenty. It was just when you pair my crafty heart with my new camera obsession and mix in a little holiday spirit, I couldn't resist the urge to create.

I pinned this image a loooooonnnnggg time ago. Possibly over a year ago. I think it is a cute and clever idea.

Getting the picture was a bit more difficult than I anticipated. I showed the kids what we were looking for and they were so excited to create and shoot that they were wiggling around like they had ants in their pants. There was much jumping and twirling and superhero-style posing. I had trouble with them getting the fist rotation and placement (i.e., not directly in front of their face) just right. As I was editing I was thinking about a way to make this easier. They need something that they would normally hold upright. I thought about maybe a clear juice glass. They would naturally be inclined to hold this upright, create the right shape with their hand, and have more of a natural "handing-off" pose. It could be easily edited out, cut out after printing for the lollipop, or just obscured when the lollipop was in place. I have these small glasses I found in the dollar spot that would have been absolutely perfect--had I thought of it before hand.

It took me three separate sessions (I don't get much time with these crazy boys) to end up with two mostly workable shots. Here is what I started with:

Hmm. One of those superhero poses. He was alternating between superheroes and rock star.

I finally got his placement right after I pinned him down on the floor. It slowed him down just long enough and kept his fist forward. His eyes are a little diverted, but maybe he's looking at the lollipop?
After a little editing magic I had these ready (minus the pinspiration marks, of course):

names obscured to protect their superhero identities
I printed these out at one of those store kiosks that print them while you wait. I don't have a good photo printer so I just loaded them on a thumb drive and ran to the store.

I made the mistake of stepping into a craft store while I was out and I stumbled across the most perfect cardstock. I had to buy it to mount the photos. I cut the cardstock a little bigger than the picture, used an exacto knife to cut some holes in the appropriate places, and started assembling.  When L got home from school, I sat him down with a sacred adults-only sharpie marker to write in his classmates names. W's school specifically asks for generalized cards to make it easier for the kids to pass their own.  In the middle of assembly we had to make an impromptu trip to urgent care for the world's worst nosebleed--ugh.

Sometime around midnight, I finished them up. They were not difficult, nor really time consuming to assemble, it was just so late thanks to our 4 hour urgent situation. Here are the final results!

We just couldn't get the cute face and the right fist on this wild man. This will do.


Total cost: $14 without the cardstock, I bought a big pack for $10 and used 20 sheets of it. Somewhere less than $20 for 40 Valentines.

Total time: Really the actual photo taking was the hardest part. Assembly took maybe two hours because I had to cut all the cardstock to size. These would have been perfectly fine without the cardstock, but I like the look and it made them a little more sturdy.

Final verdict: I think they turned out pretty cute. Minus the funky hand position on L, but his friends will never notice that. They are going to notice the lollipop. I spent a little more than I planned, and way more than in years past where I use the dollar store box split between them both. I am happy with them. The boys had an absolute blast shooting them and getting them ready. I have honestly never seen my boys so excited to pass out their Valentines. We just may get in a tradition of photo Valentines. Also, while editing, I googled something about photo Valentines, and there are a ton of versions of this. Check out the image search for more ideas on posing and staging the shots. Another note, when you buy your lollipops, consider the wrapping. These had a lot of wrapping which limited areas of the photo that were visible when the lollipop in place so I had to account a large empty area in the picture.

And Happy Valentine's Day from Pinspiration!!

Wednesday, December 19, 2012

Excuses, excuses. . .

I just finished prepping 30 photos for the upcoming posts! Yay! I'm back in the game again. Here's some of what I've been doing the last two weeks while I've been MIA. Between Christmas decorating, party planning, a job change, and attending all the required social functions the holidays bring I have:

Coaxed a timid little donkey into the Christmas Pageant
Planned and hosted a fabulous 3 year-old birthday bash for this little cutie
Ran 13.1 miles in the Dallas Half-Marathon, completion time 2:15
Before the race

After. Blurry. A little like how I felt.
Made this cute little gift. . . can't show the finished product yet, but look for it to be featured soon. Sometime after 12-21-12. . .
Sneak peek of step two. . .
Nursed this cute little sickie back to full strength. Amazing what a little macaroni and cheese and an ice cream sundae can do for your spirits.
 

I've also been working on a few Christmas presents you'll start seeing pop up on here. I'm back on the blog. Thanks for sticking around. Lizzy

Tuesday, December 4, 2012

Last of the Halloween candy

Last week I realized we STILL had some Halloween candy lying around. I have been secretly dumping a handful a day for a few weeks and the bowl was almost empty. I wanted to give my kiddos one last hurrah with the candy before I trashed the rest of it. My favorite way to win the battle of mom vs. kid in the candy department is to find something healthy and stick enough candy/sprinkles/whipped cream on top so that it feels special and indulgent.

Here is how the Halloween candy went out:

2 single serving no-added sugar applesauce cups
1 fun size pack of Skittles
2 small shakes of the rainbow sprinkles

I split the Skittles pack between the two--each child got 8 skittles and gave each a little shake of the rainbow sprinkles. Voila! Super special applesauce for dessert. Everyone wins!
 

And look at these happy faces!

And if you stir it up a little the colors will streak and make rainbow applesauce. . . until you over stir it and then its just that ugly brownish color.

Anyhoo, if you want to be the coolest mom tonight, throw some sprinkles on fruit and call it a treat!

Here are a few of my other special desserts:

Toast with peanut butter and use chocolate chips to make a happy face

Any kind of canned fruit with a squirt of whipped cream

Peel a banana and stick little surprises in it--pretzel sticks, candy bits, chocolate chips

Peel a banana and drizzle with chocolate syrup. Top with a squirt of whipped cream and a cherry--like a sundae without the ice cream.

Yogurt with graham cracker squares stuck in the top for dipping/scooping

Yogurt with a shake of sprinkles

Yogurt "milkshake." I have made these for my kids since they were babies. This is especially good if you need to get yogurt in them for medical reasons (aka, too many antibiotics :) ) Fill a lidded cup halfway with yogurt. Make sure it doesn't have fruit chunks in it. It should be smooth. Fill remainder of the cup with milk. Place the lid on top and shake vigorously until combined. I'm not sure that my kids yet know that milkshakes are actually made with ice cream.

Get creative. My kids will pretty much eat anything if I put a little shake of sprinkles (or anything I call sprinkles. . . hello Parmesan cheese! or Sea salt!) on top. One shake goes a long way so it doesn't take much. 

Tuesday, November 20, 2012

Pin 160

Original pin:
Pinned Image
http://www.howdoesshe.com/5-ideas-to-keep-kids-entertained-at-a-restaurant/

Tic-tac-toe with sugar packets while waiting on restaurant food.

I didn't plan on doing this one this week so I don't have pictures of my own to share. Guess that is a little what this pin was about anyway. There are actually a few ideas on keeping kids entertained at a restaurant.

My oldest is 5 and in the last six months or so finally figured out the whole tic-tac-toe thing. We tried this out this week as we waited on our food to arrive. It is a clever idea and he was really into it as I set it up. However, my sweet little five year-old does not have the delicate touch required to place the sugar packets without knocking over the balanced knives. We had to reset the game board after each of his moves. We only made it through one game before we both we ready for something else.

If you read the comments on the original post there are some pretty hot opinions about kid's behavior in restaurants and what you should and should not allow your kids to do. I try to teach my kids to be respectful in restaurants and in all honesty, we just don't go out much to restaurants that don't have a playground. A little sad, right??

In the spirit of the original post, here is what I have used to entertain my kids at restaurants:

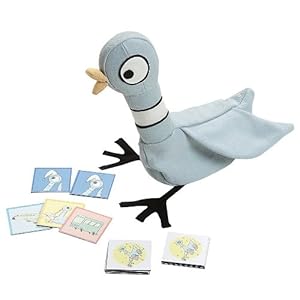
1. If I am really planning ahead, I will grab our memory card game. (Which happens to be one of our favorite story characters: The Pigeon Wants a Match)


Its fairly easy to clear the table enough to set this one up. Sometimes we half the deck if there is not enough room.  We could just as easily grab any card game--Old Maid, Go Fish, but Pigeon Match is our favorite (and it's all packed in that cute little pigeon bag!).

2. I spy. Big Brother's favorite game. We play this everywhere when we are waiting. The doctor's office is an especially hot spot for this game but it works for a restaurant too.

3. Hot Wheels. I usually have a few roaming around in my purse somewhere. It comes with the territory of having two boys. These usually occupy but you run the risk of having to fish them out from under the table over and over again.

4.  After the tic-tac-toe game we moved on to this one: I had some fruit snacks in my purse but you could do this with anything. Sometimes I use TicTacs, Skittles, or any little reward you can think up. I don't necessarily want to give them a bunch of sugary treats right before a meal so the challenge for me is to see how long I can make a fun size pack last and keep them entertained. I ask them a question and if they get the answer right then they get one fruit snack (or TicTac, or Skittle, etc.) If they get it wrong then they get nothing. There is a fine line between hard questions to make the pack last and easy enough to keep them engaged. You can ask questions that take them time to figure out like, "How many sugar packets are in the dish" and "How many letter "a'"s are on the menu?" My five year-old gets lots of spelling words, math problems, history "Who is the President?", geography "What is the capital of Texas?", while my little one gets questions like, "What letter does purple start with?" and different color, shape, number, letter, relative ("Who is mommy's sister?") type questions.

5. Stacking Cheerios. When my youngest was little my oldest would play this one. Now that my baby is nearly three I don't usually have Cheerios stashed in my bag anymore.

6. If we are starting to fail, we order a bowl of chips and salsa--or whatever appetizer is on the menu that can be prepared in minutes.

Total cost: $0 unless you count the cost of food.

Total time: 30 seconds to set up. Entertained us for 2 minutes.

Final verdict: We'll try it again when he's older but constantly picking up the knives and rebuilding was just a little of a pain.

And since I have no tic-tac-toe picture I'll just share with you some thankful art that came home from preschool this week. I absolutely LOVELOVELOVE this piece. It is going in the safe.

Me too, buddy, me too.

Wednesday, October 31, 2012

Pin 151 & Pin 152

A trick AND a treat for Halloween!

First, the trick:
Pinned Image
http://becomingbetty.blogspot.com/2011/03/crock-pot-ravioli-casserole.html

Crock pot ravioli casserole.

I have totally over-thought this one. First--where is the ravioli??  This is farfalle. But it looks good and the recipe sounds good. I thought a crock pot dinner on Halloween would be the way to go to avoid the rush that comes in the evening. But when I started reading the directions I had to change my plan. You brown the ground beef and onion and then put it in the crock pot with the canned tomatoes and tomato sauce for 7 to 8 hours?? And you have to precook the pasta too??  That just seems excessive--and a little pointless. What is the crock pot for then if not just to keep it warm? I just couldn't bring myself to chop onion and brown ground beef at 8 this morning so I took a sharp detour on this one.

Ditch the crock pot. I started boiling water for the pasta in one pot and browning the onion and ground beef in the skillet. The pasta and beef finished almost simultaneously. I drained the pasta and added the beef and onion mixture to the pasta. I added the herbs, tomatoes and tomato sauce to the pot with the intent of simmering it together to develop some flavors. There was no where near enough liquid. I only used 1 lb of meat (recipe calls for 1 and 1/2 lb) and 12 oz of pasta (recipe calls for 16 oz) so I can't possibly imagine how this doesn't burn after 7 hours in the crock pot. I even had a little extra tomato sauce I had tossed in since I had two 8 oz cans (recipe calls for 15 oz).  I added an additional can of stewed tomatoes to try and spread the sauce a little. Due to the small amount of sauce, I couldn't really simmer it much so I just left it on the stove on medium-low long enough to heat it through. My grocery store was out of frozen spinach this week so I omitted it. I tossed in the cheese just before serving it up--on special Halloween plates, mind you.

I know that sounds like a lot of negatives for this recipe, but really, it was fairly tasty. I would put this in the category of kid food because it is pretty kid friendly. Not unlike a Hamburger-Helper sort of meal, but with better ingredients (i.e., no powder to mix sort of ingredients).  Both the boys ate it--which you probably know by now means it is a keeper. And it wasn't hard at all. Here is what I would change next time: While the beef and noodles are cooking in their separate pots, I would simmer the tomatoes, tomato sauce, and herbs together in a separate pot so the flavors can mingle before mixing them all together. I would use diced tomatoes instead of stewed tomatoes--mostly for their bite-sized quality and I would increase the tomatoes to at least two cans, if not three.

Total cost: $8 for 6-8 generous servings

Total time: Without using the crock pot I pulled this together in about 30 minutes.

Final verdict: It was an easy weeknight meal. I can't imagine how it would pull together in the crock pot. It just doesn't seem like there is enough liquid. However, it had a good flavor and I think if you allowed the sauce to cook on its own you really could get some nice flavors out of it. When our neighbor came trick-or-treating he said, "mmmm! Smells like spaghetti in here!" to which my husband replied, "Not spaghetti. Almost spaghetti." And this meal may be forever known as almost spaghetti. It's pretty accurate. . . if you changed the farfalle to spaghetti noodles, what would you get?

And now the treat:
 Pinned Image
http://www.navywifecook.com/2012/10/halloween-week-candy-corn-fruit-cups.html

A little "candy corn" dessert. This just looked so refreshing to me! I dished up the pineapple and oranges into cups while the "almost spaghetti" cooked. When the boys saw them they just went gaga over the fact that I was making a dessert! Oh poor deprived children whose mother never makes dessert. Sir Lancelot's eyes lit up, he clapped his hands, and he cried out with glee, "Oh, momma! It's a HEALTHY dessert!!"  Wow. All this and they didn't even know about the whipped cream yet.

So after they gobbled up their plates of "almost spaghetti" with peas they were served up these little delicious items--now topped with whipped cream. Seriously, they were gone in 45 seconds. Before I had even had time to top my serving with a little whip and sit down Sir Lancelot was drinking the juice from the bottom of the glass.


Total cost: For four servings (two child sized, two adult sized) I used two medium sized cans of oranges, one large can of pineapple chunks. $3

Total time: 3 minutes to drain and dish

Final verdict: These were so good. And I don't feel guilty one bit for eating them. Winner. Sir Lancelot, you'll see these again, my dear. We've got a whole can of whipped cream to finish off.

Tuesday, October 30, 2012

Pin 149

Original pin:
Pinned Image
http://www.ghoulfriday.com/terrifying_tortilla_chips

Make your own tortilla chips in fun Halloween shapes. The take away here was the cookie cutter fun shapes for Halloween.

I have been making my own tortilla chips for some time now. I finally perfected the recipe just the way we like it that wasn't too crispy and wasn't too soft and wasn't too burnt-tasting. I usually only make them when I am making chicken tortilla soup. Since that was on the menu tonight I decided to jazz up our chips with some fun Halloween shapes. Below is my recipe, adapted from many, many, many attempts at finding just the right technique:

Tortillas (I usually prefer corn. Tonight I only had flour. Here's the thing--I but these giant bags of corn tortillas and then stash them in the freezer because I really only use them for these chips. I assumed I had some there but when I opened the freezer I only had flour tortillas there. They were a little stale but I just tossed the top tortilla out. Stale is okay because you are going to bake them anyway. I digress, back to the recipe)
Cooking spray
Salt (I like to use a sea salt grinder--it makes me feel a little gourmet)

Preheat the oven to 375 degrees. Cut your tortillas to the desired shape. I usually just use a pizza cutter to make quick work of tortilla stacks into cute little triangles. Tonight I used the Halloween cookie cutters. This step definitely slowed me down here.

I'm not sure if it was because the tortillas were flour or because they were a little stale or a little frozen, but cutting them with my cookie cutters was not easy. Differently than dough or soft, fluffy bread, you can't really wiggle the cookie cutter to cut straight through the tortilla. This was going to take a long time to individually cut these chips for my whole hungry family. Time to get creative.

Hmmm. How can I solve this problem. I need some good, strong force. . . AHA! A hammer should do nicely. So I grabbed my meat mallet and gently pounded away at the edges of the cookie cutter with the smooth side of the mallet. I was careful not to use so much force as to crumple my cutters. (They are from the dollar store, you know.)

This technique worked so well I decided to save some time and pound through stacks of tortillas. I found that three-tortilla stacks were just the right size to cut multiple chips at once, yet still cut through all the layers. Four was too many and the bottom layer was never cut completely.
Oh the pounding drove my family crazy! My kiddos were trying to watch TV in the next room and they were fairly irritated by the pounding until they came to investigate what I was making. Then they got a little excited about it. If they were a little older I totally would have put them to work on this job.

That weird square one is a Frankenstein head.
Next I lined the chips on a cookie sheet and gave a light spritz of cooking spray followed by a few turns of the salt grinder. Into the oven they go! After 9-10 minutes I gave them a flip, a spritz of cooking spray, and put them back in. Watch carefully and bake an additional 3-7 minutes depending on your desired level of crispiness and browning.

Then I had to rush out the door to make it to a PTA meeting. I didn't get any fresh-out-of-the-oven pictures for you. However, I was lucky enough that my family saved some for me.

When I walked in the door an hour and a half later, the first thing my husband said to me was, "What did you do to those chips??" Uh-oh. Why? "They were the best batch you have ever made." I think it was because I used the flour tortillas instead of the usual corn tortillas. They were less like a chip and more like a cracker. Here's the thing with crackers--my boys (including my husband) love them.  I sometimes just don't buy them because they eat them up so fast and leave all those cracker crumbs EVERYWHERE! But these chips did have a nice flavor and the boys loved the Halloween shapes.

Here are a few after shots. You can see how they brown up nicely:


If you are here for the recipe, then I am sure that was the longest-winded recipe you have ever read. Let me remove all the commentary and just write it plain and simple for you here:

Tortillas (corn or flour)
Cooking spray
Salt

Preheat oven to 375 degrees. Cut tortillas to desired size and shape and place in a single layer on cookie sheet. Lightly coat with cooking spray and salt. Bake 9-10 minutes. Flip chips and lightly coat with cooking spray. Bake an additional 3-7 minutes, watch closely and remove at desired level of browning.

Do not be discouraged if it takes you a few batches to perfect this recipe. Tortilla brands and ovens are different. I recommend a hot oven. Preheat the oven and then let it sit an additional 10 minutes to allow it to get good and hot before you start baking these. I found that when I made multiple batches, the second and third ones were always better than the first because the oven temperature was more stable.

And if you don't like my recipe, go try the one at the link at the top--its a little different.

Remember the pin here was the Halloween shapes?

Total cost: $0 for stale, frozen tortillas and cookie cutters stashed away in the top of the cabinet

Total time: Cutting these out was time consuming--well compared to the old pizza cutter way. 20 minutes to cut enough to fill 1 & 3/4 cookie sheets

Final verdict: It was a fun way to add some holiday cheer. I wouldn't do this regularly. I do think that corn tortillas would cut much, much easier with the cookie cutters (and maybe fresh ones too??) I will probably do it again, but only around holidays! Cutting with cookie cutters always leaves scraps. I am not one to waste but since the tortillas were stale I didn't care too much. Baked chips are a great way to use up old tortillas before it is time to toss them!

Friday, October 12, 2012

S'mores Yogurt Parfait


I'm always looking for after-school snacks that are healthy-ish, and more importantly, filling. But I can only feed my kids vanilla yogurt so many times before they start eyeing the cookie jar. I have tried to distract them with things like banana "ice cream" and frozen yogurt drops. Here is what I came up with today.

Ingredients for 2 servings:
3 full graham crackers
1 cup low calorie vanilla yogurt
2 tbsp chocolate chips

I put the graham crackers in the food processor and pulsed it a few times to make coarse crumbs. I put about 1/4 of the crumbs in the bottom of each glass. Then I put a 1/4 cup yogurt on top of that. Next I layered 2 tsp chocolate chips in each of the cups. Topped the chips with an additional 1/4 cup of yogurt each. Split the remainder of the graham crackers between the two cups on top of the second yogurt layer. Garnished with the remaining chocolate chips.


I am getting a round of applause over the head with a mouth full of snack!
 They gobbled these up happily and ran off to play. I did not hear one "I'm hungry" or "When is dinner?" or "Can I have a snack" for three hours! At three hours, my answer was, "Dinner's ready! Yay!"
 

Friday, September 21, 2012

Pin 134

Original Pin:
Pinned Image
http://www.makeit-loveit.com/2011/02/using-serger.html

I love the posts over at makeit-love it because they always have great, easy to follow tutorials. I recently came into a serger. I have been interested in learning them and I acquired the family hand-me-down serger from my sister about a month ago. I remember when my mother bought this machine when I was a child. I am going to guess it is somewhere in the range of 20-23 years old now. I remember going down with her and buying fabric from some warehouse to make a whole new summer wardrobe for us. I picked green and white stripes. We were going for the units look.

 Now, I'll be honest here--it sat in the box for a few weeks before I even thought about getting it out. I wasn't quite sure where to start--project wise. This tutorial I had pinned a while back was a good confidence booster. So I decided to start by just learning how to thread the monster.

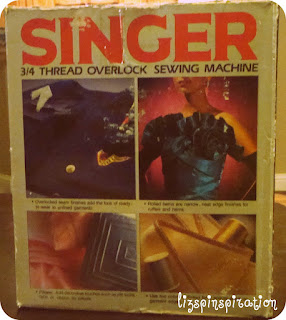
Here she is, still boxed.
 Something here I would like to draw you attention to is the beautiful teal prom dress on the side. I am drawn to this picture. There is a time in my past when I would have died to wear something like this!
Just look at that beauty. And the gloves!!
 And then I worried we might have an instructional problem when I saw this. Hmm. Sure hope there is a book in here.
 Luckily, there was. Looks complicated, but armed with my knowledge from makeit-loveit, I decided to dive right in.

And. . .  success! Well, I got it threaded like the picture at least. Now to see if it works. I grabbed some scrap out of my stash and started running it through to see if this beast was in working order. The first couple runs were not so smooth and my thread kept breaking. Here's the tricky part--I didn't know if the thread was breaking because I had threaded it wrong or if it was because the thread was old. A phone call to my mother revealed that the thread on this machine was the ORIGINAL thread!! Oh dear.

Turns out I also had one of the threads wrong. It went over when it should have gone under. Once I got that fixed and fuddled with the tension a little bit I had a pretty good seam going. Time to go to bed.

Total cost: $0

Total time: 1 hour

Final verdict: The makeit-loveit post is fairly generic--as it should be because all machines are different. I couldn't have done it without the book I found in the bottom of the box.  But the most important thing about this pin was that it gave me some courage and motivation to get that serger out of the box and working.

Bonus: My first serger project

Thursday was crazy sock day at preschool. Izzy (as he is asking to be called today--its a pirate name) doesn't have any crazy socks. They just don't make lots of crazy socks for boys like they do for girls. I had bought some fun socks a the dollar store a while back because I thought they would make cute sock monkeys. Lucky for Izzy I hadn't actually got around to making sock monkeys because they were now going to be his crazy socks. But how to get ladies-sized socks to fit a 2 year old?

I thought about cutting them off at the heel and sewing a toe seam but I worried they would be too wide in the foot and be uncomfortable all day smushed in his shoe. I couldn't take them in width-wise because the I'd end up with a seam somewhere on the foot. That would be maddening to live with all day!

I started with the two crazy socks and then I dug up some little boy socks who had lost their match long ago.


I cut the foot off right above the heel. Putting right sides together, I pinned the top of the little sock to the bottom of the crazy sock. I serged them together, stretching the little sock evenly.


Here they are all sewn up!

He was really excited to see them in the morning. He loves the bright and colorful things!


However, when it was time to leave for school, he started to worry a little. I reassured him that all his friends and teachers would be wearing silly socks too, but it wasn't enough. So I dug out a matching pair from my craft stash and we went to school together.