Showing posts with label hair. Show all posts

Tuesday, April 16, 2013

Pin 198: Pretty Braided Bun

Original pin:

http://www.babble.com/home/25-more-totally-pretty-10-minute-hairstyles/#braided-bun

Last week I was having a surgical procedure on my neck. I needed to get all my hair up and out of the way to make everything go a little bit smoother. I turned to my beauty board for a little inspiration and found this braided bun tucked away amidst these 25 totally pretty hairstyles. I also appreciate that it promises to be complete in 10 minutes.

Here is the offender to be removed. It is just an ol' fatty tumor that has been hanging around for about 5 years, but it keeps growing and it bugs me. Time to see you off old friend.

The directions are simple and easy to follow. I particularly like this step:

I totally would have rocked this look as is about, oh, 23 or so years ago. 

But not today. Finished it up, lickety-split. It was easy and complete on my first attempt. 
 My hair doesn't have quite as much volume, so I needed to dress it up a bit. I pulled a crocheted flower from my yarn stash and pinned it in place to pretty things up a bit. After smoothing out the top and spraying in place I was ready to go.

Total cost: $0

Total time: 10 minutes--as promised!!

Final verdict: A nice, pretty way to get all my hair up. My surgeon was thankful for the effort as well! I will definitely use this again! And I am going to spare you the post-op pictures.

(And a note, as I was editing the photos to prepare for the post, my son walked in and said "Ooooh! Pretty girl. I love that pretty girl."

Since they are all of the back of my head, I replied with, "Do you know who that is?"

Son: "No. Who?"

Me: "That's your mommy!"

Son: "Oh mommy! I love you! Let me give you a hug."

Me: "Thanks darling. Now get your booty back in bed and GO TO SLEEP!!")


Monday, March 4, 2013

Pin 191: Inside-out Ponytail

Original pin:
Pinned Image
http://www.jettingtothewedding.com/blog/diy-wedding-hair-a-modern-bun.html

This is posted on a wedding site as "big day" hair, but seems really simple and easy. I liked the style and am always looking for a ponytail alternative. This seemed totally doable.

On a scale of 1-5 where 1 = I can make a straight part and 5 = I have 7 different hair styling irons and can use them all perfectly with professional results, I would rate myself at a 3. I can pull off a decent do when I try. This one is uncomplicated, although I have been about 50/50 with the Pinterest inspired hair. I figured I had a shot.

I was wrong. I tried it three, maybe four times and here are my results:
 
 Classy, right? Pulling my hair through as described in the tutorial was really a mess. My hair may really be too long for this style as well. By the time I had it pulled through enough to get the ends towards the base of the ponytail, it was so loopy and floppy that it just fell over everywhere. If I didn't pull it through enough then I had a lot of ends to work with trying to pin up and around.

Total cost: $0

Total time: 20 minutes

Final verdict: Couldn't make it happen. My hair is really soft and it took a lot of hairspray to even get the sloppy volume in the picture. I think my hair may be too long, although in the tutorial, it looks like the model has longer hair than mine. I may play around with it more in the future, because I do think it is a chic look, but it did not work out for me that day.

So that was the post I had prepared. . .

As I finished the post and got ready to publish, I glanced back over the tutorial to check the link. I realized that I may have pulled my ponytail through the opposite way than the tutorial. I know where I messed up but I can't really explain it in words.  I was pulling the whole thing through starting with the base of the ponytail to the ends, instead of just pulling the ends through. Now are you really confused???

I hopped up from my computer, and just had to retry it with this new revelation. You'll have to excuse the day-old-slept-on-non-hairsprayed look in these photos.

I tried pulling from the ends instead of from the base and after only two attempts had this:
Much better start. After pinning up the ends and fluffing a little bit I ended up with a very rudimentary version of the original style.

Never mind all the sloppy flyaways--I had fixed the problem! I conquered the style! I can totally clean this up with some fresh hair, and a little practice. At first it felt really loose and that it would just fall out any minute, but after I started pinning up the ends to the base, it started to feel much more secure. I'm digging the look and it is a great alternative to the sock bun--not that I don't sport a sock bun on many a day. I do start to get a little self-conscious about that sock. . .

So the REAL final verdict: I can make this work! And it is much easier to conquer then that sock bun was.

Thursday, October 18, 2012

Pin 145

Original pin:
Pinned Image
http://www.u-createcrafts.com/2011/01/creative-guest-crocheted-headband-with.html

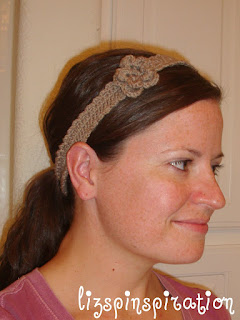
Also known as "The Austin-Fort Worth Headband" as this is what I did during the return trip. I know I said I wasn't pinning during our vacation, but I had to do something and I had limited supplies. I was flipping through my crochet board for inspiration when I realized I had everything (almost--we'll get to that) I needed to do this one.

The tutorial is fairly easy to follow with one exception. There is a mistake at the end of row two. If you scroll all the way down and read through the comments, you can figure out how to complete row two. Just a warning so you don't go crazy trying to figure out that step.

I didn't have a button with me so this is where I had to improvise. Instead of creating a button hole, I just slip stitched around the edge a few times to get to the other side to start the edging. When the band portion was finished, I made a chain a few inches long, threaded it through the hole at the end of each band, and then single-chained back down the foundation chain. I did this on each side to create ties. If you are going to do this without a button, shorten your foundation chain at the beginning of the band because you aren't going to need the overlap accounted for with the button.
The other thing I did a little differently was the edging. The original pattern calls for chain two, skip one stitch and slip stitch into the next. Repeat all the way around for the edging. I wasn't getting as much ruffly-looking edging as I wanted, so I chained three instead of two. Everything else was the same.
Not a great picture of the edging. Look at the top, the bottom edge is sitting crooked here.
All that is left is to wear it. It felt kind of hippie-vibe-ish so I tried to style it hippie-like:
 Not so sure I'm pulling it off. . . let's go to nature. Maybe I'll feel more hippie out there.
Umm. Not so much. I'm not much of a hippie.
This is how I am most comfortable wearing it but I feel like it makes me look a bit childish and less funky-cool like the original author.

What do you think? Can I pull of the relaxed hippie style or should I pass this one on to my niece?

Total cost: $0

Total time: Approximately 3 hours.

Final verdict: This one is going to take some getting used to. But it is so stinking cute on the original girl!

Wednesday, July 25, 2012

Pin 107

Original pin:

Pinned Image
http://www.thesmallthingsblog.com/p/hair-style-tutorials.html

Pinned with the description "40 ways to style medium or long length hair."

We've been traveling this past weekend and I needed a hair style that would hold up to travel, heat, wind, and wrangling kids, yet still look classy. I didn't want to go with a plain ponytail so I turned to this pin.

This website is awesome. There are tons of video tutorials and the one I used was simple and easy to follow. It held up all day. The videos are easy to follow and see what she is doing in them. I get bored with my hair daily and am always looking for something new to do with it.


At the end of the afternoon, and after a nap, I had a little stray escape.


Total cost: $0

Total time: 20 minutes. The video I watched was around 7 minutes, plus 15-ish for fooling around until I got it right.

Final verdict: I love, love, love new ways to do my hair. I will definitely come back to this site for more hair inspiration. I just love the way she teaches, too.

Saturday, May 26, 2012

Pin 79

Original pin:
Pinned Image
http://www.lovestitched.com/my-tutorial/knotted-jersey-headband-tutorial/

Knotted headband tutorial, promised no sewing.

I was so, so disappointed when I found this tutorial was not for this exact headband. This picture is from an etsy shop that the blogger used for inspiration for her headbands. I really wanted a wide, stretchy headband. It looks so sweet and comfortable here. The blogger combined this picture with the tutorial I used way back at Pin 24.  Because that tutorial uses hot glue and a ribbon at the back I knew that this wide stretchy headband was not the same project. The blogger uses much thinner strips of knit.

I found two leftover t-shirt sleeves in my scrap bag and played with different cuts to see if I could replicate this with a no sew method. After about 45 minutes, I gave in. I like to sew and I didn't want to give up the wide headband. I grabbed two more leftover sleeves (the first ones were pretty mangled by this point) and cut them into two matching loops.. I cut off the seam making them into two rectangles and then knotted them in the same method originally used. I matched up the ends and stitched them shut. I used a pretty tight stitch and stitched two rows on each band because I knew these would be under a lot of tension.

The final product:
Happy with my wide band and a teased ponytail.

 You could vary the size of the knot by how tightly you pull it. I needed it to be pretty tight. The sleeves I used were from a small t-shirt left over from Super Hero Cape day so I needed all the length I could get!
With some big sunglasses and fancy coloring I felt very Hollywood.
Hair up in the back in a messy bun.
Total cost: $0

Total time: After I gave in to the sewing and started with fresh fabric, about 10 minutes.

Final verdict: I love my stretchy wide headband. I told my husband it was my dirty hair day headband because it will totally hide a greasy hair day! He didn't think that was funny. Hey, we all have hot mess mommy hair days. Throw this on with a big pair of sunglasses and roll around town in style.

Tuesday, April 10, 2012

Pin 50

Original pin:
Pinned Image
http://blogs.babble.com/family-style/2011/08/12/10-easy-hair-bun-alternatives-for-mom-hair/?pid=3211#slideshow

Titled "15 Easy Hair Bun Alternatives for 'Mom Hair'" was a bunch of links to different hair ideas and tutorials. I chose to try the Chestnut Bun.


http://joannagoddard.blogspot.com/2011/06/do-your-own-wedding-hair-chestnut-bun.html


Looks pretty easy, right? I am really in dire need of a haircut so this elegant hair style that hides all the ratty ends is perfect. I chose to attempt it for work last night. It took me a few tries to get the hair pull-through step just right. First I was using one of those hair bands with the extra grips to keep it in tight and it was causing all sorts of snags when I was trying to pull through. I found another band without the grips and that one worked better. I also found that it was easier to pull the whole ponytail through by making the whole and starting by flipping the base of the pony through first rather than sticking my fingers through the hole and trying to grab the pony to pull through from the middle or ends.  Judging by the step-by-step pictures this looks like what the author did too. I didn't get it perfectly straight, but I did like the end result. It was smooth and felt pretty--much prettier than a messy bun or ponytail. It mostly held up for the entire 12 hour shift, I had only one straggler spring loose. The tutorial DID say to carry some extra pins on you to tame any loose hairs through the night. But overall I was pretty happy with it.

My good camera's batteries were dead (thanks to lots of use on Easter) so I had to shoot it with my phone camera so we'll just have to call these "artsy."


It's hard to see the detail, but the flip creates a feminine twist on each side of the bun.

Total cost: $0

Total time: I played with it for about ten minutes and did it completely at least twice. After practice, I could probably do it in less than five minutes.

Final verdict: I loved it! It felt elegant and would be an easy updo for any occasion. This one will definitely be making the rounds.

Thursday, March 8, 2012

Pin 24

Original pin:


Perfect since I have recently re-picked up the art of crochet (after a 23 year hiatus.) This was really very easy and would be easy for any beginner because it only requires the ability to create the long chain. It is two long chains folded and knotted together just so.

In the time it took to watch one episode of DVR'd trash TV I had this beauty ready to go.

I can not find a place in my house to lay things flat for pictures that doesn't make a shadow.


Pinterest headband + Pinterest sock bun curls = Pinhead kind of day. heehee.

Total cost: $2 for some dollar store yarn and ribbon. It didn't use much so it could easily be made with scraps lying around.

Total time: 1 hour, distracted.

Final verdict: Very cute, easy, I like the bow tie closure at the bottom. It feels very feminine. I would totally make this as a gift for you.

Tuesday, February 28, 2012

Pin 15

Original pin:


http://agirlsgottaspa.com/blog/2011/06/review-homemade-deep-conditioning-hair-treatment/

My hair is super dry lately, and very frizzy. I need a haircut in a bad way. Since having my youngest, I have had frizzier hair than ever in my life. In October I tried the Brazilian blow-out, but it didn't work for me. My hair is subjected to all kinds of heat styling and ponytail torture. I decided a nice moisturizing mask would do the trick. This link didn't really go into much detail as to how to actually do it. It was just a list of ingredients and a review of the treatment itself. I have no fear of forging ahead without exact directions so I jumped right in. I did follow the reviewers advice on one thing and used a food processor to blend the ingredients. I used one whole ripe avocado, an equal amount of coconut oil, and whatever amount of olive oil I thought would hold it all together. The coconut oil was still kind of chunky after the food processor, but there were few avocado chunks.

I decided that I should wet my hair first because it just seemed like the right thing to do. The reviewer mentioned having avocado bits all over her house after, so after smearing it in from scalp to tip of the hair I twisted my hair on top of my head and wrapped the whole thing in plastic food wrap. So lovely. The plastic wrap kept the heat in and I figured it helped the mask penetrate. However, as it heated up, the coconut oil melted and the mask began running down my face and neck. I unrolled some cotton and stuck it up under the edge of the plastic, salon-style, to catch the drippings and put a towel around my neck to keep the oil from ruining my shirt. I really looked nice.

After about an hour, I washed it all out and blow dried it. It was amazingly smooth and soft! I don't think I got all the oils out the first time so I rewashed it in the morning. I would recommend a double shampoo in the future. The softness lasted days and the frizziness was drastically improved. One thing I did not expect--my drying time was cut in half! AND I didn't have to flat iron it! So it was like a mini-Brazilian blow-out only much cheaper and with shorter lasting results.

Total cost: $8 because I had to buy coconut oil, but it should last a while.

Total time: Hands on 15 min, soak time 1 hour.

Final verdict: I still need a haircut. I think if my ends were healthier this would have had even better results. I might warm the coconut oil a bit before mixing together to avoid the initial chunks in the mask. I'll do it again--if nothing else to cut down on drying time. Plus, ripe avocados are 3 for $1 right now. Stock up!

Monday, February 20, 2012

Pin 9

Original Pin:
I am always looking for cute hair accessories because I wear my hair up a lot! This looked cute and easy enough. I had to buy the combs but was totally set on the embroidery floss! I sat down in front of some good ol' trash TV and worked through it. My ends are a little bit loose but I could maybe improve that with some practice! My finished product(s):


Combs came in a 2 pack so I made 2!

Wore it to work this weekend. My hair stayed put with some help from a few extra bobby pins (It is just too thick!)
Total cost: $2.19 for hair combs

Total time: 30 minutes for both

Final verdict: Happy with the finished product. I'm going to keep a look out for cheap yet sturdy combs that may tame my volume of hair a little better. My combs are a bit flimsy! But I felt that my comb made my quick up-do a little more polished.