Showing posts with label DIY beauty. Show all posts

Tuesday, May 21, 2013

Pin 206: Whipped Body Butter

Before we get down to business I have a very important announcement for you! For months now, I have been talking about this certification test I am supposed to be preparing to take for work. This extensive studying (cough! cough!) has been keeping me from pinning as much as I would like. Well, my friends, I have booked a date to get this test over with!! Mid-June this nonsense will be over and I can get back to my pinning and blogging more regularly. WooHoo!!

Now on to business. . .

Original pin:

http://www.livingthenourishedlife.com/2012/02/homemade-whipped-coconut-oil-body

Whipped coconut body butter. Coconut oil seems to be the hottest ingredient lately. I see it in everything! I actually have four coconut body butter recipes pinned. I wanted to make some of this because I keep hearing about all the wonderful things it can do for your skin so I closed my eyes and just picked one of the pins. I ended up over at the Living the Nourished Life blog which has a super simple recipe. I had some coconut oil in the pantry but I wanted to give some of this as teacher gifts as well so I sent Mr. Pinspiration out to the market to pick up some more.

When I started this I noticed two different consistencies with my coconut oil. (I am going to stop here for a minute to clarify something--I am NOT a coconut oil expert. The extent of my coconut oil knowledge is as follows: Coconut oil comes from coconuts. When it is solid it can be very hard. Coconut oil has many different uses. The end.) Not sure if this was due to my different brands, one being fresher, or something totally unrelated.
The one on the left was my new jar, the right was the jar I already had.
The old jar was hardened and a little separated (as I expected) but the new one was so velvety soft and coconutty looking I almost wanted to put a spoonful in my mouth! It looked like the inside of some wonderful coconut dessert!
Extreme close up!!! See the difference in the textures?? The left was the new jar and the right I dug out of the older jar after chopping up the hardened part and stirring back with the oily part. 
I started with the more delicious looking fresher jar. I set my stand mixer to work and danced around singing the "Whip It" song because I couldn't resist.

My singing must have sent off some bad vibes because my body butter was looking nothing like I expected.
It was totally liquefied. I figured this had something to do with being here in sunny Fort Worth and in my comfy 78 degree house. (I can't afford to keep it any cooler here in Texas so my body has adjusted to this 78 degrees and I now find it perfectly comfortable. Except for in the winter when my husband insists we keep it more like a chilly 68. Brrrr. I am a Texas girl and the heat doesn't bother me.)

I poured this in a small jar and popped it into the fridge. Next I whipped up some from the older jar with similar results. I even packed ice packs around the bowl to keep it chilled while it whipped. Into a jar and into the fridge it went. Before I whipped the third, and last, batch, I chilled the coconut oil itself, just to see if I could get any different results. The chilled coconut oil initially whipped up like it was going to get that fluffy appearance as in the original pin, but even packed in ice, started to melt quite a bit after two minutes.

Just as an experiment, I re-whipped one of the original jars after it had chilled. Still not airy and fluffy, but it didn't quite liquefy as much.

After much experimentation, I ended up with three jars of similar consistency.  I tried fragrance with one of the batches, but the coconut scent was delicious and I didn't feel the need to overpower it with a different smell so I didn't add it to subsequent batches. Refrigerated, the mixture hardened to a consistency that was like cold real butter--hard but manageable.
A freshly chilled jar
Once allowed to reach room temperature, the body butter is very soft with a consistent texture. I haven't had any separation of ingredients or re-hardening of the oil. It isn't the fluffy, airy texture I expected, but it isn't unpleasant either. It melts really fast in my hand so I have to move quickly transferring it to wherever it is headed. There are tiny bits of coconut oil that I can feel when I smooth it over my skin, but they melt quickly. I compare it to those little beads that are sometimes in face wash that dissolve quickly.
Two of these jars were for gifts, so I stamped up the tops to get them ready for the teachers. 


I wrapped them up in a 16x16 square of fabric with a little note and a quick bow and they were ready to gift! 

Total cost: I can't say, because these were gifts. I used about 1/2 jar of coconut oil for each jar and made three jars. 

Total time: After much experimentation, I would estimate you could make this in 10 minutes. I spent about 1 & 1/2 hours playing around. 

Final verdict: It is very indulgent to use! I love this and will be using it frequently. I hope the teachers liked it as much as I do. The recipe was surprisingly simple and uncomplicated. If your house is cooler than mine, you can probably achieve a less melt-y texture than I did. I have been keeping it in my bathroom and the consistency has stayed the same as it was originally in the butter rewarmed to room temperature. In the summer, it may be more enjoyable to have the butter chilled to apply. This pin was a winner for me, but next time I just may have to try out some of those other recipes. 


Tuesday, April 16, 2013

Pin 198: Pretty Braided Bun

Original pin:

http://www.babble.com/home/25-more-totally-pretty-10-minute-hairstyles/#braided-bun

Last week I was having a surgical procedure on my neck. I needed to get all my hair up and out of the way to make everything go a little bit smoother. I turned to my beauty board for a little inspiration and found this braided bun tucked away amidst these 25 totally pretty hairstyles. I also appreciate that it promises to be complete in 10 minutes.

Here is the offender to be removed. It is just an ol' fatty tumor that has been hanging around for about 5 years, but it keeps growing and it bugs me. Time to see you off old friend.

The directions are simple and easy to follow. I particularly like this step:

I totally would have rocked this look as is about, oh, 23 or so years ago. 

But not today. Finished it up, lickety-split. It was easy and complete on my first attempt. 
 My hair doesn't have quite as much volume, so I needed to dress it up a bit. I pulled a crocheted flower from my yarn stash and pinned it in place to pretty things up a bit. After smoothing out the top and spraying in place I was ready to go.

Total cost: $0

Total time: 10 minutes--as promised!!

Final verdict: A nice, pretty way to get all my hair up. My surgeon was thankful for the effort as well! I will definitely use this again! And I am going to spare you the post-op pictures.

(And a note, as I was editing the photos to prepare for the post, my son walked in and said "Ooooh! Pretty girl. I love that pretty girl."

Since they are all of the back of my head, I replied with, "Do you know who that is?"

Son: "No. Who?"

Me: "That's your mommy!"

Son: "Oh mommy! I love you! Let me give you a hug."

Me: "Thanks darling. Now get your booty back in bed and GO TO SLEEP!!")


Monday, March 4, 2013

Pin 191: Inside-out Ponytail

Original pin:
Pinned Image
http://www.jettingtothewedding.com/blog/diy-wedding-hair-a-modern-bun.html

This is posted on a wedding site as "big day" hair, but seems really simple and easy. I liked the style and am always looking for a ponytail alternative. This seemed totally doable.

On a scale of 1-5 where 1 = I can make a straight part and 5 = I have 7 different hair styling irons and can use them all perfectly with professional results, I would rate myself at a 3. I can pull off a decent do when I try. This one is uncomplicated, although I have been about 50/50 with the Pinterest inspired hair. I figured I had a shot.

I was wrong. I tried it three, maybe four times and here are my results:
 
 Classy, right? Pulling my hair through as described in the tutorial was really a mess. My hair may really be too long for this style as well. By the time I had it pulled through enough to get the ends towards the base of the ponytail, it was so loopy and floppy that it just fell over everywhere. If I didn't pull it through enough then I had a lot of ends to work with trying to pin up and around.

Total cost: $0

Total time: 20 minutes

Final verdict: Couldn't make it happen. My hair is really soft and it took a lot of hairspray to even get the sloppy volume in the picture. I think my hair may be too long, although in the tutorial, it looks like the model has longer hair than mine. I may play around with it more in the future, because I do think it is a chic look, but it did not work out for me that day.

So that was the post I had prepared. . .

As I finished the post and got ready to publish, I glanced back over the tutorial to check the link. I realized that I may have pulled my ponytail through the opposite way than the tutorial. I know where I messed up but I can't really explain it in words.  I was pulling the whole thing through starting with the base of the ponytail to the ends, instead of just pulling the ends through. Now are you really confused???

I hopped up from my computer, and just had to retry it with this new revelation. You'll have to excuse the day-old-slept-on-non-hairsprayed look in these photos.

I tried pulling from the ends instead of from the base and after only two attempts had this:
Much better start. After pinning up the ends and fluffing a little bit I ended up with a very rudimentary version of the original style.

Never mind all the sloppy flyaways--I had fixed the problem! I conquered the style! I can totally clean this up with some fresh hair, and a little practice. At first it felt really loose and that it would just fall out any minute, but after I started pinning up the ends to the base, it started to feel much more secure. I'm digging the look and it is a great alternative to the sock bun--not that I don't sport a sock bun on many a day. I do start to get a little self-conscious about that sock. . .

So the REAL final verdict: I can make this work! And it is much easier to conquer then that sock bun was.

Thursday, October 18, 2012

Pin 145

Original pin:
Pinned Image
http://www.u-createcrafts.com/2011/01/creative-guest-crocheted-headband-with.html

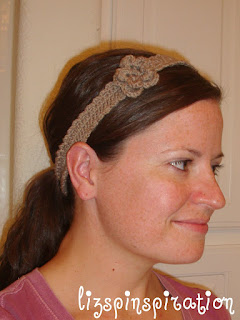
Also known as "The Austin-Fort Worth Headband" as this is what I did during the return trip. I know I said I wasn't pinning during our vacation, but I had to do something and I had limited supplies. I was flipping through my crochet board for inspiration when I realized I had everything (almost--we'll get to that) I needed to do this one.

The tutorial is fairly easy to follow with one exception. There is a mistake at the end of row two. If you scroll all the way down and read through the comments, you can figure out how to complete row two. Just a warning so you don't go crazy trying to figure out that step.

I didn't have a button with me so this is where I had to improvise. Instead of creating a button hole, I just slip stitched around the edge a few times to get to the other side to start the edging. When the band portion was finished, I made a chain a few inches long, threaded it through the hole at the end of each band, and then single-chained back down the foundation chain. I did this on each side to create ties. If you are going to do this without a button, shorten your foundation chain at the beginning of the band because you aren't going to need the overlap accounted for with the button.
The other thing I did a little differently was the edging. The original pattern calls for chain two, skip one stitch and slip stitch into the next. Repeat all the way around for the edging. I wasn't getting as much ruffly-looking edging as I wanted, so I chained three instead of two. Everything else was the same.
Not a great picture of the edging. Look at the top, the bottom edge is sitting crooked here.
All that is left is to wear it. It felt kind of hippie-vibe-ish so I tried to style it hippie-like:
 Not so sure I'm pulling it off. . . let's go to nature. Maybe I'll feel more hippie out there.
Umm. Not so much. I'm not much of a hippie.
This is how I am most comfortable wearing it but I feel like it makes me look a bit childish and less funky-cool like the original author.

What do you think? Can I pull of the relaxed hippie style or should I pass this one on to my niece?

Total cost: $0

Total time: Approximately 3 hours.

Final verdict: This one is going to take some getting used to. But it is so stinking cute on the original girl!

Wednesday, October 10, 2012

Pin 142

Oops! Looks like I can't count lately. I skipped 142!

Original pin:
Pinned Image
http://www.healthylivinghowto.com/1/post/2012/01/detoxification-part-i-healing-waters.html

How to draw a detox bath.

I actually had pinned two different sites for detox bath. Both were the same directions. I guess I think I need a lot of detoxing! Lets explore this. What exactly is a detox bath? From what I can find, it is a bath that draws out toxins from your skin, can help with aches, and can improve sleep and energy patterns.

I love a relaxing bath. My plan was to soak in the bath, candles lit, sipping champagne. Sounds relaxing, right? Then I started reading the directions. Apparently you aren't supposed to take IN toxins (ahem, champagne) while you are detoxing. You are supposed to drink lots and lots of water. Dang. Who would have thought detox would be alcohol-free? Oh. . . never mind. No champagne so I gave up on my candles too.

Instead I gathered my detox supplies.
 And read all the safety warnings. Uh oh. I hope not.
Well, here goes nothing. . .
This was hard. I didn't expect it to be hard. For the first 10 minutes or so it was relaxing. And then it got really, really hot. I was sweating--which is the point. But I still had 30 minutes to go! It was like sitting in a sauna. I drank every drop of my 32 ounces of ice water I had taken in with me.  Due to all the warnings on the website, I had jokingly given my husband a heads-up about this pin. "Ha, ha. If you hear a loud crash you might come check on me. Ha, ha, ha."

When I started whining about the time he came to check on me. At 20 minutes left my husband came in and fanned me with a magazine. This is when I started thanking myself for not drinking alcohol and lighting candles. All that extra heat! No, thank you.

At 10 minutes left he brought me a washcloth with ice cubes to put on my forehead.

At 5 minutes left he gave me minute by minute countdown. It was like he was cheering me on through the finish line of a marathon. And, I DID need help getting out. I was lightheaded after all that heat. Warnings noted.

So did I feel detoxified? I don't really feel any different. I don't know what I was expecting, really, but there were no visible toxins in the water. My skin doesn't look or feel significantly different. I didn't lose any weight. My energy level didn't change noticeably from yesterday. My sleep pattern didn't change.

Total cost: $2

Total time: 40 minutes, to the second.

Final verdict: Unless I notice something dramatic in the next day or so, I won't be wasting my time or energy doing this again. Have you done it? Do you notice anything different?  (And in case you were wondering--no laxative effect. Guess that only works if you DRINK the water you're soaking in. . . )

Tuesday, July 31, 2012

Pin 110

Original pin:
Pinned Image
http://petitelefant.com/how-to-pore-strips/

Homemade pore strips--you know, like those Biore strips? Clever, right?

I'll admit, I don't have horrible skin. But I do have icky pores, for sure. I love pulling out all that gunk with the pore strips. I just love looking at all the gunk pulled out and feeling so refreshed afterward.

And here I am. Braving it all and sharing my personal photos with the world.

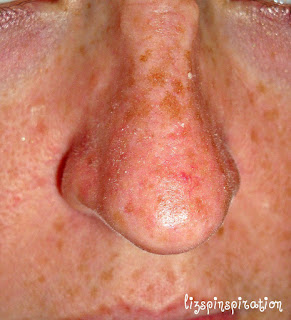
The before pores:


Following her directions, I mixed this up and slapped it on, FAST. She really drives home that you need to put it on fast. I had my mirror all positioned near the microwave and spread it on with the back of the spoon. Until it is fairly dry, this stinks!

Biore strips were only made for the nose and chin. I had always wished there were strips for other parts of the face. As she did, I applied it all over.
A few minutes later it was starting to set.
 Roughly 20 minutes later, I started the work of peeling it off. I started at my chin and worked the way up. Immediately, I noticed that there is something missing from the directions. While the mixture is drying, you should drink a very stiff cocktail.

Peeling this off is so very painful. I consider myself to have a rather high pain tolerance. This hurt. My husband asked more than once if I needed to go to the emergency room. In addition to taking off this first layer of skin, it took off every tiny hair. Ouch! I started to get worried when I noticed this giant stray hair that had embedded itself in the mask!


Very worried about this hair.

And I lost some eyebrow.

A chunk of baby hairs near the hairline.
 I did my best to spare the eyebrows and baby hairs by tearing off the mask and leaving the parts that were adhered to hair.

Saving the eyebrows and hairline.

For all the pain, for all the effort, I had one pore out. Seriously, I checked every little chunk that came off. For all the hairs and eyebrows sacrificed, I had one pore.

See my little pore.
And finally, the after picture:
Before on the left, after on the right.

Total cost: $2.29 for gelatin

Total time: 30 minutes including drying time. (Which you should utilize to prepare for the upcoming pain.)

Final verdict: Beauty may be pain, but this pain did not yield as dramatic results as I had wanted. I will not be doing this one again. The recipe made at least enough to cover two faces. I would recommend sticking to the Biore defined areas (nose and chin.) The cheeks, upper lip, and hairline were, by far, the most painful areas to peel this off of. It did exfoliate well and did remove unwanted (and some wanted) hair.

FYI: You can soak off the remaining pieces with warm water.

Wednesday, July 25, 2012

Pin 107

Original pin:

Pinned Image
http://www.thesmallthingsblog.com/p/hair-style-tutorials.html

Pinned with the description "40 ways to style medium or long length hair."

We've been traveling this past weekend and I needed a hair style that would hold up to travel, heat, wind, and wrangling kids, yet still look classy. I didn't want to go with a plain ponytail so I turned to this pin.

This website is awesome. There are tons of video tutorials and the one I used was simple and easy to follow. It held up all day. The videos are easy to follow and see what she is doing in them. I get bored with my hair daily and am always looking for something new to do with it.


At the end of the afternoon, and after a nap, I had a little stray escape.


Total cost: $0

Total time: 20 minutes. The video I watched was around 7 minutes, plus 15-ish for fooling around until I got it right.

Final verdict: I love, love, love new ways to do my hair. I will definitely come back to this site for more hair inspiration. I just love the way she teaches, too.

Wednesday, July 11, 2012

Top Ten Favorite Pinterest Pins

As I promised yesterday, here are my top 10 pins.  These are MY favorite either because I have used them over and over again, or because they were just awesome to begin with.

10. Pin 80: Knitted swiffer cover. I have already received requests for these for Christmas gifts. Better get started now!
9.  Pin 49: Mommy dress.  I wear this all the time and always get compliments on the color combo. I did go back and fix the sleeves, just in case you were wondering.

8.  Pin 31: Frozen yogurt dots. We can't walk by the yogurt at the grocery store without my kids asking to make these.
7. Pin 71: Lemon slices and daisies. I am still amazed at how long these flowers stayed beautiful and fresh. Weeks.
6.  Pin 53: Homemade pita bread. Simple and delicious. So many ways to stuff the leftovers never last long. But best right as they are coming out of the oven hot.
5.  Pin 35: Honey Almond Sugar Scrub. I love this as a facial scrub and use it nearly every day. I have used this basic formula to create other varieties by using flavored teas and different extracts.


4.  Pin 23: Sock bun. A pinterest legacy. I don't get super awesome curls but I think it is a fun way to wear my hair up and out of the way. A change from the boring ponytail, a comfortable way to sleep, and a great way to hide hot-mess-mommy hair. I still think its weird when people know I'm wearing a sock on my head though.
3. Pin 12: Glow bath. My kids ask for this all the time. I use it as a reward for good behavior or as a trick to get them into a bath when I am just too exhausted to fight.
2.  Pin 5: Make your own foaming soap. Genius. I will never buy foaming soap for my children ever again. You can create this for pennies.
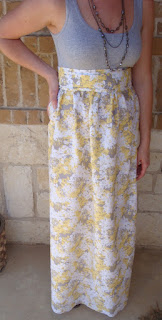
1. Pin 37 & Pin 90: Technically two projects but they came from the same pin so I am considering them one. The tank maxi and short dresses. I always get compliments on these when I wear them out.


My top five posts based on YOU! Ranked by popularity & views:

5. Pin 69: Microwave corn to remove silks & husks lickety-split


4.  Pin 89: Cafe Rio Chicken: Made in the slow cooker with so many uses.

3.  Pin 92: Classic Baby Blanket Crochet Tutorial. Almost done with number 2.


2.  Pin 90: Short tank dress
1. Pin 91: Jillian Michaels Detox Drink. Aren't we all looking for a quick way to lose weight?