http://sewingin-nomansland.blogspot.com/2010/07/sunshine-daisies-bottom-mellow-mommy.html
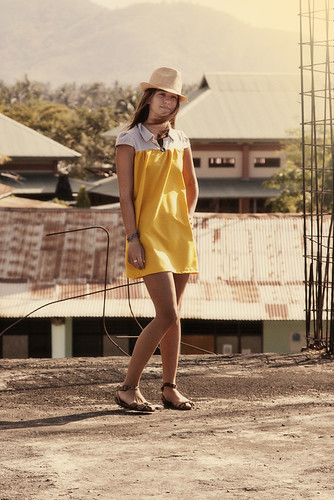
I thought this dress was so cute! And it looks pretty simple so I thought I could whip it together quickly just in time for Easter Sunday. Yesterday, Saturday, I spent all day running around from T-Ball to the community church egg hunt and then getting ready for Easter with the family. I was exhausted by 7 pm. Time to put the boys to bed and get this puppy started.
I printed out all the pieces and had glanced over the instructions. One of the first things that jumped out to me was that it is not noted what the seam allowances are and I couldn't tell if the pattern pieces accounted for them. The back bodice piece looked small so I increased it by about two inches across (thankfully!) This model must be very, very petite.
The instructions were written as if the author were sitting in the room with you and pointing to pieces while she talked. Rather than naming the pieces like, "sew the collar piece to the bodice piece" it was worded, "topstitch what you just sewed." That took me a minute to figure out that it meant to put the collar on the bodice. I spent a lot of time staring at her pictures to figure out what exactly she meant. Also, it felt like there was maybe a step or fabric piece missing in relation to the main skirt (yellow part) because the pattern only called for one cut and the instructions never called for sewing a seam on the skirt. Luckily, I read through the directions first and noticed this so I went ahead and folded the fabric so that I could have one back seam and two arm holes (important, right?) A commenter to her post asked this same question but then minutes later commented again that she had figured it out. No further explanation so I'm not sure if I just missed it, although I read it over and over, or if maybe she and the author had an email exchange.
The only major snag I had was that I put the sleeves on upside down. I knew it was wrong when I did it but it was late and I needed this dress for the morning. I improvised and tucked the excess fabric in to make the sleeves more like flutter sleeves than cap sleeves. They weren't awesome but they looked good enough to wear.
The yellow skirt is what initially drew me to this picture so I stuck with yellow for mine too. Feels real Easter-y.
It is way shorter than anything I usually wear, but I don't think it looked inappropriate. I used every inch of the 3/4 yard of yellow fabric the pattern called for. If you are any bigger than me I would recommend getting maybe a full yard or more depending on how full you would like it. My collar could use a little fine tuning and I just may rip the sleeves off and flip them around before I wear it again, but overall I thought it was pretty cute.
Guess yellow and turquoise were the colors of the day. This was totally unplanned and you can't see Suzie's turquoise necklace in this picture, but I assure you it was there.
.JPG) |
| My collar got a little wonky after a few glasses of wine! |
Total time: 3 hours
Final verdict: This will be a fun summer dress. I felt cute in it even though my legs have yet to see the sun this year. To follow this pattern and instructions you must have some experience with sewing because some of the things it requires are intuitive sewing steps. It is also a pretty small pattern so you may need to size it up or down. It is a little shorter than I would like so I my add some trim or additional fabric to the bottom.

.JPG)
No comments:
Post a Comment