Tuesday, August 28, 2012

Pin 126


http://colbyalmond.com/12-creative-ideas-the-will-change-your-life/

Because I'm always looking for new ways to change my life. . .

This post is specifically related to number 8--soda straws. I didn't plan this pin, it was just one of those things that happens. I had just popped open my Diet Coke and remembered this trick. I'll let the video speak for itself.


So, I guess my memory isn't too great because maybe you noticed that the tab needs to be more like a 90 degree turn instead of the complete 180 I gave it. The pin failed, but it seems that it was user error. Guess I'll have to try this one again on another day.

Total cost: $0, I was "borrowing" the soda from my parents fridge.

Total time: 30 seconds

Final verdict: Needs a do-over. User error due to lack of following directions. oops.

Sunday, August 26, 2012

Pin 125

Original pin:
Pinned Image
Original source unavailable.

The pinner said "Flatten a slice of wheat bread, cover it in peanut butter and roll it around a banana. Slice like sushi and drizzle with honey!" I thought this would be perfect for the kiddos.

I am always searching for lunch to serve the boys other than pb & j's or spaghetti o's. This was a cute idea and actually came in very handy when I had only a few slices of bread left and a couple of bananas that only had one or two good days left in them.

I skipped the honey drizzle, but I did put a tiny dab of marshmallow cream in the roll with the peanut butter. 

Either my bread was small or my bananas were large, but I had trouble getting the bread to wrap all the way around the banana. See in the picture above where the bread tore a little as I tried to stretch it around the banana? Also, it needs to be cut very delicately. I would suggest a serrated knife because the smooth one started to squish the banana out!


This one got a little mangled in the process.
Total cost: $0. It made the last few slices of bread stretch a little farther.

Total time: 5 minutes

Final verdict: These were delicious! The eating boy ate two whole rolls (equivalent of two slices of bread and one banana) and the non eating boy almost finished one roll. I had to deny the request for more because we were out of bread! We called it banana sushi and L thought it was "Yum, yum, yummy!" If you've been reading along, you may remember we have been helping L cope with effects of his asthma medication by making sure he has appropriately timed and filling, nutritious snacks. This one is a winner and will be a good one to put in our rotation. Easy enough to pack for school as well!  If you banana is too ripe to hold its shape, it would still be yummy to smash it up and layer it on top. It might help it all fit together too. Might have to try that one next time.

Friday, August 24, 2012

Pin 123 & 124

Original pin:

Pinned Image
This particular photo is from http://probablyactually.wordpress.com/ but it links to the original tutorial found here: http://blog.craftzine.com/archive/2009/05/craft_pattern_podcast_snuggler.html

The little girl I've been sewing for lately needed a swaddle wrap to add to her collection. As a neonatal nurse for over 10 years I have performed the swaddle literally hundreds of thousands of times. I have very specific requirements and techniques for it. I looked at this tutorial and a couple of other pictures of different styles of wraps and then just made my own pattern. I took out the Velcro. Instead, I made the right wrap to encircle the baby completely. Sadly, I had no model available so I had to steal Mr. Kitty late at night out of one of the boys rooms. He seemed to be about the size of a newborn, just fluffier.

I added some extra lightweight interfacing to the swaddle straps to help them keep their shape. I also made the entire thing out of cotton. It is August in Texas. No infant should be dressed in flannel or fleece this time of the year.  Safe Sleep recommendations warn against overheating so I felt cotton was a good choice. Cotton outer shell, cotton lining, extra lightweight interfacing, and matching thread were my supplies.

I played around with it a little and it was very simple to piece together. Finished it up and tried it on Mr. Kitty.

The top strap started at the right, went over both arms and around the back. Mr. Kitty is pretty squishable so his top strap went pretty far.


Thanks for sharing Mr. Kitty with me, L.
 Total cost: Not gonna say--it was a gift. I used about 3/4 yd each of lining and outside. I didn't even think to take a picture of it open so I could show you the pretty lining and how I changed the straps.

Total time: 2 1/2 hours but that includes the figuring out how to make this time. When I sew without a pattern I usually have to sit down and visualize it for a few minutes first.

Final verdict: It fit Mr. Kitty pretty well. I didn't get to try it on baby because when I went by she was out of the room for tests. I was a little worried it wasn't going to be long enough for her. Next time I will make the foot portion narrower and longer. This time it was more of an oval shape from shoulders to feet.


Original pin:
Pinned Image
Original source unavailable.

Wrap baby gift in a blanket instead of paper.

So I made her a receiving blanket and wrapped up her pink stuff inside.

Total cost: no comment--gift

Total time: I can make a receiving blanket in 20-30 minutes or so.

Final verdict: Pretty presentation. Got that baby girl some pink now!

Pin 122

Original pin:
Pinned Image

http://www.u-createcrafts.com/search/label/teacher%20gifts

Back to school time! We've been busy getting ready to send our oldest off to Kindergarten. I took a break from sobbing to put together this little gift for his teacher.


I was going to get some more expensive lotion but when I saw this I thought it was more appropriate. What Kindergarten teacher doesn't need something that is positive, nourishing, and, above all, energizing??

I took it that additional step and added in the hand sanitizer too. Must be the nurse coming out in me.


I updated the card. Wrote my stuff inside and let L write a message to his teacher also. Clipped it on to the ribbon with a clothes pin and headed out to meet the teacher night.

Total cost: $5

Total time: 15 minutes. I am a slow stamper.

Final verdict: I've never given a back to school gift to the teacher but I thought this might get US off to a good start seeing that I'm a little torn up about this whole Kindergarten thing lately. It was cute without being pricey.

Tuesday, August 21, 2012

Pin 121

Original pin:
Pinned Image
http://smashedpeasandcarrots.blogspot.com/2011/01/how-to-sew-bias-tape-tutorial.html

A tutorial on how to sew bias tape on correctly. I never knew I was doing it wrong? hmm.

Clearly I was because mine never looked this good.

One of the easies baby gifts I like to make is to sew pretty ribbons onto plain white birdseye diaper cloths. Yes, babies are just going to puke on them anyway, but mama's got to have something cute to toss over her shoulder while getting puked on in public at least. I like the ones with the seams down the middle because then I don't have to pin it and I get perfectly straight lines. If you've been with me a while, you know I am a short-cut kind of gal. I really just prefer to pin to Pinterest.

So, I take these ribbon scraps and sew them down each side along the middle seams and then trim the bottom and top edges with bias tape. My friend has a new little girl in need of some pink so I spent last night whipping a few pink things up for her. I already had this partially ready. I had leftover ribbon and trim from another project that I had tacked on to the cloth a while back when I still had the right thread in the machine. I didn't have any bias tape so it sat unfinished in the project closet for quite a while.

Magically, while looking for my zipper foot last week I came across some pink bias tape. Pulled this out last night and decided it was time for me to grow up and learn how to use bias tape correctly. The tutorial was easy to follow and I was thankfully just sewing two straight lines.

Lookee here! All pinned up.
 It was the most beautiful bias tape I have ever sewn. End of story.


Total cost: $0. Pulled together 100% from leftover pieces.

Total time: That pinning is work, you know. 20 minutes.

Final verdict: It really looked much better. I just never knew I was doing it wrong! I feel so smart now.

Monday, August 20, 2012

Pin 120

Original pin:
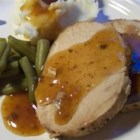
Amazing Pork Tenderloin in the Slow Cooker Recipe
http://allrecipes.com/recipe/amazing-pork-tenderloin-in-the-slow-cooker/

Pork loin in the slow cooker.

The eating child requested pulled pork last week. I don't like barbecue sauce (yes, I know--its a crime to dislike barbecue sauce and live in Fort Worth. It's not the barbecue method I dislike, it is the sauce itself.) so I need the meat to have a good flavor alone, but that won't clash with barbecue sauce on top.

This one was very easy to prepare and only had to cook for a few hours. I was a little wary of the short cooking time but all the commenters assured me the cooking time would work.

And it did. The meat was juicy, tender, good flavor. I sliced half and shredded half to make the boy some pulled pork sandwiches. Everyone loved it. Hubby took the rest to share at work the next day and apparently it was gone by noon.


Total cost: $14 for a 2.5 lb pork loin and a ranch packet.

Total time: Prep 10 minutes, cook 4 hours

Final verdict: Eating boy cried when he found out daddy was taking the leftovers to work so we had to save him some for lunch too. Non-eating boy actually ate some (!) and the rest magically disappeared when the rumor of pork was circulating around the office. This recipe was so easy and fast. I am totally guilty of planning on cooking in the slow cooker but forgetting to start it until lunch time so this one worked out perfect. And I love that it uses red wine because I am always looking for a good excuse to pop one open.

Tuesday, August 14, 2012

Pin 119

Original pin:
Pinned Image
http://www.thethriftyhome.com/2009/05/power-of-vinegar.html

"Soak paper towels in vinegar and wrap around faucets. Wait an hour and wipe off. Cleaning power of vinegar!" says the previous pinner.

We've got some hard water out here in funky town. I have tried all sorts of products to remove it and some work a little more than others. Nothing has removed them completely.  I was in a major kitchen cleaning funk this morning--seriously, I was climbing up on things to dust the tops of cabinets, the refrigerator top was disinfected, I even cleaned the vents on the front of the oven with alcohol and q-tips. I thought this would be easy enough to set and let it work while I obsessed over other things.

The kitchen faucet before:

I wrapped it with soaked paper towels and then just dumped more vinegar on top for good measure.

One hour later:
Still some small spots left.
So I rewrapped it with the same paper towels, dumped a little more on and then let it continue to soak.

Three hours later:


This is probably as good as it will ever get. It is the best I have been able to get with any cleaning product so far. In the middle picture you can see some leftover rings, but you can only see them well up close. I was pretty happy with the results. Maybe if I had grabbed some of those q-tips and started scrubbing I could get those pesky rings off.

Total cost: $0, I keep that vinegar around here in bulk.

Total time: 5 minutes hands-on, total soak four hours.

Final verdict: Easy enough and did a good job. I will do this again when the water stains have built back up. Oh, vinegar. Is there nothing you can't do?

Monday, August 13, 2012

Pin 118

Original pin:
Pinned Image
http://picky-palate.com/2010/05/13/fluffernutter-cookies-3-ingredients/

Fluffer. Nutter. Cookies.

I bought the marshmallow creme for these weeks ago but hadn't gotten around to making them. Yesterday we were getting ready to leave the house to head to the neighbors for dinner and swimming when I decided to whip these babies up. They are seriously the easiest things to make. In less than 20 minutes they were mixed, baked, and on a plate headed down the street.

I love peanut butter with all my heart and soul. These were fantastic. I haven't stopped talking about them all day today. It wasn't just me who loved them, though. The kids loved them, the grown-ups loved them, even the man who doesn't like marshmallows loved them. They are truly that awesome. And it can't get any easier than three ingredients and one bowl. These are the new go-to for a quick treat.

I forgot to use a scooper and just plopped them down with a spoon. Didn't hurt the taste one bit.

Close up of the ooey gooey marshmallow swirlies!
Total cost: I had to buy marshmallow creme-$3

Total time: 15 minutes total.

Final verdict: We ate the entire batch in about 10 minutes after dinner. I have been thinking about them all day and can't wait to make them again. You have to try these! 14 thumbs up from last nights swimming crew! You're going to need some milk to wash these down.

Friday, August 10, 2012

Pin 117

Original pin:
Pinned Image
http://www.weightwatchers.com/food/rcp/RecipePage.aspx?recipeid=71911&sc=11

A pinner before listed the ingredients as cool whip, fat free milk, and an oreo. The actual link uses frozen yogurt, milk, mint, and chocolate sandwich cookie.

I didn't have any oreos in the pantry today and was craving something sweet. I am also going to use this as an excuse to have some calcium in my diet. I present to you my rendition of this recipe, clocking in at under 200 calories per serving:

1/2 cup fat free cool whip
1/2 c milk
1/2 package of 100 calorie Right Bites Chips Deluxe

Tossed it all in the blender cup of my favorite immersion blender and whipped it together. Garnished with a few broken cookies. This was soooo good. Like milk and cookies. (Well, it is milk and cookies.) Yum, yum. I also drank it all by myself without the kids seeing because I was not planning on sharing.


Total cost: $0, everything already on hand.

Total time: 2 minutes

Final verdict: I will definitely be making this again. A woman has GOT to monitor her calcium intake and I clearly need more calcium--especially the kind that comes paired with chocolate. And I don't feel totally guilty about having a mid-afternoon milk shake. You could easily make this with whatever your favorite cookie is, or whatever you have in the pantry. There are so many varieties of the 100-calorie packs, it seems like your options here are endless.

Thursday, August 9, 2012

Pin 116

The Forgotten Files--installment one

Every so often I will do a pin and then totally space out and forget to photo it or blog about it altogether. Summer has been busy and I've been working on a very labor intensive pin to show you in September (hopefully). I'm going to play a little catch up and fill you in on pins done that don't have photos to go with them.

Original pin:
Pinned Image
http://caithatescake.com/?p=561

More corn! I love corn. Especially this delicious summer corn on the cob we have right now at the farmers market for pennies. Delish.

One of my most popular posts, Pin 69, microwaved corn, was so good I had to compare the results to this--oven corn. Basically the same concept only made in the oven.

Back in July the boys had swimming lessons at night, every night, for two weeks which really made dinner time hard. Having dinner before lessons was too early, but if I waited to cook until we got home, it was too late and the kids were a starving mess. I didn't want fast food or cereal every night so I had to get familiar with the automatic start/stop function on my oven (in addition to a few crock pot nights.) 

One night I lined up a few ears of corn next to my casserole, programmed the oven, and headed out the door. Just as I was nervous with the corn in the microwave the first time, here I was again. Nervous about setting the corn husk on fire only this time no one was home! Am I insane? I at least timed it so that we would come home 5 or 10 minutes before it was done. I guess I thought maybe that way I could fight the fire myself?? I don't know.

Anyway, the corn did NOT catch on fire. I left it in for 30 minutes. It was cooked, hot, and delicious but it was not the miracle that the microwave does to it. Maybe if I had cooked it hotter, or longer? Not sure. It was done, but the silks were not off the way they are from the micro. Nice try, but it is back to the microwave for me. I have continued over and over to cook in the microwave and it works every single time. Love it.

Here is what we did while the corn cooked.
Total cost: $1 for a family's portion of corn.

Total time: 30 minutes in the oven while the boys splashed across town.

Final verdict: Nice try, but I'm sticking to my microwave.


Wednesday, August 8, 2012

Pin 115

Original pin:
Pinned Image
No source available.

A sweet, gooey concoction of popcorn, marshmallow, brown sugar, and butter. How could this go wrong?

After receiving a rave recommendation from a Pinterest friend, I decided to whip this up for a snack this afternoon. My boys love popcorn and marshmallows. We've never mixed them together, but I figured they would love this.

It was easy to prepare and I had all the ingredients available without going on a store run.


The eldest was interested, my baby wanted nothing to do with the stuff. Serious crying, thrashing, fist pounding refusal.

This was sweet, very, very sweet. Neither myself or L wanted more than 1 cup of it. It was good, but sickeningly sweet, which is probably good since there is an entire stick of butter in this! The boys were also very concerned with the stickiness so I had to give them each a wet washcloth next to their cup of popcorn. W wouldn't even try it when I offered to feed it to him. He has such a sweet tooth I thought he might change his mind if he got a taste.

Total cost: $0, everything already available

Total time: 5 minutes including popcorn popping time

Final verdict: Great if you are looking for something sweet, but too sweet for us. Would make some yummy popcorn balls or good party food. We probably won't make this again, but it wasn't bad. There is still 3/4 of the bowl waiting to be eaten that will probably end up trashed later.

Monday, August 6, 2012

Pin 114

Original pin:
http://ashbyfamilyblog.blogspot.com/2010/08/ms-long-legs-pattern-tutorial.html#axzz1n1zpAvTl

Cute little tutorial for owls. I recently got my Pottery Barn Kids catalog in the mail and these reminded me of this tutorial I had pinned a while back.

Penny & Joy Owl Plush

Lucky me! I just so happen to know a soon-to-be born wee one who needs a little stuffed owl to decorate the nursery up. Inspired by these two, I decided to whip up a fat little owl of my own.

I didn't use a pattern, just looked at these cute little guys and created my own interpretation drawing from each. If you are looking for a pattern, the top link has a pdf you can download. I didn't have access to a printer (read as: I didn't feel like lugging my laptop across the house to plug it into the printer. Lazy much?) so I just created it as I went. (Dangerous--yet fun. I like to live on the edge.)

Once I had the eyes appliqued on I packed up the pieces and headed out to girls craft night to finish this owl off with a glass of wine and some mint milanos.


My little guy turned out boxier than PBK's and Toad's Treasures, but I sure thought he was cute. He made a great little pillow too! My son was really sad to see him whisked away and is hoping I will make him something to snuggle with next.

Total cost: Ahem. I don't usually comment on costs of gifts. Cheaper than PBK.

Total time: 2 hours

Final verdict: I love him. I hope little PJ loves him too. He will make a perfect little kid sized pillow too. I think he likes his new place. Owlie sent me this photo of him and P at the new house:


Sunday, August 5, 2012

Pin 113

Original pin:
Pinned Image
http://www.skiptomylou.org/2011/02/15/10-beautiful-ways-to-crochet-a-flower/

10 ways to crochet flowers.

If you've been following me for a while, you know that I only recently took up the hobby of crochet. I haven't yet made any flowers, though I've seen them all over Pinterest.

I finally had an occasion to make some flowers so I went to this tutorial to learn how. I chose three different ones to learn, but what I've found is that they all use pretty much the same basic technique. I learned these during nap time one afternoon. They were so easy, and impressive. I just had to whip up one of my yarn letters from Pin 43 to stick them on.


This is for soon-to-arrive sweet Baby PJ. One of my dearest friends is having her first baby in just weeks, and although no one really knows the gender yet, I wanted to make sure she had a little pink on hand, just in case. They are just safety pinned on. I am going to have to learn how to crochet a boy-ish accent in the next few weeks if I need to replace the pink with blue! I'm thinking stars? Yellow and blue stars?

Total cost: I only had to buy supplies to make the P. The flowers use so little yarn, I was able to use leftover pink & yellow I had in my stash.

Total time: I learned three different styles and completed them in less than 3 hours.

Final verdict: As one blogger warned, flowers are addictive. I am ready to just stick them on everything. Watch out little PJ! I may turn you into a little flower girl when your mommy isn't watching!

Thursday, August 2, 2012

Pin 112

Original pin:
Pinned Image
http://katescreativespace.com/2012/07/05/keepers-of-the-flame/

Does your home have Olympic fever like ours does?

We have gymnasts, divers, and swimmers running all over this place lately!

Yesterday he was practicing platform diving on the couch. 
And I, as any good parent of an Olympian, was taking pictures.

The boys are so, so, so into the Olympics. I saw this craft on Pinterest and just knew we could do it. Yesterday we ran to our favorite dollar store and picked up a few white tees. We have tons of those red plastic lids floating around.

Apparently the lid we used had an extra rim on top of the rim so we ended up with a little bit of a different effect, but still pretty cool, I think.


They had fun making them. W was a little upset that I didn't hand over the paintbrush and PERMANENT paint at the end, but he got over it.

We sported them around town today. I was a little jealous I didn't have one for myself.

Total cost: $2 for 2 shirts at the dollar store.

Total time: 10 minutes to paint.

Final verdict: I convinced big brother that if he didn't sleep in it tonight, I would wash it and he could wear it tomorrow. He's got a pretty hot playdate in the morning that he wants to wear it to so he obliged. Can't look quite as cool with day-old chocolate ice cream stains down your shirt. It is so fun for me that they are so into the Olympics this year! And I get mommy points for creating afternoon craft time!

Wednesday, August 1, 2012

Pin 111

Original pin:
Pinned Image
http://bamkapowxo.tumblr.com/post/13597111267/crafts-activities-future-family-octopus

I was throwing together lunch for the boys today when I realized I had two hot dogs and only one bun. Little man will ask for a bun, and big brother will want one when he finds out there is only one. I had to do something to distract them from the lack of bun. Octopus hot dogs it is.

I sliced each hot dog in half. For the legs I just cut through, lengthwise, the bottom half of each half, turning 1/3 each time. (Three cuts total.) Yeah, I only had six legs, but no one counted.

I didn't like my toothpick created eyes, so I used some of those long skinny chocolate sprinkles. Ketchup for a mouth, drawn on with a toothpick. Some of the mouths were more blob than smile. Great for the boys because then they had "an angry octopus" and "the happy one." They loved this. It was easy and fun.

The angry one and the happy one


Time for battle of the octopi!!
Total cost: $0 for two leftover turkey dogs

Total time: 2 minutes

Final verdict: They absolutely LOVED it. No one even noticed they didn't have a bun. And sprinkles for lunch!! (Yes, two measly sprinkles, but that counts!)  Don't do this if you don't want your kids to play with their food.