Sunday, December 30, 2012

Pin 170

Original pin:
Use another pair of pants to trace your pattern.
http://www.theribbonretreat.com/blog/pajama-pants-tutorial.html

The pin description called this tutorial "one-seam pajama pants" but that was a little misleading. The "one seam" referred to the fact that there is only an inner seam on the leg--not an inner and an outer seam.

As I mentioned on the Facebook page yesterday, the next few posts are going to be projects that have just been hanging around being unfinished. I think we all have THAT project that for one reason or another, just doesn't get done. My big end-of-the-year-beginning-of-the-year blowout is going to be wrapping up a few of these.

Over the SUMMER (!) L-man picked out this fabric he wanted for jammies. It was flannel (hot), I thought I had a pattern for jammies but couldn't find it, I found it but it wasn't his size, . . . lots of excuses. He could see the fabric sitting at eye-level on my craft shelf and kept asking when I was going to make his pajamas. Sheesh.
When I stumbled across this pin not too long ago I decided this would be the way to go with finishing these up.

As true to form, I modified it a teensy-weensy bit. First, I didn't want a different cuff. In making my pattern, I extended the sides and bottom by 1 inch and the waistband by 2 inches (my elastic was 1 1/4 in).  I was using a pair of pants to measure that was almost too small and I wanted roomy, comfy jammies.  When it came time to hem the pants, I finished off the edges on the serger and then folded up a one inch hem. I stitched the serged edge in place and topstitched around the bottom.
Really not much in modifications. It was a good tutorial. It assumes you do know a little about sewing but it has good pictures and is easy enough to follow. It was a great idea. I was a little worried (after I cut of course) about the waistband being wide enough to stretch comfortably.


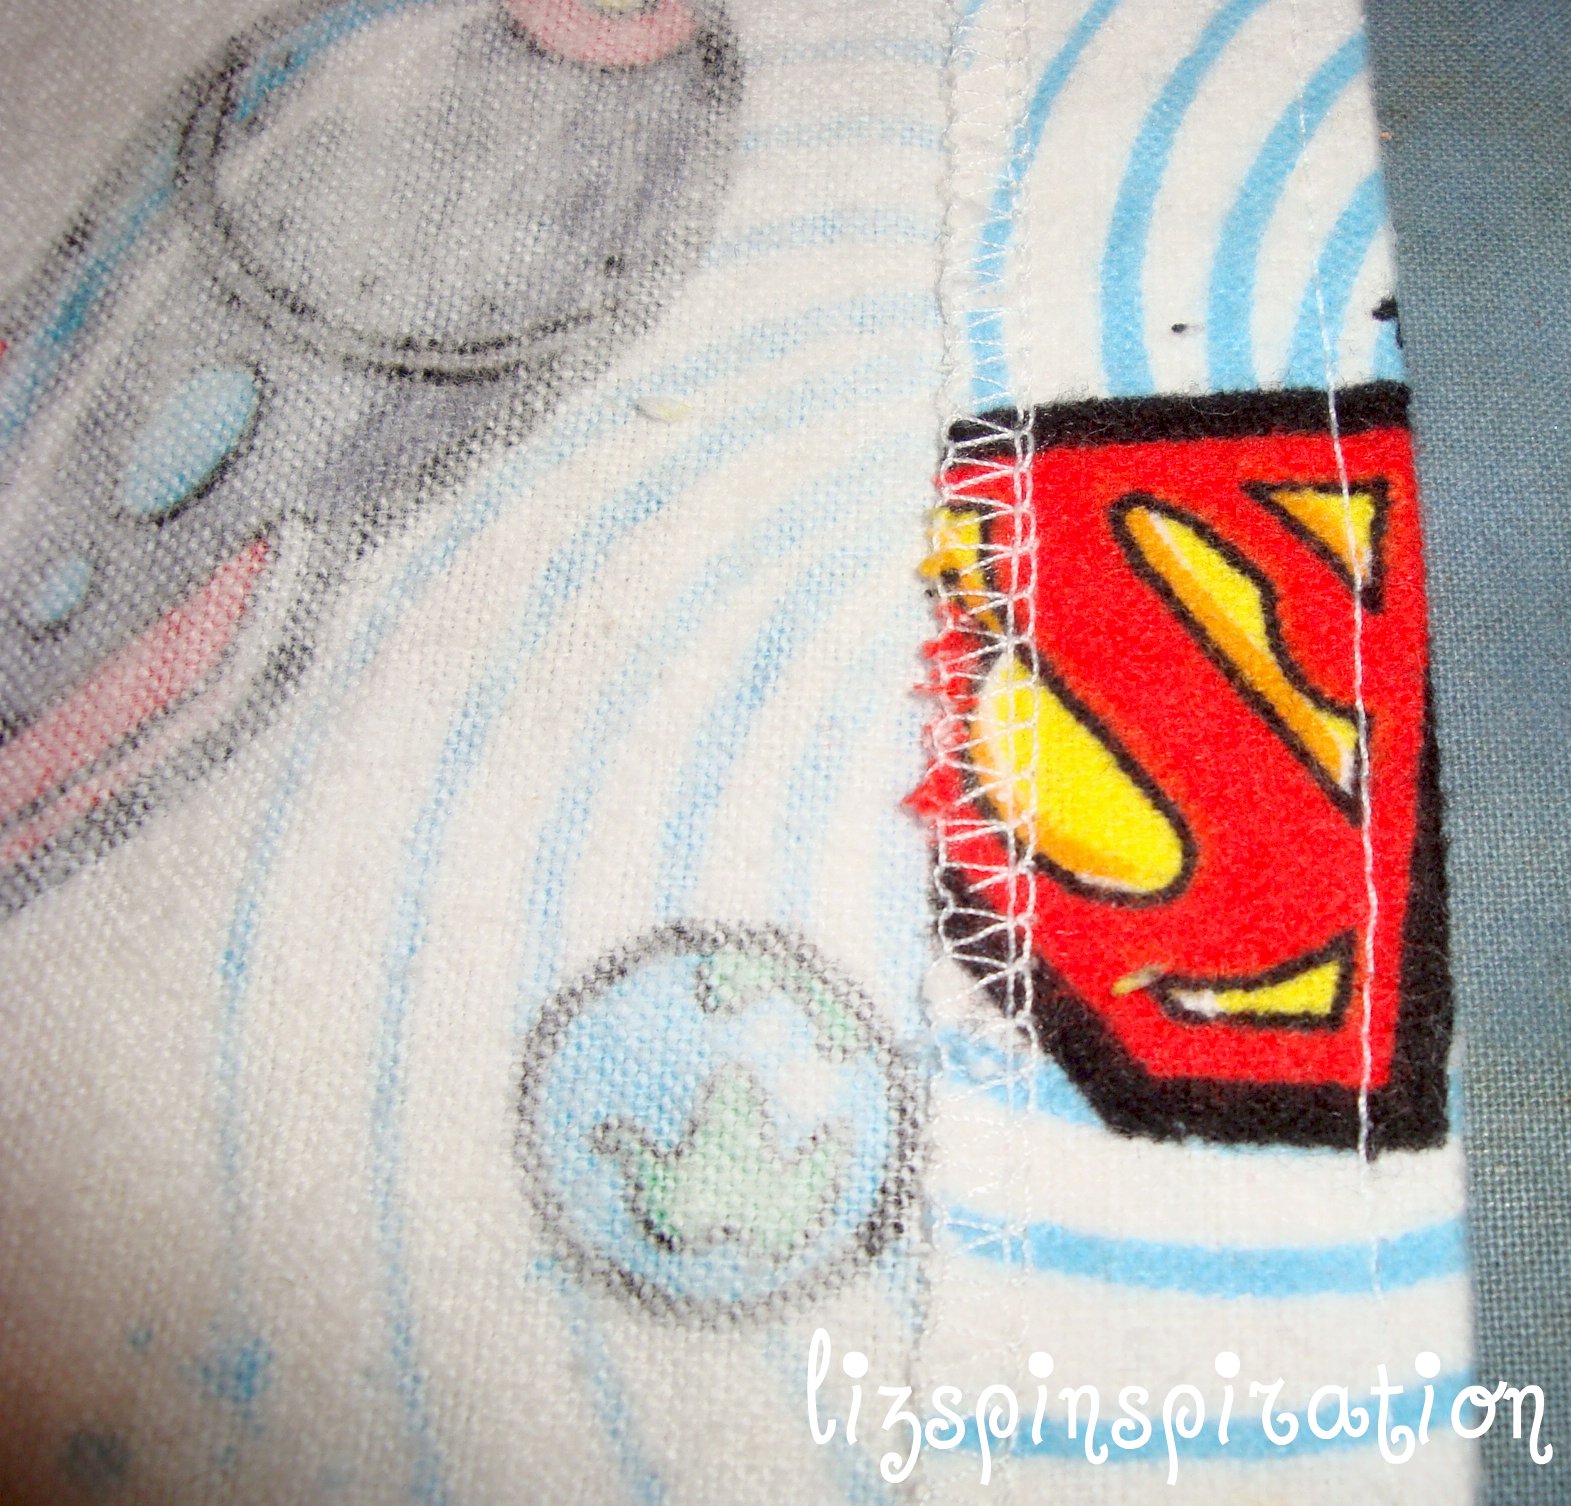
I wanted to make a top to go with it. L likes his jammies to be a matched set. I grabbed a dollar store t-shirt from my stash. (I grab them whenever I see a size that we use. Can't beat $1 and someone is always needing a t-shirt. I also cut them up and use them for miscellaneous projects. Cheap knit jersey fabric.)  I cut a few spaceships and a Superman logo from the scraps and appliqued them onto the t-shirt using trusty ol' Pin 70.
And it was all ready to go!

This morning when I showed them to him he was so excited! Like Christmas all over again.

Look at this (crazy) happy face:
And they fit PERFECTLY!!
Total cost: I don't remember what I paid for the fabric so many months ago. I am guessing probably around $3. I used one yard and had a little scrap. I probably could have squeezed them out of 3/4 yard but maybe not had an embellished t-shirt to go with it. Add in a dollar store t-shirt for $1 and the entire set is $4. You can't buy jammies for $4!!

Total time: 1 hour for the pants. 30 minutes for the top. Easy peesy lemon squeezy.


Final verdict: I hope the crazy grin on his face tells you! He loved them. I was surprised at how easy they came together. I will totally do this again. How easy would this be to make as a gift (if you had the right size of pants to measure. . . )
Aren't you supposed to have bed head AFTER bed?? Just sayin'.
Love this boy!

Friday, December 28, 2012

Pin 169

Original pin:
Pinned Image
http://amazingmae.blogspot.com/2009/06/road-trip-pillow-cases.html

Road trip pillow. What a cute idea! I love this idea to have a pocket on the pillow case for carrying around all your things. Especially helpful for road trips and slumber parties, but fun around the house as well!

The original AmazingMae has a tutorial to create the entire thing from fabric, but I stumbled across some white plain pillowcases at the dollar store and decided to take a little shortcut. I thought about how I could attach the handle and came up with three solutions:

1. Rip out a bit of the seam on each end, insert ribbon, stitch closed.

2. Finish edges of ribbon and just sew in place.

But since I had some pretty plain pillowcases to start with, I decided to jazz them up a bit and go with option number three:

3. Full length ribbon on each side.

I didn't take any pictures as I went, so these directions may not make any sense at all--but I'll try. Maybe if you read the instructions and look at the finished pictures together you can make sense of it.

I cut two lengths of ribbon that were twice the width of the pillow case with a little extra for the handle. I layed the case out as a long, flat, rectangle and, starting at the bottom of the pillow case, pinned the ribbon up one side. (Only pin through one side.) I left a length for the handle and then pinned the ribbon down the other end of the pillow case. In essence, the ribbon was making a giant upside down "U". I sewed the ribbon in place. Then I flipped the case over and did the same thing with the second length of ribbon.

For the pocket I used 1/4 yd fabric. I folded it right sides together lengthwise and pressed. I trimmed the edges to make a neat rectangle. I sewed the three open sides shut and left an inch or so to turn. I turned right side out and pressed. Then I topstitched along the top edge of the pocket. I appliqued the initial in place using the same process as in Pin 70. I pinned the pocket in the center of the case and sewed the sides and bottom in place.

I had picked up a two-pack of new pillows at an after-Thanksgiving sale for $10. I put the pillows in and stuck a little stuffed lovey in the pocket and they were ready to gift!


Total time: 1 and 1/2 hours each

Total cost: Including the inside pillow and the lovey they were around $15 each. Dollar store pillow case, less than $1 worth of fabric pocket and a spool of ribbon.

Final verdict: My boys wanted their own when they saw them. The girls loved them and they were great to have on Christmas Eve once the kids went off to watch the Polar Express.

Wednesday, December 26, 2012

Pin 168

Original pin:
Image courtesy of Tana Photography
http://www.zankyou.us/p/how-to-elope-in-high-style

Nope, not me!! I have a friend who requested an elopement sign for her recent nuptials. She sent me this image she had pinned--so, technically, it is not my pin. . . . . . .  I was happy to oblige. She granted me creative license to interpret this as I wanted.

I started with a blank canvas. Hobby Lobby had them on sale a few weeks ago and I had picked up a 2-pack. I painted a light base color and then taped off what I wanted to be the inside of the frame.
This is totally official. I even pulled out the level for super straight lines.

I painted in the inner frame and removed the tape.
Next I painted some pretty edges to finish out the frame shape. Then added some randomly swirled whimsy to the frame.
Finally to add in all the important details:
All that is left is a bride and a groom! I delivered the canvas and my well wishes shortly before the anticipated date. I received these pictures earlier this week:
The happy couple!
 
 Love it!!

Total cost: Not saying. . . this was a gift.

Total time: Around two-three hours. I worked slowly on this to let it develop.

Final verdict: D loved it and I think it looks great in the pictures. What a fun way to share your good news with friends and family. Congratulations to the newlyweds and thanks for letting me be a part of your big day!


Pin 167

Original pin:
Pinned Image
http://www.host-itnotes.com/search?updated-max=2011-08-04T00%3A05%3A00-07%3A00&max-results=7

A breakfast birthday party. I have quite a few pins for breakfast parties, cute little breakfast-y treats, and pajama party ideas. . . but I used the breakfast theme as inspiration only and developed it out to fit my W.  He would NEVER go for pancakes/donuts/cereal treats in place of a cake loaded with sprinkles. No way. Life as we know it would be over if there was a birthday party without an official cake.

I've known for a while that a breakfast party was the way to go. He is the first one up nearly every day. We have found him on more than one occasion hiding in the pantry in the middle of the night eating cereal straight from the box. His Grandmother started gifting him Froot Loops. Sometime around August I decided it was going to be a Froot Loops party and I began to stockpile party supplies. Froot Loops decor is all things colorful. At the end of the summer season I bought up lots of colorful bowls and cups. Every time cereal was on sale I bought a box or two.

For invitations, we copied a box of Froot Loops and added our own banner to the front. Inside were all the details and a request to the guests to arrive in their PJs.
 I glittered up the "oo"'s.
The menu was cereal, fruit, coffee, juice, pigs in a blanket, and, of course, cake.
 I found some colorful buckets for $1 a piece at the end of summer and use some dollar store ladles as scoops.

All the cereals were circle shaped to serve a dual purpose--craft time!!

Our activity was cereal necklaces. I put out some muffin tins with selections of each cereal. I gave each child a string of yarn and let them go to work.
 W barely finished his before he started eating it! Seemed to be a common problem with this crew. . .
Other games I had brainstormed but we didn't have time for : Pin a tail feather on Toucan Sam, Ring Toss/Hula hooping with hula hoops (or some other type of game using hula hoops--tossing different items into/through hoops), you could create toss games using pool rings as well.

Time for cake! A double layer white cake with every inch covered in rainbow sprinkles. He described it as "my dream come true!!"


A little opening presents and then it was time to go. Each child left with some Froot Loops to go, a straw bowl, and a straw spoon for sipping up that sweet Froot Loop milk.
Stacked together and wrapped up in clear cellophane.

We have been working to finish up all the leftover cereal. I guess I've got him impressed with my superb physical fitness because he is convinced this picture of Kerri Walsh is his mommy.

Total time & cost: ??? I started so many months ago picking up things here and there. I never kept track.

Final verdict: Easy easy party! Menu was easy to pick and easy to serve. Kids were all in a good mood. The weather was beautiful so we were able to throw open the doors and windows and let the kids play out back for a good portion of the day. We were able to feature all his favorite foods!
 

Saturday, December 22, 2012

Pin 166 (er. . . 166.5??)

Late edit: I just noticed I have two pin 166's!! I guess this is 166.5? No more drinking and blogging.

Original pin:
Pinned Image
http://www.myrecipes.com/recipe/black-bean-corn-topped-potatoes-10000001895990/

Black bean and corn topped potatoes.

Sounds good and easy for a family dinner. I took another pinner's suggestion and added some bell pepper to the mix. I also prepared my potatoes my new favorite way (Pin 156) rather than the microwave way suggested in the recipe.


I am looking at this picture and noticing that you can't really see that there is anything much more than cheese piled on top of this potato. I promise you it is all there :)
I also snuck in a little sour cream and butter to that potato that you can't see. The items had to be layered appropriately to enhance mixing of flavors. (I'm a little particular about potatoes.) I threw in a little chopped ham on the side for some protein. My men would be bewildered without a little meat on their plate at dinner.

So how was it? It wasn't bad, it just didn't have any wow-amazing-can't-get-enough factor to it. It was not unlike the filling in the wraps from Pin 143--Southwest Chicken Wraps. The topping itself is not too original. Putting it on top of potatoes is the innovative idea. My family didn't care for it. The recipe made a large amount so, unless you have a big crowd to feed, start planning for leftovers. You could serve Southwest Chicken Wraps the next day and add a little shredded or chopped chicken to the mix, serve on top of lettuce as a taco salad type dish, or serve on top of tortilla chips.

Total cost: The only items I had to go out and buy were the bell pepper and the black beans, so I spent around $3.

Total time: Aside from cooking the potato, cooking the topping was quick--20 minutes to chop, mix, heat.

Final verdict: I won't be making this again for potatoes. My family didn't eat much of it and I was stuck with a ton of leftovers to plow through.

Thursday, December 20, 2012

Pin 166

Original pin:

Pinned Image
http://sewlikemymom.com/the-great-cover-up/

This was labeled on Pinterest as a bath towel, but it is a tutorial for a swimsuit cover up. Either way it inspired me to make this cute bath gift for my niece's birthday last week. This pin was inspiration, er, pinspiration, only. I actually did not follow her tutorial--mostly because I didn't have any velcro. Great reason, huh? Since mine was for a little girl, I figured I would just make it pull over style. Here is how I made mine. . .

I started out with a regular sized bath towel. These things can be expensive, but I found a nice plush and soft one at Ross for just a few dollars. After washing, drying, and pressing it, I layed it out flat on the floor.
 I cut of each end of the towel on the innermost big line. I cut right along one of the small lines so that I left some of the flat edge in place to prevent fraying and general terrycloth mess. Then I serged along each cut edge.
I brought the serged edges together and stitched a 5/8" seam and pressed it open. Now I had a big tube towel.
I folded a large hem down along the top opening--around three inches. Pressed and pinned in place. I stitched nearly all the way around about 1/2 inch from the edge of the hem, leaving an opening for the elastic. Then topstitched entirely around the top, 1/2 inch from the fold. I measured a length of elastic that I felt would be large enough to easily stretch so she could pull it over her head, yet short enough that it would hold the towel up tight enough.
Finally, I followed the applique tutorial in Pin 70 and appliqued a "M" on to the lower edge of the towel. Here is the finished product:
I picked up a little basket of bath goodies from the dollar store to go along with it:
Body wash, bath soap, hand soap, shampoo/conditioner, mesh scrubbie, bath fizzles, hair detangler spray
I rolled it up and stuffed it down in the basket with everything else.
 
Total cost: $15

Total time: 1 hour

Final verdict: Cute and easy gift. Maybe a little practical for a 5 year old, but with some fun too. Poor kid comes from a practical family. Our side got her soap, an apron, a bike helmet. . . what can I say?

Here she is rocking her towel (or as 3-dub calls it--her cookie monster dress).

Wednesday, December 19, 2012

Pin 165

Original pin:
Pinned Image
http://www.katyelliott.com/blog/2011/12/cinnamon-applesauce-heart-ornaments.html

Cinnamon heart applesauce ornaments.

These were very simple to make. I bought some large jars of ground cinnamon at the discount grocer for less than $2 each. One batch used about 1 1/2 of the large jars. It was easiest to incorporate by hand rather than try to stir together. They really need to be mixed well and this was the easiest way I found. Towards the end it was more like kneading a dough and incorporating the last part of the cinnamon in with the kneading.

I started these during a free minute while cooking dinner. Just after I finished mixing them I had to return my attention to dinner so I wrapped the dough in plastic and let it sit on the counter a while. After dinner was over and cleaned up I pulled the dough back out.  Lately I have been rolling out things between wax paper rather than fight the fight of sticky dough. I sprinkled the bottom layer of wax paper with the cinnamon as directed but once the dough was rolled out the sprinkled cinnamon left some noticeable color variations on the surface of the dough that remained there after cooking. At the last minute, I decided to flip my hole-making skewer around and use the pointed end to make some decorations on the shapes.
You could make some really cute designs with some stamps! I didn't dig mine out ahead of time.


These had to bake a lot longer than the original poster suggested. Maybe it is the humid air here but one hour in they were still visibly wet. I just let them sit and came back periodically to check on them. After two hours, I flipped them to encourage the other side to dry out a little. In all I think they baked around 4-4 1/2 hours. The baking made my house smell so good!  My husband kept asking if he could eat them. No, seriously, he really really wanted to eat them! Yuck.


Remember that color variation I was talking about before? Can you see them on the edges of the cutouts in the photo below? That is not just the exposure of the photo.
Once they were all baked up and dried out it was time to start decorating with them.  I had one item in mind from the beginning of how I wanted to use these. First was for L's teacher's gift. I got so many compliments on the jars from Pin 72 that I wanted to make a variation on those as a teacher gift. I was just trying to find something different from candy/coffee mug/candle teacher gift rut. Everyone always likes getting flowers, right? I wrapped it in some twine and then a second layer of some festive holiday yarn.  I have a favorite crafting jar that is supplied with purchase of a particular pasta sauce. I have been stockpiling these jars. I like to make my own tomato sauce most of the time but I have found myself buying this pasta sauce just for the jar!

This morning W and I went to my absolute favorite Flower Market on 7th street this morning to pick up some fresh flowers. I didn't have anything specific in mind so when I saw these hydrangeas for a great price I bought three.

I absolutely love hydrangeas. Three may have been overkill. Considering these are going to continue to open up for at least a few more days, they may just overtake the jar! It probably would have looked good even with just one. I just couldn't resist.
I hope teacher loves them as much as I do. I was sad to see them go.

I strung up a bunch individually and in pairs to use for gift wrap decorating. I had also carved our names into a few and stung them up together to hang on the tree.
Names obscured to protect the innocent.
These are easy and cheap to make.  If I was smarter, I would have dug out my letter stamps prior to baking and you could make these to use as name tags. I made over 30 of them with one batch. These would be just as inexpensive as those stick-on tags and so much cuter!

I tied some up with the festive yarn and some with the twine. The twine-tied ones look very rustic if that is a look you are going for.

Total cost: Less than $3

Total time: Prep time was about 45 minutes. Bake time was 4-4 1/2 hours. Play time... indefinite.

Final verdict: These were surprisingly easy and make a nice presentation. I have so many I don't foresee myself making them again this year. But I have got all sorts of ideas for next year. These would be fun ornaments for kids to gift their classmates, gift tags, garland-style decorations, all kinds of embellishments.