Friday, September 28, 2012

Pin 137, Pin 138, and Pin 139

Original pin:
Pinned Image
http://mycrossfitpaleojourney.wordpress.com/2012/07/05/crockpot-honey-apple-pork-loin/

It's Pinterest for dinner tonight!

First up--apple and honey pork loin in the crock pot. I used Gala apples instead of red delicious, because that is what I had at the house. I don't think it made a difference.

It was easy enough to prepare--just honey, apples, pork loin, and cinnamon. Put it in the crock pot and let it cook all day. It smelled wonderful. When Wibzy and I came home from our errands in the afternoon he ran to the kitchen and started asking for donuts. (Ha! When I make homemade donuts, they have a little cinnamon in the batter so the house DID smell a little like donuts.) 

When I opened the crockpot that afternoon I was a little nervous. The whole dish was this ugly gray color. I don't think the pictures do it justice. It looked ashen. I thought it may have been cooked beyond the crisp into just ashes. I tried to capture it on film for you:


Looks appetizing, right?
 
After I cut it opened we were all relieved to find that the meat was white and moist, and oh-so-flavorful.The juice was golden.
 
I thought the apples would be able to be served as a side dish, but they had cooked so long they just fell apart. Once we sliced it up the gray color was no longer so obvious, and with the delicious taste it didn't really matter anymore. The apples basically just fell apart in the pork and in the sauce so we cut ours up and drizzled it with the apple-y sauce. There was no liquid added to the cooking process but it surprisingly made a lot of broth/sauce. Both the boys ate the pork and the apples.

Total cost: $10

Total time: 10 minutes prep, 7 hours cooking

Final verdict: We will probably make this again. It had a good flavor, few ingredients, and was easy. Just don't let your people see it first coming out of the crock pot!

Original pin:
Pinned Image
http://www.sowonderfulsomarvelous.com/2010/01/cooking-challenged.html

Honey-balsamic glazed roasted carrots.

Well there is no way my family is going to eat 2 pounds of roasted carrots, so I had to downsize this recipe a little. I was looking for a quick and easy vegetable to serve alongside my pork and I thought the honey would tie the two together. I love the sweetness of reduced balsamic vinegar so I was all for this one.

The kids didn't love it. the carrots were still crunchy and they were expecting them to be soft. I don't know that they liked the balsamic taste to them.
It was hard to get a good picture of these because they were so orange they were messing with my auto-focus!

Total cost: $1.30 for 1 lb carrots

Total time: 10 minutes prep (only because I used whole carrots that needed to be peeled and cut. Faster if you use baby carrots.)

Final verdict: Not a kid dish in this house, but I thought they were good. Probably won't get used much around here.

Original pin:

Pinned Image
http://monstermama-monstermama.blogspot.com/

7-Up biscuits. I have seen this one come up often on Pinterest.

I actually have made this a few times but never blogged about it. I first made them way back before this little blog was even born. They are sooo good. But since I have made them over and over I decided to tweak them a little this time.

Here is what I did:

Mix everything together as directed in the original. Where I changed it up is at the kneading. I didn't have time to clean up the mess kneading bread on the counter makes so I decided to skip this step. I melted the butter in my 9x9 pan in the oven. I mixed everything together in a bowl and then dumped it into the 9x9 pan on top of the butter. Spread the dough out evenly with a spatula. Then I took my pastry scraper and scored the bread into 9 squares. Not only did this avoid the mess of kneading on the counter but I also ended up with evenly sized pieces and no scrap leftovers. 

Bake as directed. When they were done they popped right out at the scores without any problems. Hooray for shortcuts! I didn't have the smooth tops that rolling them out would have given me, but the taste was exactly the same. My husband and kids love these biscuits. The first time we made these, the pan was gone before we even sat down to eat.
This is the only picture I got. Notice the pan is already half-empty and was completely empty just minutes after this shot.


I am a little passionate about bread. Around two-three years ago I stopped buying refrigerated breads, biscuits, doughs, etc. It is so easy, much more delicious, and you avoid so much processed ingredients to create your own.  (I'll admit, though, in a pinch I will resort to the premade stuff--but I can taste a difference now.)  I have a collection of my favorite dinner rolls, french breads, biscuits, pizza dough, etc. These are definitely in the list. (And I actually did skip the premade biscuit mix called for in the recipe and used the old fashioned flour, baking powder, salt, shortening method.)

Total cost: I had everything on hand already, so they were basically FREE!

Total time: 10 minutes to mix, 15 to bake

Final verdict: I think you know--I've raved about them enough by now. I know we will make these again. (From a fat/calories/carbs standpoint, they are not the healthiest think, so TRY and limit yourself--ha, ha! Just try! Bet you can't!)

Tuesday, September 25, 2012

Pin 136

Original pin:

http://www.thecountrychiccottage.net/2011/10/how-to-make-sweater-pumpkins-no-sewing.html

Getting in the fall spirit around here. Since it is still in the 90's I need something else to do around here with all those sweaters. Sweater pumpkins it is!

Last week, I hit up a couple thrift shops looking for some pumpkin-y sweaters. I had a little trouble at first finding orange AND in my budget. I was looking around for more like the dollar-a-piece type of items, and all the sweaters were clocking in around $3-4. Time to get creative. So I came home with one child's sized sweater, one adult sweater, a stocking cap, and a lap afghan. Today I swung by the dollar store to pick up a grapevine wreath to make stems.

The loot.
I made my little orange one first. I followed the directions exactly. Time to shake it up to make the stocking cap.

I didn't want to cut open the hat anywhere since it only has the one opening.  I stuffed the hat to my liking and then decided to close it up a little differently than the first one. This time, I wrapped my grapevine stem piece in a little yarn and then used the tail of the yarn to sew around the rim of the cap.
I left the stitches loose until the end where I stuck the stem in and cinched it shut, tucking in the loose edges. A little hot glue held everything in place.

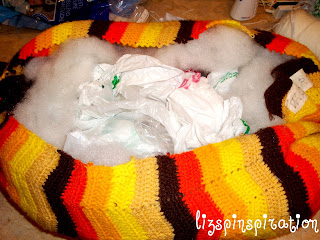
For my third pumpkin, I decided to take on the afghan. I really wanted the chevron pattern to show on my pumpkin so I was going to have to make it big. I started by cutting the afghan in half and working with one half. I ran out of stuffing so I started grabbing other things to stuff it with. There are some giant pieces of foam left over from an old, old, OLD project and then a ton of empty shopping bags.


When it was time to start gluing the edges shut on this beast I decided to skip the hot glue. I wanted to match up the stripes and I kept burning myself trying to do it so I decided to sew this one shut with some yarn. I ended up having to adjust the top a little as well to get the pumpkin shape I wanted. I tucked the excess down in the pumpkin and sewed the top shut using the same technique I used on the cap.

Since I was out of stuffing, and now nearly out of shopping bags, I decided to quit at three. We'll save the extras for something else. I posted this tease picture on facebook earlier today and all your guesses have inspired me. Looks like I will have plenty to work with.
My pumpkins!


Total cost: $10

Total time: 2 hours

Final verdict: A little bummed I ran out of stuffing so soon. They weren't as easy as they looked at first. I don't think I would hot glue again. I would sew the side seam and bottom seam shut. Personally, I think it is just as easy and looks nicer. Plus, if you mess up, it is so much easier to rip out stitches than hot glue. Stuff through the top, and cinch the top shut. If you don't sew, however, you'd better stick with her method. Cute idea, will add a nice festive touch to the house. You could make fabric stuffed stems to make them into pillows too.


Saturday, September 22, 2012

Pin 135

Original pin:

http://colbyalmond.com/12-creative-ideas-the-will-change-your-life/

Once again, I am looking for the simple ways to change. my. life. (OMG!!!)
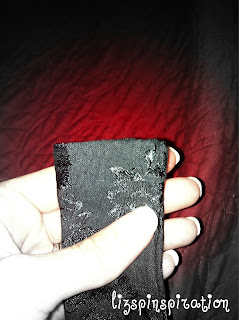
If you remember, I tried the straw-in-the-soda back at Pin 126.  Next up--number 4, perfect jewelry.

At the beginning of September I traveled to Chicago for an educational work-related conference. In packing my jewelry I remembered this trick. Not as easy as it looks.

First, none of the jewelry I wanted to pack fit through normal straws that I had in the pantry.  The clasps were just too large. I must have very tiny straws, right?? I guess that's just what you get when you shop at the dollar store.

See all the clasps up next to that "normal sized" straw.

Lucky me, I save those kid cups with the giant straws from restaurants. Smart, clever me will just use those instead.


Well, that worked for some. . . but not all. Either that clasp in the original picture is super tiny or my necklace clasps are gigantic. I fit the ones I could through the big straws and the rest just got packed in my jewelry case like normal. I even forced one through by smashing the straw a little flat first.
smashed straw

I was a little worried about the excess that wasn't through the straw getting tangled on its own and then having to untangle it WITH the straw complicating the whole mess.

So did it work?? Absolutely! It was so awesome to be able to pull out one necklace at a time.  Not a single snag or knot to deal with.

Total cost: $0

Total time: 10 minutes. Problem solving time here.

Final verdict: I may never throw those restaurant straws away again. They were the perfect size for my jewelry travel case. Even though not all my items fit through them, it was nice to have over half of them contained. The two that didn't fit were nicely separated by the strawed ones so I had zero tangles to mess with. I did have a little trouble getting the one I had forced through the smashed straw out and didn't want to pull too hard. I wouldn't recommend forcing them through like that. Overall, if you can make it work with what you have, I would recommend it.

Friday, September 21, 2012

Pin 134

Original Pin:
Pinned Image
http://www.makeit-loveit.com/2011/02/using-serger.html

I love the posts over at makeit-love it because they always have great, easy to follow tutorials. I recently came into a serger. I have been interested in learning them and I acquired the family hand-me-down serger from my sister about a month ago. I remember when my mother bought this machine when I was a child. I am going to guess it is somewhere in the range of 20-23 years old now. I remember going down with her and buying fabric from some warehouse to make a whole new summer wardrobe for us. I picked green and white stripes. We were going for the units look.

 Now, I'll be honest here--it sat in the box for a few weeks before I even thought about getting it out. I wasn't quite sure where to start--project wise. This tutorial I had pinned a while back was a good confidence booster. So I decided to start by just learning how to thread the monster.

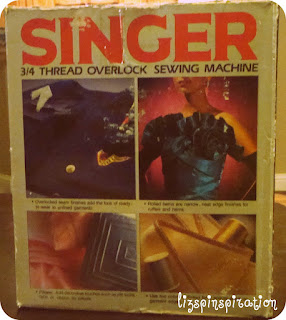
Here she is, still boxed.
 Something here I would like to draw you attention to is the beautiful teal prom dress on the side. I am drawn to this picture. There is a time in my past when I would have died to wear something like this!
Just look at that beauty. And the gloves!!
 And then I worried we might have an instructional problem when I saw this. Hmm. Sure hope there is a book in here.
 Luckily, there was. Looks complicated, but armed with my knowledge from makeit-loveit, I decided to dive right in.

And. . .  success! Well, I got it threaded like the picture at least. Now to see if it works. I grabbed some scrap out of my stash and started running it through to see if this beast was in working order. The first couple runs were not so smooth and my thread kept breaking. Here's the tricky part--I didn't know if the thread was breaking because I had threaded it wrong or if it was because the thread was old. A phone call to my mother revealed that the thread on this machine was the ORIGINAL thread!! Oh dear.

Turns out I also had one of the threads wrong. It went over when it should have gone under. Once I got that fixed and fuddled with the tension a little bit I had a pretty good seam going. Time to go to bed.

Total cost: $0

Total time: 1 hour

Final verdict: The makeit-loveit post is fairly generic--as it should be because all machines are different. I couldn't have done it without the book I found in the bottom of the box.  But the most important thing about this pin was that it gave me some courage and motivation to get that serger out of the box and working.

Bonus: My first serger project

Thursday was crazy sock day at preschool. Izzy (as he is asking to be called today--its a pirate name) doesn't have any crazy socks. They just don't make lots of crazy socks for boys like they do for girls. I had bought some fun socks a the dollar store a while back because I thought they would make cute sock monkeys. Lucky for Izzy I hadn't actually got around to making sock monkeys because they were now going to be his crazy socks. But how to get ladies-sized socks to fit a 2 year old?

I thought about cutting them off at the heel and sewing a toe seam but I worried they would be too wide in the foot and be uncomfortable all day smushed in his shoe. I couldn't take them in width-wise because the I'd end up with a seam somewhere on the foot. That would be maddening to live with all day!

I started with the two crazy socks and then I dug up some little boy socks who had lost their match long ago.


I cut the foot off right above the heel. Putting right sides together, I pinned the top of the little sock to the bottom of the crazy sock. I serged them together, stretching the little sock evenly.


Here they are all sewn up!

He was really excited to see them in the morning. He loves the bright and colorful things!


However, when it was time to leave for school, he started to worry a little. I reassured him that all his friends and teachers would be wearing silly socks too, but it wasn't enough. So I dug out a matching pair from my craft stash and we went to school together.


Wednesday, September 19, 2012

Pin 133

Original pin:
Pinned Image
no source available

Smart idea! Write on the washer lid with a dry erase marker to remind you not to toss your "do not dry" items into the dryer.

I grabbed a dry erase marker on laundry day and went to work. Now, I don't have just a whole lot of fine items that can't be dried, but this week I found at least three.  First item into the washer. . .

I actually wrote instructions on the washer just in case someone else in my house might feel like moving laundry to the dryer. Riiiiggghhht. . .  keeping the dream alive. But, guess what didn't go in the dryer? You got it, that white button up shirt with lace, that's what! I hung that shirt up and wiped off the dry erase with a damp cloth.

Here I am. Feeling so awesome and smart that I find just the right spot to store my dry erase marker in the laundry room where I can reach it and remember it. Next up, two sweaters I picked up a the thrift store for some upcycling later this week. Into the washer you both go! Green sweater, brown sweater scrawled across the top of the washer.

Guess what. Neither of them go in the dryer either! Touchdown dance! Now to just wipe it off. . . maybe this cloth isn't wet enough. . . maybe some Windex? . . . soak for an hour with bleach??!?!?!
After all that I still have this reminder:


Here is my theory:

While I do try to keep a tidy home, I probably only clean the washer top every six months or so. There was probably some degree of build up of lint and detergent, and who knows what else on the top of the washer. The first time I wrote on it the ink stayed on the build up gunk. Then I cleaned it all off. The second time it went straight on the top and apparently soaked in! I can't get it off yet. Same marker, same spot.

Total cost: $0

Total time: 20 minutes if you add in the attempted clean up. (plus one hour soak)

Final verdict: I thought I was smart and clever, but I guess I won't be trying this one again. I'll have to stick to post-it notes. Although, any brown and green sweaters may be safe for life around here.


Tuesday, September 18, 2012

A big FAT thank you!

When I started this months ago, I never would have dreamed to have so many fans and visitors to my page. I am so flattered and thankful for all of you and your support. This week I surpassed 1,000,000 hits to my site. In honor of this fabulous milestone, Pinspiration now has a Facebook page! Click on the Pinspiration Facebook link to the right to get new posts delivered directly into your feed.

And once more. . . THANK YOU!!

XOXO, lizzy

Pin 131 & Pin 132

I actually did these pins a few months ago but am just getting around to posting about them. Who knew that starting Kindergarten would derail me so much!

Original pin:
Pinned Image
http://quilttaffy.blogspot.com/2008/07/invisible-closing-seam-tutorial.html

Invisible closing seam tutorial. I have actually used this a few times since the first , but originally I was using it to finish up a sash. It is really a great tutorial. It has clear instructions and lots of pictures so I had no trouble following along. I don't have too terribly much to say about it since it really was made so simple.


The finished product.
Total time: 5 minutes

Total cost: $0

Final verdict: Guess I already gave this one away when I said that I had used it multiple times already! oops! It is a great tutorial for a very handy stitching technique. I also used it on Pin 114 to close up my little owl.

Original pin:

Pinned Image
http://blog.globalstreetsnap.com/post/23167060192/love-this

Going for this look. . . I pinned it to my "I could make that" board. And so I did. I attempted to make a top, skirt, and sash. And I attempted it without a pattern. I chose a few pieces I already owned to use as guides and worked from there.

The skirt gave me a lot of trouble and, as goes with sewing on the fly, I started to run out of fabric. It ended up tighter across my hips and thighs than I intended and I just couldn't get it to hang just right.

I love the top. It is very light and comfortable and goes well with jeans also.

Here it is:

The original model is much thinner than me and she is wearing the skirt higher at her waist, where I made mine to hit at the hips because that is more comfortable for me.

Total cost: eesh. I forgot. I did these a while ago and I can't find the receipt.

Total time: 4 hours. All three pieces were very basic items.

Final verdict: The top and sash have gotten a lot of use. The skirt--not so much. I have worn it a few times, but like I said before, it is a little tighter than intended and doesn't quite hang right. But I am out of room for more modifications. I might just hike it up next summer and wear it as a strapless dress. We'll see.

Tuesday, September 11, 2012

Pin 130

Original pin:
Pinned Image
http://goodenessgracious.com/2011/11/cutting-up-potatoes-super-fast.html

Use an apple slicer to quickly cut up potatoes for mashed potatoes or fries.

Like so many times before, (when will I ever learn??) I did the pin BEFORE actually reading the link.

I was making some of my favorite crock pot baked potato soup last week and decided to use this trick to cut the potatoes faster. I had already enlisted my favorite potato peeler--because he is the fastest around. So when it came time to cut these bad boys up, he had to pitch in as well. Because I didn't read the link first, we went at the whole potato and for me it was pretty much impossible. But Mr. Muscles who lives here and is really fast at peeling potatoes is also pretty fast at cutting potatoes with my apple slicer.

Step one.

Step two
I decided to get all smart so I could get in on this potato cutting action and decided to cut the potato in half first. I was able to use the apple slicer on the half potatoes without too much difficulty. The original link actually does say to cut the potato in half first.

So I tossed all the potato chunks into the crock pot and cooked as normal. Mr. Muscles wanted the potato soup a little chunky so I didn't mash the potatoes all the way at the end. The big circle piece that is the "core" from the apple corer was a weird size and shape to have chunky in the soup. The original link actually says for mashed potatoes, which would be fine because you would smash all the weird shapes away.

Total cost: $0

Total time: 1 minute or less

Final verdict: I won't use this again for soup, and I think fries would be too large and a core shaped fry might be weird. But for mashed potatoes it would be great. Cutting them in half first definitely made them easier to cut and as a bonus they then stood flat on the cutting board. The pieces aren't uniformly sized however. Clever little trick, but in the long run, I don't know that it would really save that much time.

Thursday, September 6, 2012

Feeling Inspired

Last month when I went to our girl's craft night my sewing friend was working through the intricacies of preparing a pattern. I rarely sew from a pattern. This brought up some interesting conversation. While she enjoys the methodical steps taken to cut and trace and piece together the project, I much prefer the final product and have been known to take short cuts to get there. I was a little fascinated at watching the whole process unfold.  Thus, a few days later I was inspired to pull out an old pattern and set to work. I planned to follow directions exactly, no short cuts. Pinning, and trimming, and clipping curves and all that jazz.

Hubby was out for a boy's night and I ventured out to the fabric store with the little guys. Why do I ever think this is a good idea? I always lose focus of what I am actually looking for and balk at what I end up with when I get home.

I nearly bought hunter's orange because I wasn't paying attention.

I came home, washed and pressed the fabric that night with intentions to start the next morning.

In the morning, I pressed the pattern (!), measured, cut, pinned, did everything right. I was slowing down to enjoy the process while I sipped coffee and the kids played.

evidence of my rule following!
It was at this moment here, as I layed all the pieces out, that I realized my mistake. This fabric is all wrong. This is Sound of Music CURTAIN CLOTHES FABRIC!!! I am making a dress that is going to look just like those clothes Fraulein Maria made for those kids to play in out of the curtains in her room! But, alas, it is too late. I am vested in this project. I am going to see it through, and follow the directions, and find enjoyment in the process. (And a little laughter too.)

I plugged along. I worked on it nearly eight hours the first day. We never made it out of our jammies either. I worked slowly and meticulously, realizing I had chosen the pattern I own with the most pieces for this endeavor. It took me right at a week to finish. I worked on it A LOT. I don't have a craft room so once I dragged it out I worked on it for hours at a time. 

So here is the final dress:
Those von Trapps were so sad when their father caught them in play clothes.

A good shot of the fabric so you can see how curtain-like this is.

 
What do you think? Could I sneak in line with these kiddos unnoticed?

Final verdict: This wasn't about the dress itself, or about the fabric, or even about becoming Leisl (she made being 16 so cool).  This was about slowing down to enjoy the process of creating something with your hands. Did I enjoy it? Absolutely. I can't do it every day until I can create a dedicated work space in my house. I will still sew with abandon--probably more frequently than not. It was a fun little experiment and repaired some of the burned bridges between me and patterns!

And maybe someday I will learn not to go fabric shopping with the boys in tow!