Thursday, January 31, 2013

Pin 180

Original pin:
Pinned Image
http://www.bluelacehouse.com/2011/05/make-your-own-camera-bag.html

A tutorial to make a camera bag insert to use in a purse and avoid the standard black boxy camera bag.

My birthday was earlier this week and I got myself a really fantastic birthday present! I have been saving my money a long time to get myself a fancy schmancy new camera! I am so excited. I have been wanting this camera for ever!!

I never even considered that I would need a place to store it. But as I waited in line at the camera shop to pay for it I was eyeing a bunch of really cute bags that were way, way out of my budget. I knew Pinterest could help me out here. It only took a few minutes to find this simple tutorial. Time to go shopping.

I hit up a discount clothing store and picked up this cute bag:
 
 
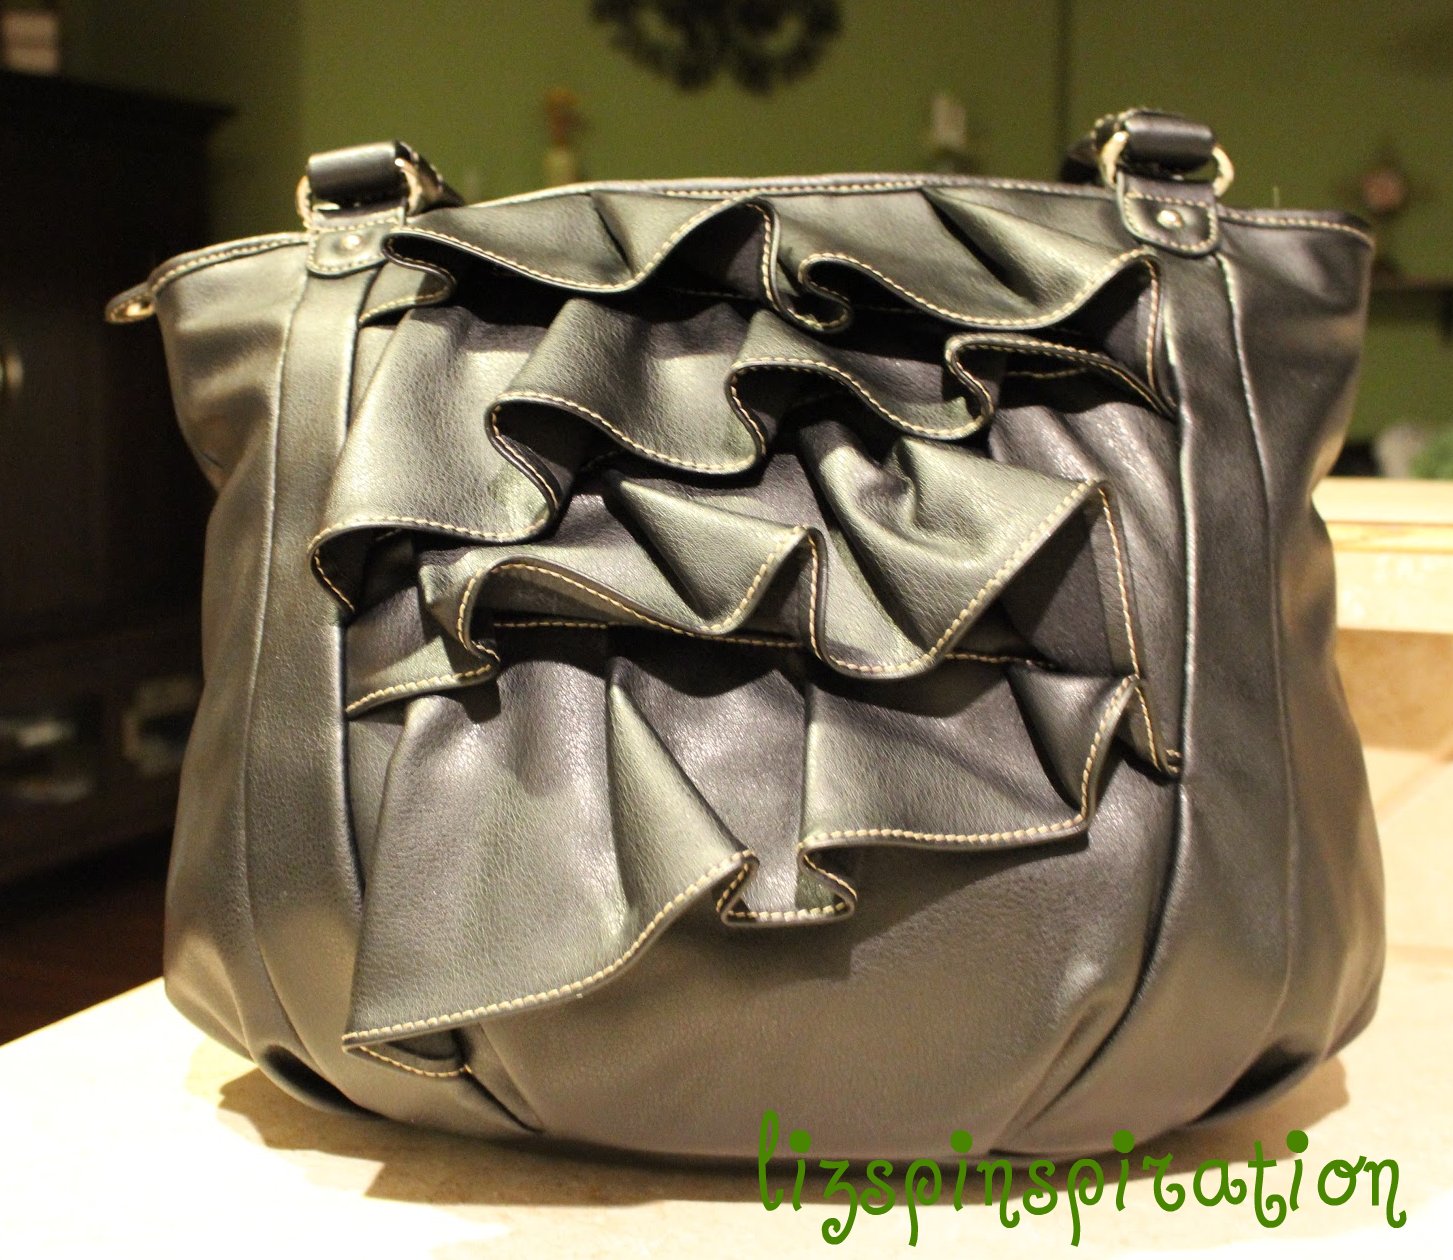
It has a large zipper-top opening and deep side pockets with a handy little zipper pocket on the side.
 
I swung by the craft store for some foam and some fabric--I needed something colorful to jazz this up. After I put the littles to bed, I started drawing out my plans.
I did this in the completely, absolutely wrong order. I should have first taken my bag home and measured both the camera and bag before buying the foam and fabric. But since the discount clothing store and the craft store are neighbors, I thought I could just estimate. I was a little short on foam. I had to compromise.
Foam core board to the rescue! This particular board has been in so many projects, but this was the last bit of it. I wrapped these in batting to substitute for some of the missing foam!

Then, I was short on fabric as well! So I dug out this t-shirt remnant that sort-of coordinated with my fabric.


I tried to follow her directions, I really did. They were simple and easy to understand, so its not her fault. I was just adjusting as I went. 

Halfway through, I decided to forgo as much Velcro as possible. Starting with the middle divider, I decided to sew it on. I just felt like it would be more stable that way. However, I could only easily sew the bottom part of the middle divider on.

So, then, I had to sew Velcro on to each side of the divider panel. (Note to self: sew the Velcro on first). Another step out of order.
I fully sewed each end on the insert. I couldn't sew the Velcro on for anymore dividers at this point. All Velcro should be sewed on before assembly! This is what happens when you sew as you go.

Here is the finished product. Its a little sloppier than I prefer. There are too many visible seams, the topstitching isn't tight enough to the edge so the edges look a little loose and sloppy to me.

The non-Velcro-ed divider slides in perfectly though--this is one of the ones with the foam core board.
All aside, this goes INSIDE a bag so really the only person to see these little details is me. So how does it look inside?

Not too bad. It adds a nice pop of color. It fits all my things perfectly. I'm not sure it could withstand just a whole lot of jostling, but I'm going to put some of that extra foam board & batting I covered underneath and on the ends for a little more stability.

Total time: Not the one hour she had!! I had a few trouble shooting moments to take care of. I spent about four hours all together on it.

Total cost: $24.99 for the bag and around $10 for not-enough fabric and foam. (That's not including the money I spent on other fun goodies at the discount clothing store while I was in there.)

Final cost: While it is not super pretty on the outside, it is doing its job nicely. It fits in the bag, it fits my things. I could do it a whole lot better next time. But I'm going to stick with this one for now. A great idea to save some cash!

Tuesday, January 29, 2013

Pin 179

Original pin:
Pinned Image
This pinned picture is linked to http://www.belleamour.co.uk/2011/03/crocheted-love/ but the actual tutorial lives over here: http://saltforthespirit.blogspot.com/2009/02/itty-bitty-crochet-heart-tutorial.html

One of the local craft stores was having a sale on yarn a few weeks ago. I was drawn to the colors in this yarn and picked up the whole skein for $1. I decided I needed to do something Valentine-y with it. I decided to crochet up a little Valentine decor. Using the little heart tutorial I started by making a bunch of little hearts. I played around a lot with the basic pattern and tried bigger and smaller hearts. Some of those worked out, but others didn't. I ended up with 13 finished hearts. I made some crochet lace on the fly. I first made a chain long enough to drape along my mantle. Then I did a (sc, ch2, skip 1 ch, sc) all the way down the length of the chain. When I got to the end, I turned and did (sc, ch3, sc) in each space made in the previous row.  I whipped up four little tassels to use to tack up my chain.

my little tassel
I tacked the chain and tassels up on the mantle and gathered all my hearts. They were a little spread out because I had been making them randomly throughout last week.

Most of them did not lay flat. I decided to iron them flat so that they would look like hearts as they hung from my garland.

The heart on the left is before ironing and the heart on the right is after ironing.

All the hearts after ironing

 
All that was left was to get them up on the garland. I tied them up there, each a little differently. No pattern or measuring done.


Total cost: $1
 
Total time: Once I had the hearts figured out, I could make them fairly quickly--ten minutes each, maybe. The garland lace took the longest. All together I probably spent around 6 hours crocheting and assembling the garland.
 
Final verdict: I like it. It feels festive and I just love the color combo of the yarn. I have never decorated for Valentine's Day in my house, but this may just be catching. 

Wednesday, January 23, 2013

The Stuck Jar

I don't have a pin for this. I don't recall seeing this on Pinterest, but that doesn't mean it is not out there. I don't think I came up with this on my own. I think I MUST have seen this or heard this somewhere and it was one of those thing that was just filed away in the dark, dark, recesses of my brain.

However. . . it. is. FANTASTIC!

Back story:

A long, long, time ago I used to have multiple jar openers. The rubbery disc kind, the weird wrench-like kind, a plastic circle with gear-like teeth. Then I got a husband and I didn't notice as much the gradual disappearance of these said jar openers. Lately, my jars have been so tightly sealed. Even Mr. Muscles has been having such a time opening a particular brand of peaches that I have just stopped buying them.

Yesterday as I was preparing dinner, I needed to open my new jar of minced garlic. It wouldn't budge. I tried tapping, running under water, and any other trick that has worked in the past with no success. I was fearful I was going to break a bone in my wrist as I struggled against the jar, half bent over, clutching it between my knees. Time to stop and think rationally.

Which missing jar opener was my favorite? The rubbery disc.

Why? The rubber really got a good grip on the lid.

How have I opened jars in the past? At work sometimes I use a glove to open tight lids.

What do I have that is rubbery? Well, those big cleaning gloves, but I don't really want those near my food. AHA! I have rubber bands!

So I dug out my rubber band ball (yes, I have a rubber band ball. I save all the rubber bands from my newspaper and stick them on my ball. It is reminiscent of my childhood--but these rubber bands aren't green.) I popped one around the lid and, magically, with almost zero effort at all, that lid gently popped right off. WHAT!?!?! Life changing. I had to try it on other jars--and it worked. Only thing is, I don't have any peaches to try it on! Guess what I'm buying at the store this week???


This is going to be really, really useful in the future! It may put Mr. Muscles out of a job--now he will have more time for those other household chores on his Honey-do list.

Sunday, January 20, 2013

Pin 178

Original pin:
Pinned Image
http://www.compartmentlife.com/2011/11/the-pinterest-challenge-fall-2011-toilet-paper-or-art/

I am always looking for home decor at affordable prices and free is pretty much up my alley. I informed my family to start saving rolls and very quickly I had more than I knew what to do with. It was eye-opening to see exactly how much toilet paper we use in this house! Then my bag just sat there. . . and sat. . . and sat. . . and sat. . . Until I decided to start up these "unfinished projects." So here we are with the completion of, yet another, unfinished project.

It took me just a few weeks to fill up this bag with toilet paper rolls, paper towel rolls, and any other cardboard roll we might come across.

I fired up my glue gun, parked myself in front of the TV (I had some DVR to catch up on) and went to work. I cut one-inch strips and just started gluing together at random. I didn't really have a plan. I did find a really sturdy roll (I think it came from foil) that I was able to cut with a sharp knife and preserve the circle shape. This came in really helpful because it provided some super-sturdy anchors. Hours later, day one's progress was done and I was off to bed.

I was not able to work on it on consecutive days, so this project was not done in four days total, just four episodes of work on it. A few days later, day two progressed in the same way as day one.

And for some size perspective, those tiles are 12 inch by 12 inch in size. This project was growing fairly quickly!

Day three I was getting to the bottom of my stash of rolls. I had already put my family on alert to refill my bag!


Somewhere shortly before day three ended, the project was starting to look like a giant snow flake. NOT what I was going for, so I had to really strategize to avoid the snow flake look. Worried that it might head back in that direction, I called the gluing stage complete after day three.

I picked up some spray paint at the store last week. I found some metallic style paint in "oil rubbed bronze" for a metal look without being too shiny.

After it dried it was ready to hang up. A year ago I took everything from my mantle and have been trying to figure out what to put there next. I put this in the big empty space. Since packing away the Christmas decorations, I haven't put anything back on the mantle, so it looks really empty in my pictures. Guess I'll have to work on that next.


It is pretty sturdy and fairly light. It is held here with one thumbtack in the center circle.
 
 
Total cost: $5.99 for the spray paint. Otherwise, I used the entire bag of rolls, not sure how many, and about 6 hot glue sticks.
 
Total time: It was a little time consuming to do all the cutting and gluing. I did all the cutting and gluing over three sittings--about eight hours total. Then the spray painting was done over around 20 minutes total, split into three sessions, allowing drying in between.
 
Final verdict: It is an inexpensive way to fill some space. I think I like it. Up close, you can see many flaws--jagged edges, unequal heights and spacing, exposed hot glue. But hanging up so high and being painted so dark, a lot of these imperfections are not as obvious. My husband was a little unsure about the whole project from day one, but now that it is hanging, he admits he is surprised at how much better it looks that he expected. We are not completely sold on it yet, but I'm just going to let it hand there a while longer and see if it grows on us. Another problem is similar to the problem I had with the sock bun--I felt weird that people would know I had a sock on my head. Well, now I wonder if my guests will look up and think about my toilet paper rolls hanging on the walls. 
 

Would you?

Friday, January 18, 2013

Pin 176 & Pin 177

Original pin:
Pinned Image
http://www.familyfeatures.com/feeds/food/FeatureDetail.aspx?ID=4018

Yummy-looking lettuce wraps with apples, grapes, and an interesting combination dressing


Original pin:
Pinned Image
http://www.yummymummykitchen.com/2012/01/superfoods-skinny-tips-lululemon.html

A colorful, healthy salad.

I bought some pomegranates a week or so ago when I found them on sale and had this super-foods salad in mind. However, I had not gotten around to making it and was hoping my pomegranates had not gone bad.

Last night, I opened the refrigerator to start preparing dinner and found a wealth of leftovers and produce needing to be eaten. I had pinned the lettuce wraps recently and my mind went immediately to that when I saw the grapes and leftover chicken. I didn't have everything for the super foods salad, but it was time for the pomegranates to get a crack.

I started with chicken I had cooked the night before. It was diced and cooked in the skillet with a little olive oil and a little seasoning.


Next up came the diced grapes, pomegranate seeds, and a stalk of celery left over from a few dishes in the last two weeks.


Then I threw in some walnuts and diced avocado, followed by almond butter and honey. The original recipe calls for peanut butter, but the pinner tagged it with almond butter. I went with almond butter.

 
All that was left was to spoon it over some lettuce leaves and roll it up. I had some leftover cilantro lime rice that I spooned on top of the lettuce before I topped it with the mixture. Then I had a little trouble with the rolling. Either I stuffed my leaves too full or my leaves were to large, but I could not get them to roll pretty or stay rolled. No worries, I ate it anyway. It was hard to eat with my hands anyway because the filling was sticky.


Oooo, boy! It was delicious. So delicious, in fact, that I had to eat it again for lunch today. Only problem was that there was no more rice or chicken. I substituted in some diced mozzarella and chopped my romaine lettuce. Now I had a chopped salad! I never would have thought to use almond butter as a "salad dressing" but that is basically what it was fulfilling. It was a little hard to coat everything when I made it as a salad today, but it worked well enough.

And here is my confession. . . I keep thinking about it. I want to eat it for every meal. Lucky me, I have two more pomegranates in my fridge right now.

Total cost: $0 because it was left over night!! I may have spent $1 on the pomegranates (for 3!! good price) weeks ago.

Final verdict: Yum. Yum. Yum. Unsuccessful as a wrap but successful in the flavors! A super combined pin recipe that I am going to use again and again. I was surprised that almond butter would even work with these flavors. And knowing I could use peanut butter as a substitute will help when the almond butter is all gone.

Wednesday, January 16, 2013

Pin 175

Original pin:
Pinned Image
http://styleawip.blogspot.com/2009_12_01_archive.html

Isn't that scarf beautiful?? I couldn't locate any details about who makes it, but the link mentions that it is $1,100!! Wow.  I had it pinned to my "I could make that" sewing inspiration board. Yesterday was gloomy, snowing, and cold. I took myself to the fabric store to create my interpretation.

I was looking for an easy replication that did not require hand sewing. I bought a quarter yard of lace and a quarter yard of some super soft knit fabric. In retrospect, I didn't do this in quite the right order, but I am trying to tell you what I think a more appropriate order would be. The pictures may not match up exactly to the directions. I measured off two cuts of eight inches of lace and applied some fusible web to the top two inches of each.

I trimmed the top along the lace pattern just to have a prettier edge than a straight line.
Then I removed the backing, and ironed it onto the bottom two-three inches of each end of the scarf.
Next, I sewed along the edges of the lace overlapping the fabric, just to secure it in place. I did not stick right along the cut lines.
My stitch line--more like an approximation of the edges.
The final step was to add a rolled hem to the edges of the scarf.
 
All done!
 
 
Time to wear it out to dinner with the girls!


Total cost: $5. Wow! I saved $1,095! Wait until my husband hears how thrifty I am.

Total time: 45 minutes--even with doing things a little out of order. I bet this could be done in 20-30 minutes next time.

Final verdict: It was sooo soft. It was fairly light weight too so it didn't feel bulky. I am not a fan of winter wear, but this didn't bulk me up and feel too wintry at all. It is very versatile and can easily be paired with lots! I am happy with the outcome!


Pin 174

Original pin:
Pinned Image
http://mollykaystoltz.com/t-shirt-shag-rug-tutorial/

T-shirt rag rug tutorial

As promised, I am wrapping up unfinished projects. As some of my friends can attest, this one has been a looooooong time in the works. I started in in APRIL!! I worked on it pretty steadily April-May, dragging my bag of supplies to craft nights and work days. We got rid of all our carpet in May. I was making this scrap rug for my older son's bedroom. Right around that time we stumbled across this brand-new-in-the-package rug at a garage sale that is the one with the roads and buildings printed on it. He fell in love with it and I picked it up for $2. No need for this one so it was rolled up and put away. It took up a lot of space on my "craft shelf." Haha. I don't have a real crafting area in my home, so I randomly find space to cram my crafting stuff and this found its way onto a shelf--where it repeatedly fell off!

Let me rewind back to April. . .

I wanted this to be larger than the tutorial--which is the size of a t-shirt. So I bought fabric remnants to use instead of gathering a wardrobe's worth of t-shirts. All of my fabric came out of the remnants bin so it was fairly cheap. I chose a large piece of denim for the base because I thought it would be sturdy. Since I was not using knit for the scrap pieces, I cut all the fabric strips using my pinking shears to prevent some fraying. HOURS later, I was suffering from my first real pinjury!!
 
But now that I had all my strips, the real work could begin. I followed the tutorial to cut the base and weave the strips in. My base was so large I could only do about three rows an hour. Days and days later I made it to this point, at which it was rolled up and stashed away for nearly nine months.
 
See how close this was to actually being finished!!!
Yesterday, I pulled it all out and finished the puppy up in about 45 minutes. Seriously, why couldn't I do that earlier?? Here is the finished product:


I didn't go in with a specific pattern plan, it just worked out that I used up all my colors early on and was left with a lot of blue. I started in the middle and worked my way out to each edge. I did the center row and then did one or two above and then one or two below, then back to the top for a few, and so on. . .

Since this doesn't really have a destination in my home any more--thanks to the much COOLER manufactured rug, I just kind of left it lying in the middle of the room where I finished it yesterday. When the boys got home from school I asked them "where do you think we should put it?" secretly hoping they might fight "my room! my room!" but the only answer I got was from super-cool L, "uh, how about on the floor."  They did play on it a little and pulled out a strip or two. Maybe its best NOT to put it in their room because I just may find one of them in a pile of strips with a holey swatch of denim one day as they deconstruct it.

Total cost: I am pretty sure I spent around $17 on fabric remnants

Total time: I am just going to have to do some math here . . . at three rows an hour and 41 rows plus the hours spent cutting strips, I am going to say all together I probably spent somewhere between 18-20 hours on this one.

Final verdict: Its a homeless little rug for now. I am glad to have it finished and off my craft shelf because it took up a lot of room. It was easy enough but I'm not convinced it is going to hold up to a lot. And I am a little worried about washing it and having to rebuild! Time will tell. . . To create another rag rug I would probably find a better way to secure the strips--tying or stitching or something. But I will start much smaller for the first trial.