Monday, August 26, 2013

Pin 212: Crunchers (aka Scottish Chocolate Caramel Bars)

Original pin:
Crunchers - A Swirl of chocolate, brown sugar, peanut butter, butterscotch and crackers
http://www.twirlandtaste.com/2011/01/crunchers-addictive-chocolate-brown.html

In July, (yes, I am way behind around here) I needed a dessert to take to our family reunion. I don't make a ton of sweets but my sweets board on Pinterest is full of delicious-looking things. I used the occasion to try something out. I pulled up this recipe for "crunchers." Club crackers layered with a caramel-y filling and topped with a butterscotch/chocolate layer. Yumm.

While this dessert definitely does NOT fall into my just-whip-together-something-amazing-as-you-glide-out-the-door category, it was not difficult. Just time consuming, and as far as Mr. Pinterest is concerned, uses far too many pots and pans to pull together.

I started with layering the crackers but I couldn't fit as many in the dish as the recipe said I should, so I switched to a larger dish. I could almost squeeze the right amount into this dish but my final dessert was not as thick as the original posters. When it came time for topping, I was certain the called for amount would not cover my dessert completely so I just added a few extra handfuls of chocolate chips and butterscotch and then ended up with a nice thick chocolaty layer.

All chilled and out of the fridge ready for cutting:
I popped it out of the dish and off the foil--surprisingly easy and smooth. Time to cut into bars. I wasn't sure what to expect while cutting--if it was going to be difficult or not, but it was really easy to cut.
So my layers are not perfect, my chocolate is pretty thick, but the bars themselves were pretty darn tasty. Not exactly what I expected, but a nice little combo of salty and sweet. I packed the bars up and took them to the family reunion. One of our cousins took one taste and declared them exactly like this dessert they fell in love with on a trip to Scotland. I guess that gives me "International Chef" status.

Total cost: umm. I forgot. It was July. Sorry folks.

Total time: Thirty minutes plus chill time.

Final verdict: They were easy enough and tasty enough that I will probably make them again, but I might wait for a special occasion--maybe Christmas parties or the next family reunion. I might also stick with a smaller dish and less crackers to have a thicker bar like in the original photo.


Tuesday, August 6, 2013

Pin 211: Homemade Ice Cream in a Baggie

Original pin:
How to Make Homemade Ice Cream in a Bag by familyfun #Ice_Cream_in_a_Bag #KIds #familyfun
http://myroyalkitchen.com/2011/12/homemade-icecream-in-a-baggie/

The boys and I decided we were ready to take on this challenge today--homemade ice cream in 5 minutes using plastic baggies. Seems a perfect summer activity for kids. I had some 1/2 & 1/2 leftover from a soup recipe last week so the only thing I had to buy was rock salt. Fabulously for me, the rock salt was on sale at the grocery today!

After dinner tonight we decided to whip these up. Things did NOT go as smoothly as I had planned. The basic idea is that you put the ice cream ingredients in a small baggie.  Then the small baggie goes inside the larger baggie with ice and salt. Shake a few minutes and, voila! you have ice cream. First problem was when I turned my back for one minute, little bit decided to shake his bag upside down. You can probably guess that ice and rock salt when absolutely everywhere. Refilled his and when I grabbed my camera to get an action shot, we found problem number two. (Thus no action shots.) The ice baggie was getting torn and leaking. Quick fix--double bag the ice bag.  Back to work when almost immediately, the ice cream baggie was ripped and leaking into the ice!
milky, icy, salty mess

Double bagged the ice cream bag and changed strategies.  I sat the boys down in chairs, wrapped the double bagged double bags in a towel and we went for more of an agitation/massage motion than shaking to avoid any more trauma to our baggies.


This strategy did not result in any more tears, no leaking, and we actually did end up with some ice cream eventually. It took longer than five minutes and my kids didn't have the arm strength/endurance to do this alone. I took turns with them agitating there bags. Maybe about 10 minutes after we had fixed all our problems and changed our strategies we decided our ice cream was solid enough to sample.


It probably could have gone an additional few minutes, but it was pretty ice-cream like. The taste was really good--much better than I anticipated. The boys dressed theirs up with sprinkles and I just kept thinking of the delicious candy mix-ins I didn't have.  We made two batches per the recipe. It easily made four servings (two servings per baggie).

Total cost: $2.49 for rock salt

Total time: It took us 25 minutes to solve all our problems and end up with a mostly frozen ice cream. Next time I predict it will be more like 15 minutes.

Final verdict: We will make this again. One of my favorite soups calls for a small amount of half-and-half and the remainder always goes bad in the fridge. This is a perfect solution to using up that left over bit. My recommendations (and plan for next time) double bag from the beginning. Double bag the mixture and double bag the ice. Also, I will stick with the agitation/massage action. It worked and just took a bit longer. The kids were really bummed they didn't get to eat their ice cream out of the bag like the kids in the picture.


Wednesday, July 17, 2013

Fun Free Music! (Legally!)

This one isn't a pin, but a super fun tip I wanted to share with you. A couple of months ago I discovered this web service that allows you to download three songs a week, free of charge, that are mp3 format and compatible with iTunes, any mp3 player, android, mac & windows. New stuff, old stuff, all genres. I just downloaded two singles off the new John Mayer album that isn't even released yet. Even iTunes only has one of the songs available. I know you must be thinking by now that there must be some kind of catch, some charge or subscription hook. . . .

I'll be honest. You are right.

But the fabulous part is, the only membership you need is to your library--which is free!!

If you want to check out the website, it is https://www.freegalmusic.com/users/idlogin but just going to that link won't get you in. You've got to enter through your library's website link. So check out your library website's page and search for Freegal Music. If you are local to me, go to the city library's page-->HPL online-->digital downloads and scroll to the middle of the page and you will find the link there.

Part two of the fabulousness: You get three downloads for EACH library card, which means, if your kids have their own cards, you can download three songs for you and three songs for them.


Here is what I've downloaded so far, and not spent a single penny:

(In no particular order, well, maybe alphabetically. . . )
1. Adele--Skyfall
2. Alicia Keys--Girl on Fire
3. Britney Spears--Ooh La La
4. Cheap Trick--I Want You to Want Me
5. Foster the People--Pumped Up Kicks
6. Harlem Freaks--Harlem Shake
7.  John Mayer--Paperdolls
8.  John Mayer--Wildfire
9.  Justin Timberlake--Mirrors
10.  Justin Timberlake--Rock Your Body
11.  Justin Timberlake--Senorita
12.  Justin Timberlake--Suit and Tie
13.  Ke$ha--Die Young
14.  Ke$ha--Die Young (Deconstructed version)
15.  Ke$ha--Crazy Kids Remix
16.  Ke$ha--Dirty Love
17.  Little Mix--Wings
18.  Miranda Lambert--Easy Living
19.  Miranda Lambert--Mama's Broken Heart
20.  Miranda Lambert--Me and Charlie Talking
21.  Miranda Lambert--Over You
22.  Miranda Lambert--White Liar
23.  Miley Cyrus--We Can't Stop
24.  The Vaccines--Wreckin' Bar
25.  The Vaccines--Teenage Icon

That is a deal! Just wanted to share it with my friends so you can start browsing the selection! And if your library doesn't have a subscription, maybe you can ask them about getting one.

Pin 210: McCormick's Meatloaf Copycat Recipe

Original pin:
Mum in Bloom ~: From Scratch: McCormick's Meatloaf Seasoning
http://muminbloom.blogspot.com/2010/04/from-scratch-mccormicks-meatloaf.html

Last night was meatloaf night around here. I had intended to pick up a spice packet at the store but yesterday was a little crazy and I forgot. Pinterest to the rescue. I just did a quick search and this was the first one to pop up. It claims to be the McCormick's recipe. I had all the ingredients on hand so I decided to give it a try.

My copycat picture of the ingredients. Her counter and backsplash are strikingly similar to mine as well. . . 
The final mix is a little more than I expected and I wasn't sure if this was for one meatloaf or intended to use for multiple. In the comments of the original post I found that it is for one so I dumped the whole thing in.
I mixed everything else in and the herbs were already starting to smell good. Just needed to add my extra ingredient that goes in all my cooking:
not ketchup. . . love.
My ketchup writing skills are a little sub-par. One hour later, and smelling delicious, the meatloaf was done and out of the oven. 

The meatloaf had a great flavor, although I'm not sure it was exactly McCormicks. It was a touch on the dry side so next time I might add just a bit more milk. I made it with extra lean ground beef so that may have caused the dryness. A little ketchup on top fixed that right up. My husband took one bite and said, "Is this a new recipe?" He liked it but he, too, noticed it wasn't quite the same thing.

Total cost: $0

Total time: 5 minutes

Final verdict: We really did like the flavor in this meatloaf. I didn't have to go out of my way to locate any random ingredients. It came together in seconds. We really did like the flavor better than the original. Next time I may make this in bulk so I can just measure up what I need. I will definitely make this again, and either use a less lean meat or add a bit more milk to keep it moist. 

Friday, July 12, 2013

Pin 209: Shredded Chicken in the Stand Mixer

Original pin:
???
I really thought I HAD pinned this but after using the pin search and conducting my own, apparently I didn't pin it. I must have just read it somewhere and let my vise-like memory retain it for future use. I searched it on Pinterest and there is a ton of different sources so I can't attribute this to one original.

Anyhoo. . .

One of my absolute favorite slow cooker meals is lime-chicken tacos. Incredibly easy, versatile, and the leftovers freeze amazingly well. The most time consuming part of the whole process is shredding the chicken after it is cooked. I usually use the old two-fork method and spend a good ten minutes or so shredding each piece up individually.

When I recently made this dish, I really did have to weigh the benefits of trying this one out. You may remember Mr. Pinspiration's deep dislike of dish work and I think he secretly believes that I intentionally use more dishes in meal preparation than necessary. He especially hates those "hand-wash only" items, such as my stand mixer bowl and accessories. Pulling this out really had to be worth it if I was going to suffer the sighs and grunts of Mr. Pinspiration at dish time. I figured I could try it once.

I placed my warm, super tender, cooked chicken breasts into the mixing bowl. They were starting to fall apart already!

Locked and ready, I turned the mixer on to watch the magic. 

Holy stand mixer, Batman!! The entire bowl was perfectly shredded in approximately 3 seconds!!


Back into the slow-cooker for the final preparations and then my meal was ready to eat. Just load it into some warm tortillas and dinner was served!


Total cost: $0

Total time: 1 min (It took a few seconds to put the chicken in the bowl, carry the bowl to the other side of the kitchen. . . )

Final verdict: I could not be more amazed at how quickly it all happened. I couldn't even get any in-action shots before it was done! And the shredding was much more uniform than my old fork-on-fork method. Was it worth the extra dishes to wash?? Absolutely! I will NEVER hand shred meat again! I can wash and put away the mixer in less time than I was hand shredding the chicken previously.

Thursday, July 11, 2013

Pin 208: Slow-cooker Beef Stroganoff

Oh hello there!

It has been a while since we've seen each other.

First, I was studying really, really hard to finally take that test I had been putting off. Day of the test, I had to drive across town in the summer's only rainstorm--which happened to be a road-flooding-highway-closing-near-hurricane-torrential downpour. A great load of stress to start off the morning with. After almost two hours of testing I left with this:


My stomach was in so many knots. Then the drive home, while sunny and dry-ish, wasn't any better due to a jack-knifed semi closing the entire freeway. But I can breathe easy now because that is all in the past and I have added an extra pin to my pin collection.


By this time, our summer was in full swing and I was shuttling kids from swimming lessons to playdates to gymnastics to fairy class to library reading club to drawing class to ballet. . . .

Next up was a full week of VBS for me and the kids at church while still making as many lessons and playdates and everything else we had committed to. I needed a break so we headed out here for some relaxation:


Back at home, and mostly recharged, it is back to playdates and lessons and clubs and all the fun stuff of summer. But no more studying!!! WooHoo!!

So to catch up on a pin I did back before all this test nonsense. . .

Back during the forbidden foods week

I tried this slow-cooker beef stroganoff dish.


Original pin:

http://www.heathersbytes.com/beef-stroganoff/

It was super simple to toss it all together and it smelled delicious cooking. My only complaint was that when I added the sour cream to the hot dish it curdled and left little dots of sour cream curdles throughout. It didn't affect the taste and the curdles weren't large enough to affect the texture.

But I would NEVER be able to sneak this dish past "anyone" with sour cream curdles in the mix. As for taste, the kids and I thought it was yummy. Not unlike a meatballs and noodles with brown gravy I make sans sour cream on a regular basis around here. That eating child will just fall all over himself for any dish with pasta or gravy as a component. My non-eater has actually been a quite impressive eater the last few months and has been upgraded from "non-eating child" to "meat-eating child" as that is his favorite food group. He will eat pretty much any kind of meat and if you put something else close enough (or under) he might accidentally eat that too. As you may guess, he ate most of the meat out of this dish and a few noodles.
Total cost: Around $10 for a full slow cooker of this dish. It made at least six adult sized servings, if not more. The littles and I couldn't finish all the leftovers and ended up tossing some later in the week.

Total time: 10 minutes hands-on plus cooking time

Final verdict: It has a nice flavor and you can't beat the easiness of it. Because of the sour cream it will never be a regular around here. We didn't love it enough to try to sneak it past daddy and we probably won't make it again.

Wednesday, May 22, 2013

Pin 207: White Chicken Enchiladas

Original pin:

http://joyful-mommas-kitchen.blogspot.com/2011/09/white-chicken-enchiladas.html

I pinned this recipe for the Pinterest described "BEST enchilada recipe ever!!" over one year ago. I love me some enchiladas and some Tex-Mex so just the thought of these made me drool. Why, then, did it take me so long to make them?? I'll tell you why.

Mr. Pinspiration has a food issue. He absolutely refuses to eat anything in the "creamy" category, specifically if it is white (think yogurt, mayonnaise, sour cream, cream cheese)--unless it is dessert (i.e., frozen yogurt, ice cream, frosting, pudding, etc.), soup, or gravy. Mr. Pinspiration went on a little trip a few days ago so I went to the store and stocked up with plans to make a few of my favorite recipes with said ingredients.
There is cream cheese hiding behind there too.
Do you know anyone with any of this sort of affliction?? Apparently they are out there. I have met one other person who excludes this category of food based strictly on appearance. IMPORTANT note to my sweet, loyal, dedicated readers:  If I have ever served my husband a recipe with one of these said ingredients--DON'T CLUE HIM IN!!! He probably loved it and it could be the end of Pinspiration! Or the end of me! Its like pushing the self destruct button on the whole ship!
Not that I would ever try to sneak something in. Just in case I overlooked it in the ingredients. (And I do make substitutions sometimes.)

Back to enchilada talk. I used canned chicken to pull this together and it was ridiculously easy. Baked it up until it was bubbly and browning and served it up to two hungry boys.
Fresh from the oven.
It was indulgently yummy. I say indulgent because it really does not have a ton of nutritional value to it so it needs to be served alongside some nutrition rich foods. I served the boys some vegetable heavy Tex-Mex rice and a salad. How can you really go wrong with this much cheese? The boys loved it. They both ate their entire serving (even non-eating child.) Non-eater has actually been saying for days how much he loves enchiladas. I didn't have quite enough filling for the full ten tortillas the recipe called for, but I think I filled eight. There was more than enough sauce to spoon some over the top of the enchiladas after plating. 


Total cost: Around $6

Total time: Pulled together in 15 minutes plus baking time.

Final verdict: They won us over, but we won't be putting these in the regular rotation--mostly due to the forbidden ingredients. They were good, but a bit on the bland side. Perhaps that is because I used canned chicken. Maybe if I prepared the chicken with some Tex-Mex flair or stirred in some seasonings to the filling. They were a tad indulgent for me but were a delicious treat and am not letting the leftovers spoil! 


Tuesday, May 21, 2013

Pin 206: Whipped Body Butter

Before we get down to business I have a very important announcement for you! For months now, I have been talking about this certification test I am supposed to be preparing to take for work. This extensive studying (cough! cough!) has been keeping me from pinning as much as I would like. Well, my friends, I have booked a date to get this test over with!! Mid-June this nonsense will be over and I can get back to my pinning and blogging more regularly. WooHoo!!

Now on to business. . .

Original pin:

http://www.livingthenourishedlife.com/2012/02/homemade-whipped-coconut-oil-body

Whipped coconut body butter. Coconut oil seems to be the hottest ingredient lately. I see it in everything! I actually have four coconut body butter recipes pinned. I wanted to make some of this because I keep hearing about all the wonderful things it can do for your skin so I closed my eyes and just picked one of the pins. I ended up over at the Living the Nourished Life blog which has a super simple recipe. I had some coconut oil in the pantry but I wanted to give some of this as teacher gifts as well so I sent Mr. Pinspiration out to the market to pick up some more.

When I started this I noticed two different consistencies with my coconut oil. (I am going to stop here for a minute to clarify something--I am NOT a coconut oil expert. The extent of my coconut oil knowledge is as follows: Coconut oil comes from coconuts. When it is solid it can be very hard. Coconut oil has many different uses. The end.) Not sure if this was due to my different brands, one being fresher, or something totally unrelated.
The one on the left was my new jar, the right was the jar I already had.
The old jar was hardened and a little separated (as I expected) but the new one was so velvety soft and coconutty looking I almost wanted to put a spoonful in my mouth! It looked like the inside of some wonderful coconut dessert!
Extreme close up!!! See the difference in the textures?? The left was the new jar and the right I dug out of the older jar after chopping up the hardened part and stirring back with the oily part. 
I started with the more delicious looking fresher jar. I set my stand mixer to work and danced around singing the "Whip It" song because I couldn't resist.

My singing must have sent off some bad vibes because my body butter was looking nothing like I expected.
It was totally liquefied. I figured this had something to do with being here in sunny Fort Worth and in my comfy 78 degree house. (I can't afford to keep it any cooler here in Texas so my body has adjusted to this 78 degrees and I now find it perfectly comfortable. Except for in the winter when my husband insists we keep it more like a chilly 68. Brrrr. I am a Texas girl and the heat doesn't bother me.)

I poured this in a small jar and popped it into the fridge. Next I whipped up some from the older jar with similar results. I even packed ice packs around the bowl to keep it chilled while it whipped. Into a jar and into the fridge it went. Before I whipped the third, and last, batch, I chilled the coconut oil itself, just to see if I could get any different results. The chilled coconut oil initially whipped up like it was going to get that fluffy appearance as in the original pin, but even packed in ice, started to melt quite a bit after two minutes.

Just as an experiment, I re-whipped one of the original jars after it had chilled. Still not airy and fluffy, but it didn't quite liquefy as much.

After much experimentation, I ended up with three jars of similar consistency.  I tried fragrance with one of the batches, but the coconut scent was delicious and I didn't feel the need to overpower it with a different smell so I didn't add it to subsequent batches. Refrigerated, the mixture hardened to a consistency that was like cold real butter--hard but manageable.
A freshly chilled jar
Once allowed to reach room temperature, the body butter is very soft with a consistent texture. I haven't had any separation of ingredients or re-hardening of the oil. It isn't the fluffy, airy texture I expected, but it isn't unpleasant either. It melts really fast in my hand so I have to move quickly transferring it to wherever it is headed. There are tiny bits of coconut oil that I can feel when I smooth it over my skin, but they melt quickly. I compare it to those little beads that are sometimes in face wash that dissolve quickly.
Two of these jars were for gifts, so I stamped up the tops to get them ready for the teachers. 


I wrapped them up in a 16x16 square of fabric with a little note and a quick bow and they were ready to gift! 

Total cost: I can't say, because these were gifts. I used about 1/2 jar of coconut oil for each jar and made three jars. 

Total time: After much experimentation, I would estimate you could make this in 10 minutes. I spent about 1 & 1/2 hours playing around. 

Final verdict: It is very indulgent to use! I love this and will be using it frequently. I hope the teachers liked it as much as I do. The recipe was surprisingly simple and uncomplicated. If your house is cooler than mine, you can probably achieve a less melt-y texture than I did. I have been keeping it in my bathroom and the consistency has stayed the same as it was originally in the butter rewarmed to room temperature. In the summer, it may be more enjoyable to have the butter chilled to apply. This pin was a winner for me, but next time I just may have to try out some of those other recipes. 


Monday, May 13, 2013

Pin 204 & Pin 205: Wristlet Key Chain with Hand-stamped Charm

Original pin:

http://prudentbaby.com/2010/11/hot-mess/accessories-hot-mess/how-to-make-a-wristlet-key-fob-2/

A wristlet keychain tutorial from the ladies over at Prudent Baby.

As I mentioned a  few weeks ago, I was putting last minute details together on Teacher Appreciation week. Like last year, I was in charge of putting together gifts for the whole preschool. Since I am on a super tight budget, I am always looking for inexpensive gifts to make for the teachers. Since I have to put together so many, they have to be quick and inexpensive. These keychains seemed to be perfect. I also was able to tie the whole luncheon theme together with the keychains. As I am sure many schools experienced this year, our preschool was entirely rekeyed with strict implementation of renewed security measures. All the teachers are having to carry their keys everywhere. We made keys the theme of our lunch.

I found a super deal on the webbing and picked up some matching ribbon. I had to order the key fob sets from Amazon because I could not find them anywhere locally. Click the picture to see the kit I am referring to:


I used the one inch width.

I brought all these supplies along on my girl's crafting weekend last weekend and went to work.
I actually skipped the step on fusing the ribbon to the webbing. I was feeling a little lazy. Instead I just held it in place and sewed along. Not much later I had this big pile of ribbons and webbing.
Time to start trimming!
I discovered a severe miscalculation at this moment. I needed 21 keychains and had somehow purchased and sewn enough ribbon and webbing to make nearly 80!! I only had hardware for 25 at my retreat so I packed the excess up. Guess I'll be giving a lot of keychain gifts in the near future!! I clamped up the 25 sets I did have and went to work on step two of my project.

Original pin:

http://happyhourprojects.com/jewelry-stamping/

Metal stamping is something I have taken up fairly recently (I asked for my first alphabet set for Christmas last year) and I kind of jumped into it blindly. I need all the help and tips I can get and this tutorial had some good advice. I picked up a few new tricks and learned that some of what I was already doing was on the right track.

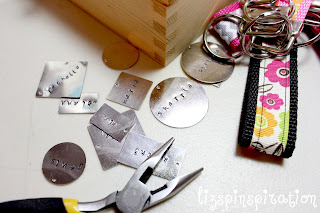
I wanted to do some hand-stamped metal name charms to add to my wristlets. Lucky me! My friend across the crafting table at our retreat had some cuter stamping letters than mine so I borrowed hers and went to work.

In metal stamping, it always takes me a few tries to warm up to good stamping. Here was my first attempt at a charm that night:

I was talking and twirled the L without thinking! oops.
Just like with exercising, I must always warm up my stamping fingers before getting down to the serious stuff!

The rest went much more smoothly.


After my names were all stamped up and stained, I used a jump ring to attach them to the key fob hardware.

My busy, busy work station:
All the important supplies: stamping bench, pliers, nylon hammer, glass of wine. . . 
Once they were all put together I had these little beauties ready for all the teachers!


So cute! And fit right in my budget. 

Total cost: Prudent Baby put hers together for less than $1 each, but since I added the charm, mine were closer to $1.50. Still a pretty good price. I found a comparable wristlet selling for $9.99 without the personalized charm!

Total time: These were much faster to put together than I anticipated. Again, however, due to my sweet, sweet crafting scene, I wasn't much paying attention to time. It probably took around one hour to sew all 24 yards of webbing and ribbon together. With clamping and stamping, I would estimate another 2 1/2 hours or so. . . its fuzzy--there was pineapple lush cake involved in there somewhere. . . 

Final verdict: I love the way they turned out. They were so easy! I ordered some additional hardware when I got home from my trip to put together the rest of the wristlets. Hate to ruin the surprise, but if its your birthday. . . or anniversary. . . or if you are graduating. . . . or lonely. . . you may be getting one of these!