Showing posts with label baby. Show all posts

Tuesday, September 22, 2015

How to Make Wall Decals Stick

Hello again faithful followers! Long time, no see. . . I MISS YOU!!! Life with three boys is crazy! Crazier than I could every imagine, but I love it nonetheless. Here is a little gift for you. A post I have been working on for, oh, about 19 months or so (!!!) Seriously, how do moms have time to do anything for themselves? It took me almost two years to get this gem ready for you guys!

Shortly before number three's arrival, I put his nursery together. (And shortly is an understatement. This was literally days before his arrival. Welcome to your life little brother.)  Sometime around midnight one night I decided to put up the wall decals that came with his nursery set. You know, those stickers that are supposed to go on the walls to decorate, but claim to be removable and repositionable and still stick.  I didn't think our walls were necessarily "highly" textured, but I could not make those darn things stick! I would put them on and mere seconds later they would slowly peel free and crumple to the ground. I searched online for tips and tricks but all I found were people with the same problem as me. Not one to be defeated, I figured out how to make those suckers behave against their will.


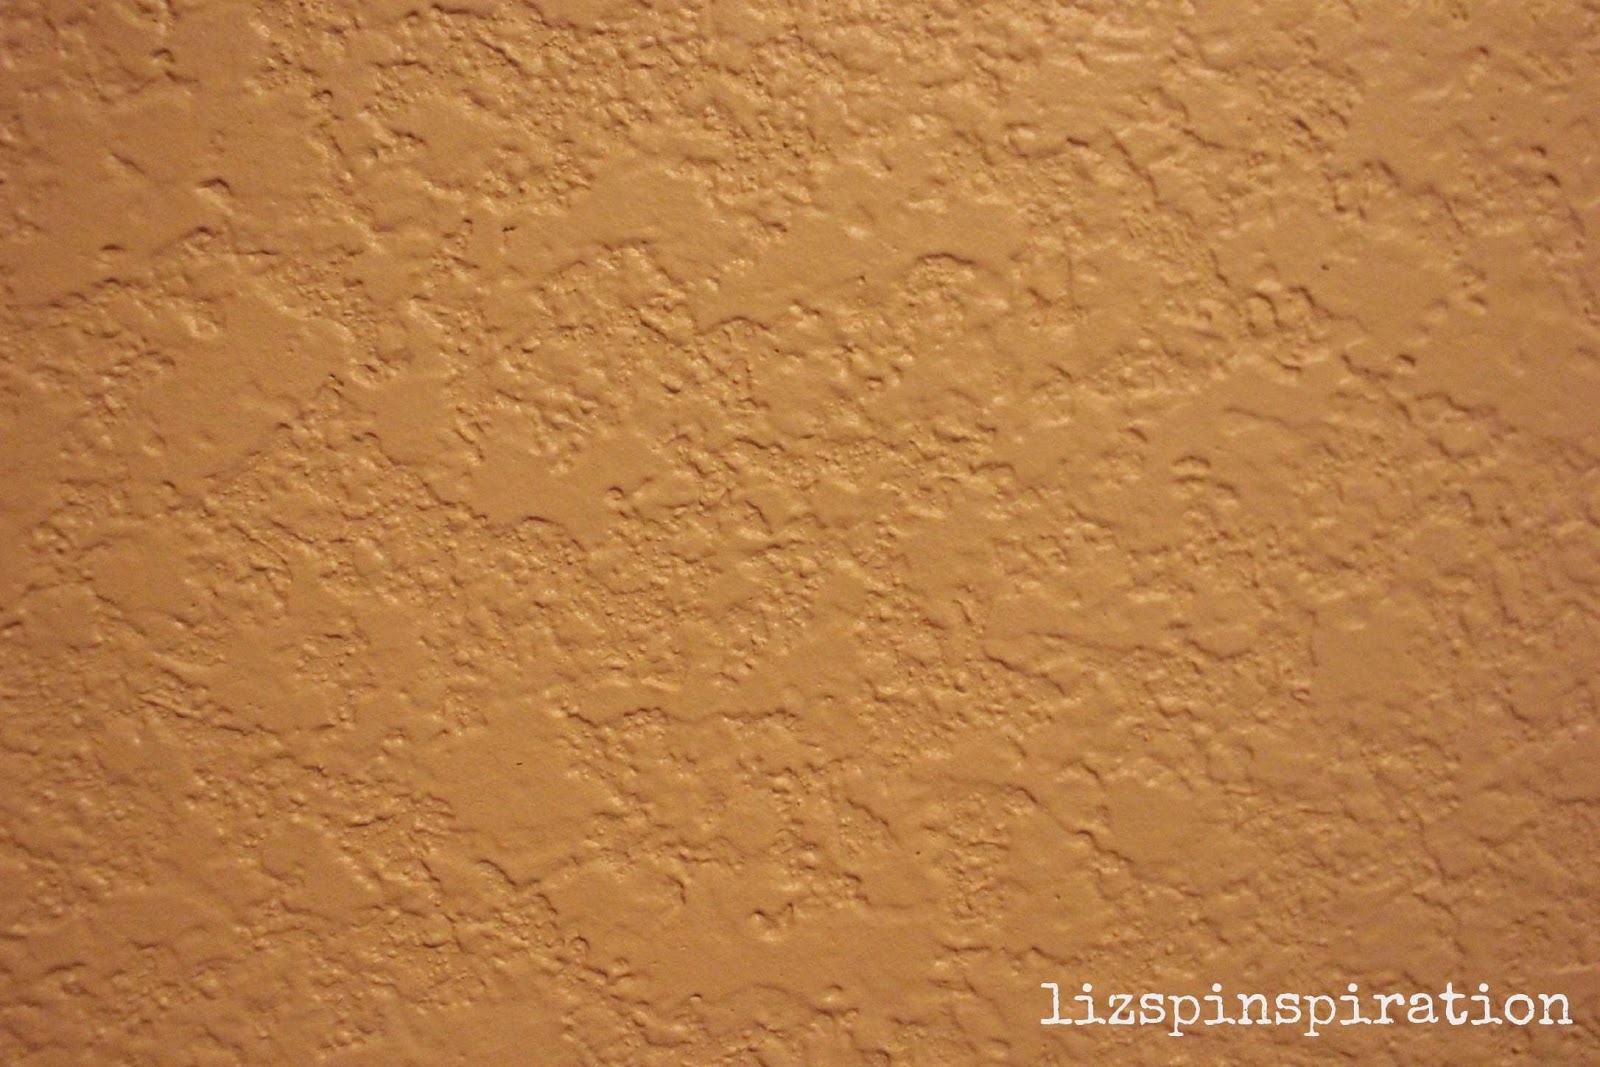
Let me backtrack a little bit. So, these particular stickers are Skip Hop brand, but this trick can apply to any of the vinyl stickers out there. Here is a close up shot of the texture on my wall, which is also covered in a semi-gloss latex paint.


After fighting with the ornery stickers for an hour or so, finding no help from my friend the internet, I was all in. I decided that these were going to stick where I wanted them even if I had to glue them up there with super glue (which is NOT what I ended up doing, so try this method first.)  Disclaimer: The following process didn't damage MY walls. I can't guarantee that this won't damage your walls so do a little patch test in an inconspicuous spot first. However, throughout this, my stickers have remained fully removable, repositionable and have stayed put for the 19 months they've been there. The photos here are not of the actual process when I put them up--because I was only blogging in my brain at the time, but I have used this process to repair decals that have come off thanks to sweetie pie's help. This decal I'm repairing is above his changing table and he has ripped it with his toes while fighting against his diaper changes, sweet little angel of destruction.


What you need--an iron and a presscloth. If you don't have a press cloth, just use a scrap of cotton fabric or a towel. Something to be a barrier between the iron and the decal.)  Set your iron to no steam and the heat to low-medium low to start. You may have to turn the heat up depending on how hot your iron gets and the thickness of your presscloth, but start low. You can always go up.

Position your decal on the wall where you want it. Place the presscloth over the decal.

Iron over the decal and presscloth with medium pressure making small circles for 10-15 seconds at a time. You are basically trying to soften the vinyl. Note--if you touch the actual vinyl with your iron you will most likely melt the vinyl to your iron thus ruining both your decal and your iron--so watch out!

Once you have sufficiently softened your decal, remove iron and presscloth. Run your hand along the decal using your fingers to really press the decal down into the texture grooves on your wall.


You may have to repeat the process a few times to really get a feel for how soft your vinyl needs to get and how hard to smooth the decal down so don't get discouraged if it doesn't work immediately. My decals were pretty big so I just worked it in sections around and around until all the edges were smooth against the wall. Other than that, its pretty simple. My husband did come in in the middle of the night to find me ironing the walls and he certainly gave me a crazy look. I just blamed it on the crazy pregnancy hormones and that lovely pregnancy insomnia and shooed him out of the room.

The top picture is the finished product of the original application. Here is the finished repair job:
Zoomed in. You can see a tiny crack where the decal had been ripped. 

But from a few feet back you don't even notice it. 
Hope this helps you! I would have loved to find this when I was in the middle of my frustration with the peeling decals. Happy wall-ironing!

Hope to see you again soon--I'll be back blogging regularly again just as soon as I finish running the boys to school, cello lessons, gymnastics, reading academy, Bible camp, doctor's appointments, Dayschool, tennis lessons, reviewing their homework, practicing spelling lists, returning library books, editing the school yearbook, selling 800 cases of fundraiser chocolate, feeding the masses, working my REAL job, kissing on all the boys, training for my next half-marathon, taking my husband out on a date here and there, PTA meetings. . . .

Friday, August 24, 2012

Pin 123 & 124

Original pin:

Pinned Image
This particular photo is from http://probablyactually.wordpress.com/ but it links to the original tutorial found here: http://blog.craftzine.com/archive/2009/05/craft_pattern_podcast_snuggler.html

The little girl I've been sewing for lately needed a swaddle wrap to add to her collection. As a neonatal nurse for over 10 years I have performed the swaddle literally hundreds of thousands of times. I have very specific requirements and techniques for it. I looked at this tutorial and a couple of other pictures of different styles of wraps and then just made my own pattern. I took out the Velcro. Instead, I made the right wrap to encircle the baby completely. Sadly, I had no model available so I had to steal Mr. Kitty late at night out of one of the boys rooms. He seemed to be about the size of a newborn, just fluffier.

I added some extra lightweight interfacing to the swaddle straps to help them keep their shape. I also made the entire thing out of cotton. It is August in Texas. No infant should be dressed in flannel or fleece this time of the year.  Safe Sleep recommendations warn against overheating so I felt cotton was a good choice. Cotton outer shell, cotton lining, extra lightweight interfacing, and matching thread were my supplies.

I played around with it a little and it was very simple to piece together. Finished it up and tried it on Mr. Kitty.

The top strap started at the right, went over both arms and around the back. Mr. Kitty is pretty squishable so his top strap went pretty far.


Thanks for sharing Mr. Kitty with me, L.
 Total cost: Not gonna say--it was a gift. I used about 3/4 yd each of lining and outside. I didn't even think to take a picture of it open so I could show you the pretty lining and how I changed the straps.

Total time: 2 1/2 hours but that includes the figuring out how to make this time. When I sew without a pattern I usually have to sit down and visualize it for a few minutes first.

Final verdict: It fit Mr. Kitty pretty well. I didn't get to try it on baby because when I went by she was out of the room for tests. I was a little worried it wasn't going to be long enough for her. Next time I will make the foot portion narrower and longer. This time it was more of an oval shape from shoulders to feet.


Original pin:
Pinned Image
Original source unavailable.

Wrap baby gift in a blanket instead of paper.

So I made her a receiving blanket and wrapped up her pink stuff inside.

Total cost: no comment--gift

Total time: I can make a receiving blanket in 20-30 minutes or so.

Final verdict: Pretty presentation. Got that baby girl some pink now!

Tuesday, August 21, 2012

Pin 121

Original pin:
Pinned Image
http://smashedpeasandcarrots.blogspot.com/2011/01/how-to-sew-bias-tape-tutorial.html

A tutorial on how to sew bias tape on correctly. I never knew I was doing it wrong? hmm.

Clearly I was because mine never looked this good.

One of the easies baby gifts I like to make is to sew pretty ribbons onto plain white birdseye diaper cloths. Yes, babies are just going to puke on them anyway, but mama's got to have something cute to toss over her shoulder while getting puked on in public at least. I like the ones with the seams down the middle because then I don't have to pin it and I get perfectly straight lines. If you've been with me a while, you know I am a short-cut kind of gal. I really just prefer to pin to Pinterest.

So, I take these ribbon scraps and sew them down each side along the middle seams and then trim the bottom and top edges with bias tape. My friend has a new little girl in need of some pink so I spent last night whipping a few pink things up for her. I already had this partially ready. I had leftover ribbon and trim from another project that I had tacked on to the cloth a while back when I still had the right thread in the machine. I didn't have any bias tape so it sat unfinished in the project closet for quite a while.

Magically, while looking for my zipper foot last week I came across some pink bias tape. Pulled this out last night and decided it was time for me to grow up and learn how to use bias tape correctly. The tutorial was easy to follow and I was thankfully just sewing two straight lines.

Lookee here! All pinned up.
 It was the most beautiful bias tape I have ever sewn. End of story.


Total cost: $0. Pulled together 100% from leftover pieces.

Total time: That pinning is work, you know. 20 minutes.

Final verdict: It really looked much better. I just never knew I was doing it wrong! I feel so smart now.

Monday, August 6, 2012

Pin 114

Original pin:
http://ashbyfamilyblog.blogspot.com/2010/08/ms-long-legs-pattern-tutorial.html#axzz1n1zpAvTl

Cute little tutorial for owls. I recently got my Pottery Barn Kids catalog in the mail and these reminded me of this tutorial I had pinned a while back.

Penny & Joy Owl Plush

Lucky me! I just so happen to know a soon-to-be born wee one who needs a little stuffed owl to decorate the nursery up. Inspired by these two, I decided to whip up a fat little owl of my own.

I didn't use a pattern, just looked at these cute little guys and created my own interpretation drawing from each. If you are looking for a pattern, the top link has a pdf you can download. I didn't have access to a printer (read as: I didn't feel like lugging my laptop across the house to plug it into the printer. Lazy much?) so I just created it as I went. (Dangerous--yet fun. I like to live on the edge.)

Once I had the eyes appliqued on I packed up the pieces and headed out to girls craft night to finish this owl off with a glass of wine and some mint milanos.


My little guy turned out boxier than PBK's and Toad's Treasures, but I sure thought he was cute. He made a great little pillow too! My son was really sad to see him whisked away and is hoping I will make him something to snuggle with next.

Total cost: Ahem. I don't usually comment on costs of gifts. Cheaper than PBK.

Total time: 2 hours

Final verdict: I love him. I hope little PJ loves him too. He will make a perfect little kid sized pillow too. I think he likes his new place. Owlie sent me this photo of him and P at the new house:


Sunday, August 5, 2012

Pin 113

Original pin:
Pinned Image
http://www.skiptomylou.org/2011/02/15/10-beautiful-ways-to-crochet-a-flower/

10 ways to crochet flowers.

If you've been following me for a while, you know that I only recently took up the hobby of crochet. I haven't yet made any flowers, though I've seen them all over Pinterest.

I finally had an occasion to make some flowers so I went to this tutorial to learn how. I chose three different ones to learn, but what I've found is that they all use pretty much the same basic technique. I learned these during nap time one afternoon. They were so easy, and impressive. I just had to whip up one of my yarn letters from Pin 43 to stick them on.


This is for soon-to-arrive sweet Baby PJ. One of my dearest friends is having her first baby in just weeks, and although no one really knows the gender yet, I wanted to make sure she had a little pink on hand, just in case. They are just safety pinned on. I am going to have to learn how to crochet a boy-ish accent in the next few weeks if I need to replace the pink with blue! I'm thinking stars? Yellow and blue stars?

Total cost: I only had to buy supplies to make the P. The flowers use so little yarn, I was able to use leftover pink & yellow I had in my stash.

Total time: I learned three different styles and completed them in less than 3 hours.

Final verdict: As one blogger warned, flowers are addictive. I am ready to just stick them on everything. Watch out little PJ! I may turn you into a little flower girl when your mommy isn't watching!

Wednesday, July 11, 2012

Top Ten Favorite Pinterest Pins

As I promised yesterday, here are my top 10 pins.  These are MY favorite either because I have used them over and over again, or because they were just awesome to begin with.

10. Pin 80: Knitted swiffer cover. I have already received requests for these for Christmas gifts. Better get started now!
9.  Pin 49: Mommy dress.  I wear this all the time and always get compliments on the color combo. I did go back and fix the sleeves, just in case you were wondering.

8.  Pin 31: Frozen yogurt dots. We can't walk by the yogurt at the grocery store without my kids asking to make these.
7. Pin 71: Lemon slices and daisies. I am still amazed at how long these flowers stayed beautiful and fresh. Weeks.
6.  Pin 53: Homemade pita bread. Simple and delicious. So many ways to stuff the leftovers never last long. But best right as they are coming out of the oven hot.
5.  Pin 35: Honey Almond Sugar Scrub. I love this as a facial scrub and use it nearly every day. I have used this basic formula to create other varieties by using flavored teas and different extracts.


4.  Pin 23: Sock bun. A pinterest legacy. I don't get super awesome curls but I think it is a fun way to wear my hair up and out of the way. A change from the boring ponytail, a comfortable way to sleep, and a great way to hide hot-mess-mommy hair. I still think its weird when people know I'm wearing a sock on my head though.
3. Pin 12: Glow bath. My kids ask for this all the time. I use it as a reward for good behavior or as a trick to get them into a bath when I am just too exhausted to fight.
2.  Pin 5: Make your own foaming soap. Genius. I will never buy foaming soap for my children ever again. You can create this for pennies.
1. Pin 37 & Pin 90: Technically two projects but they came from the same pin so I am considering them one. The tank maxi and short dresses. I always get compliments on these when I wear them out.


My top five posts based on YOU! Ranked by popularity & views:

5. Pin 69: Microwave corn to remove silks & husks lickety-split


4.  Pin 89: Cafe Rio Chicken: Made in the slow cooker with so many uses.

3.  Pin 92: Classic Baby Blanket Crochet Tutorial. Almost done with number 2.


2.  Pin 90: Short tank dress
1. Pin 91: Jillian Michaels Detox Drink. Aren't we all looking for a quick way to lose weight?


Thursday, July 5, 2012

Pin 95

Original pin:
Pinned Image
http://crejjtion.blogspot.com/2011/09/crochet-hexagon-tutorial.html

A tutorial for crocheting granny squares.

On the way home from our vacation a few weeks ago I needed something to pass the time. I had some yarn and a crochet hook and decided the car ride would be a good time to learn granny squares.

Firstly, this website has some absolutely gorgeous photographs and gorgeous crochet projects.

Secondly, the tutorial was very easy to follow. There was only one item that wasn't immediately clear to my newbie crochet self. That was that after step one, in which you make the initial loop, that the next layer is worked through the ring you created in step one. I thought you were working through the loop stitches but I just couldn't seem to make that work. When I worked round two through the ring it seemed to come out like the picture. Someone correct me if I am wrong on this one. . .

After I worked through that first problem, the rest of the tutorial was awesome. I can whip these puppies out pretty quickly. I just kept going and made my squares with a few more layers. I have a couple squares lying around now. They are easy and fast to make. I'm going to have to revisit this site when my collection gets big enough because she shows you how to join them all up for a blanket.


Total cost: $0. I just used leftover yarn I had lying around.

Total time: 45 minutes - 1hour per square

Final verdict: I was surprised at how easy this was. This post is out of order because I actually made these before I made the baby blanket. It was a easy way to learn the double crochet stitch. Although this site doesn't actually detail the double crochet stitch itself, but the granny square is made with double crochet. I have this blanket made for me as a child that is a bunch of randomly colored granny squares. I am totally inspired to create one of these now that I can granny square! I'll probably finish it in about 20 years--in time for my grandchildren. Ha!

Tuesday, June 26, 2012

Pin 92

Original pin:
Pinned Image
http://onelittlerayndrop.blogspot.com/2011/04/classic-baby-blanket.html

It's raining babies around me. I love to make baby gifts. One of my dearest friends was having her baby shower this past weekend and I really wanted to make this for her. I found it originally on ravelry.com and pinned it to my crochet board. Ravelry had it rated as easy. Just what I need.

I grossly underestimated the amount of time this would take me. I am no crochet professional, that is for sure. I wanted to start this when we were on vacation but I didn't have time to get the yarn before we left so I had to wait until we got home. That gave me just 8 days to whip this together. I worked on it night and day, during every class my child had at the rec center, during nap time. . . and I finished it the morning of the shower, just in time, whew! It was far from perfect. I wish I had had more time to make it perfect. I can only hope the mistakes that are so obvious to me are not obvious to everyone else! I know the baby won't notice them, at least! I can say that although I felt rushed in making it, and its not perfect, it was made with lots and lots of love.

The pattern itself was gorgeous. I just love it so much. I made it with 100% cotton yarn (I Love Cotton from Hobby Lobby) and it was soooo soft. I wanted to keep it for myself and snuggle up with it. And it was easy, I'll admit that. I did have to google how to crochet in the back loop.

I have already started the next one. I don't know who it will be for yet, I have so many babies growing around me right now! But I guess whoever's popping around the time I wrap it up will get this one! I predict that at a leisurely pace, this will take around one month.

I didn't get a great picture of the finished product, I had to wrap it up and head out to the shower! But I snapped a quick close-up right before it went in the gift bag.
The scalloped edge is the border. The blanket is folded over on itself so I could show you the border. My rows were straight, but my picture made them look crooked.
Total cost: Not saying--it was for a gift! But I used 4 1/2 small skeins of cotton.

Total time: 7 days, all consuming! But totally worth it.

Final verdict: I want one for myself! Do you think and adult sized one would weigh a gazillion pounds? Probably.

Tuesday, May 1, 2012

Pin 64

Original Pin:
Pinned Image
http://www.sugarbabyaprons.com/blog/item/78-im-dreamin-of-a-pink-christmas

Pink Lemonade Pound Cake--a perfect Spring treat!

I needed a desert to bring to work today to show some coworkers just how much I love them. This looked yummy and spring-y. It smelled absolutely delicious while it baked. It starts with a cake mix so it isn't very complicated. My husband was upset that I wasn't making it for him because it smelled so good! The pink color of the cake is due mostly to food coloring. I didn't quite achieve that color because after about 8-10 drops I decided that was enough. Mine was more pink-tinged colored but I covered it with enough pink frosting that it didn't matter.

Looks like a giant pink donut! I almost put some over sized sprinkles on top.
It was super tasty--sticky, yes, but moist and tasty! You can see in the picture that not all the pink lemonade poured on top after baking soaked in. There was maybe a quarter cup or so that oozed out on the plate. I was a little pressed for time, so maybe if I let it soak in overnight before flipping it that would have helped. As it was I gave it about one hour. It tastes better cold so I'm storing it in the refrigerator.

Total cost: $5 for cake mix, pudding mix, and pink lemonade concentrate

Total time: Hands on, about 45 minutes. An hour of baking, an hour of cooling. Then I put in the refrigerator.

Final verdict: It is good. Very sweet so I can't eat too much at once--which is a really good thing. That also makes it a great cake for sharing. It would be so cute for a baby shower for a baby girl or an Easter dessert.

Saturday, February 25, 2012

Easy luxe baby blanket

My own project!!

I would rather make presents for new little babies instead of buy them and I know a gazillion pregnant mommies right now! I could go broke buying gifts. This was inspired by Will's favorite blanket. We got it as a gift before he was born and it is now his favorite, gross, overly-loved, cry-by-the-washing-maching security blanket. What better to give to a new baby than a tried and true lovey?

Minky dot on the top, backed with satin, satin trim... couldn't be easier?
My supplies: fabric, thread, blanket binding

I am making this one for a girl. I wanted to make a square blanket with minimal measuring and cutting, so I decided that the best way to accomplish this would be to buy enough fabric to make two blankets. Since I have plenty of babies to sew for I know I will use the second one. So I bought a length of each fabric (minky dot and flannel backed satin) that was the same length as the bolt width (since the fabric is doubled over on the bolt) and then just cut the fabric at the fold. Ta-da! Two squares!

Notice my squares don't line up exactly.
I layed one square on top of the other, wrong sides together, pinned, and basted them together with a wide zig-zag close to the edge. Then, I pulled the blanket binding out of the package and lined it up and straight stitched as I went. I folded the corners around as I came to them and then tucked the edge under. No pinning, no ironing, easy cheesy. My final product. . .

Pretty cute--White minky dot with pink satin backing.

Total time: 45 minutes

Total cost: I can't say because I have two friends getting this! But I will say that it is at least 60% less than what you would pay for Will's version.

Final verdict: Receipient number 1 seemed happy! Now, gotta go make number 2's.