Showing posts with label project by me. Show all posts

Tuesday, September 22, 2015

How to Make Wall Decals Stick

Hello again faithful followers! Long time, no see. . . I MISS YOU!!! Life with three boys is crazy! Crazier than I could every imagine, but I love it nonetheless. Here is a little gift for you. A post I have been working on for, oh, about 19 months or so (!!!) Seriously, how do moms have time to do anything for themselves? It took me almost two years to get this gem ready for you guys!

Shortly before number three's arrival, I put his nursery together. (And shortly is an understatement. This was literally days before his arrival. Welcome to your life little brother.)  Sometime around midnight one night I decided to put up the wall decals that came with his nursery set. You know, those stickers that are supposed to go on the walls to decorate, but claim to be removable and repositionable and still stick.  I didn't think our walls were necessarily "highly" textured, but I could not make those darn things stick! I would put them on and mere seconds later they would slowly peel free and crumple to the ground. I searched online for tips and tricks but all I found were people with the same problem as me. Not one to be defeated, I figured out how to make those suckers behave against their will.


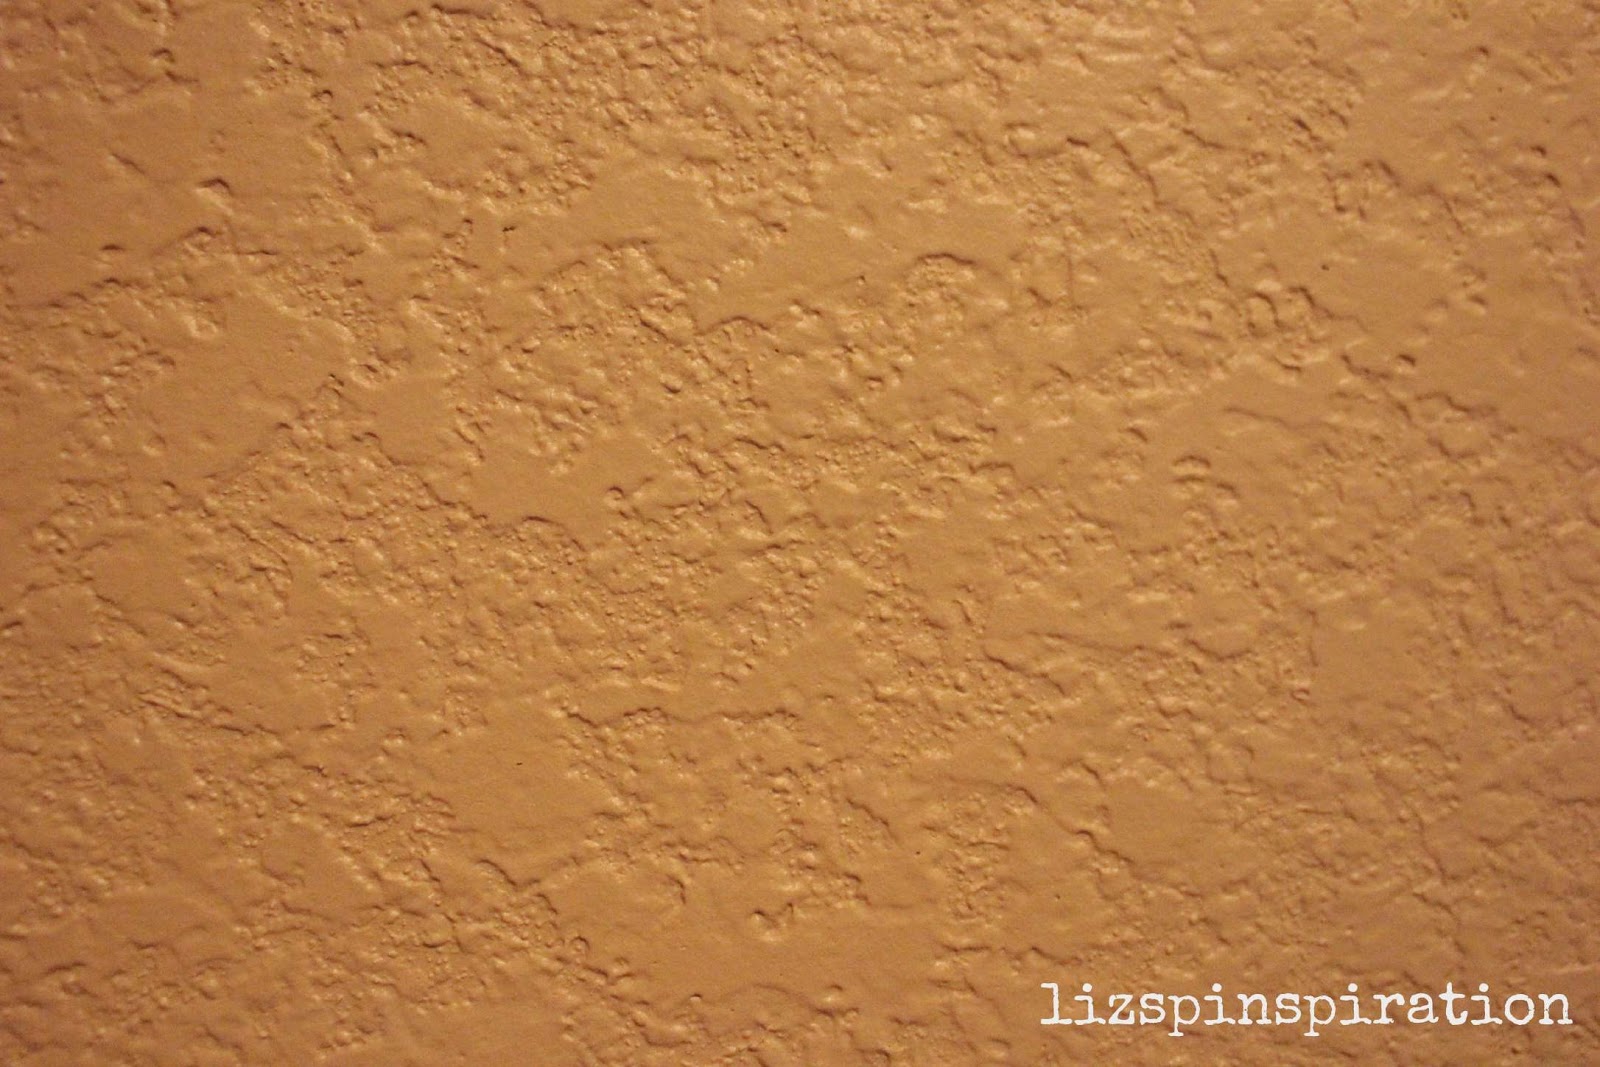
Let me backtrack a little bit. So, these particular stickers are Skip Hop brand, but this trick can apply to any of the vinyl stickers out there. Here is a close up shot of the texture on my wall, which is also covered in a semi-gloss latex paint.


After fighting with the ornery stickers for an hour or so, finding no help from my friend the internet, I was all in. I decided that these were going to stick where I wanted them even if I had to glue them up there with super glue (which is NOT what I ended up doing, so try this method first.)  Disclaimer: The following process didn't damage MY walls. I can't guarantee that this won't damage your walls so do a little patch test in an inconspicuous spot first. However, throughout this, my stickers have remained fully removable, repositionable and have stayed put for the 19 months they've been there. The photos here are not of the actual process when I put them up--because I was only blogging in my brain at the time, but I have used this process to repair decals that have come off thanks to sweetie pie's help. This decal I'm repairing is above his changing table and he has ripped it with his toes while fighting against his diaper changes, sweet little angel of destruction.


What you need--an iron and a presscloth. If you don't have a press cloth, just use a scrap of cotton fabric or a towel. Something to be a barrier between the iron and the decal.)  Set your iron to no steam and the heat to low-medium low to start. You may have to turn the heat up depending on how hot your iron gets and the thickness of your presscloth, but start low. You can always go up.

Position your decal on the wall where you want it. Place the presscloth over the decal.

Iron over the decal and presscloth with medium pressure making small circles for 10-15 seconds at a time. You are basically trying to soften the vinyl. Note--if you touch the actual vinyl with your iron you will most likely melt the vinyl to your iron thus ruining both your decal and your iron--so watch out!

Once you have sufficiently softened your decal, remove iron and presscloth. Run your hand along the decal using your fingers to really press the decal down into the texture grooves on your wall.


You may have to repeat the process a few times to really get a feel for how soft your vinyl needs to get and how hard to smooth the decal down so don't get discouraged if it doesn't work immediately. My decals were pretty big so I just worked it in sections around and around until all the edges were smooth against the wall. Other than that, its pretty simple. My husband did come in in the middle of the night to find me ironing the walls and he certainly gave me a crazy look. I just blamed it on the crazy pregnancy hormones and that lovely pregnancy insomnia and shooed him out of the room.

The top picture is the finished product of the original application. Here is the finished repair job:
Zoomed in. You can see a tiny crack where the decal had been ripped. 

But from a few feet back you don't even notice it. 
Hope this helps you! I would have loved to find this when I was in the middle of my frustration with the peeling decals. Happy wall-ironing!

Hope to see you again soon--I'll be back blogging regularly again just as soon as I finish running the boys to school, cello lessons, gymnastics, reading academy, Bible camp, doctor's appointments, Dayschool, tennis lessons, reviewing their homework, practicing spelling lists, returning library books, editing the school yearbook, selling 800 cases of fundraiser chocolate, feeding the masses, working my REAL job, kissing on all the boys, training for my next half-marathon, taking my husband out on a date here and there, PTA meetings. . . .

Tuesday, February 12, 2013

Pin 182

Original pin:
Pinned Image
http://dollarstoremom.com/2012/02/our-valentine-tradition-14-days-of-little-love-surprises/

I love this cute idea to help get in the holiday spirit. I pinned this a long before Valentine's Day and have been keeping my eyes out for some cheap Valentine-themed towels. Did I mention that this pillow is made out of towels? Like dollar-store-kitchen-two-per-pack towels? That is so my style. The idea behind the pillow is that there is a pocket on the front, and for the fourteen days of February leading up to Valentine's Day you leave sweet little notes and surprises for each other.

Unfortunately, I never came across said Valentine's day towels at the many dollar stores I frequent. I did, however, come across some St. Patrick's day towels. Put that together with a little red and voila! The "Lucky in Love" pillow is born.

Since I am making these for my two little boys who are notorious for sticky hands and snotty noses, I wanted to make sure these were washable. Pillow forms were on sale for half-price last weekend, so I picked up a couple of 12 x 12 pillows so that I could make these covers to slip on and off for washing.

I cut one 14 x 14 inch square and two 14 x 8 inch rectangles out of the shamrock towels.
Next I needed a pocket. I wanted to make my pocket out of the red and I wanted it to be heart-shaped. I needed to make a sturdy heart-shaped template. I keep a few empty cereal boxes in my craft stash because the thin cardboard is always coming in handy. I went to grab one off the shelf and found a Cheerios box in my hand. Looking down at it, I realized exactly how perfect it was.
It already had a giant heart on the box! What luck! It was the perfect size and now I didn't have to fuss with trying to get a perfectly shaped heart template. I cut out the heart and used it to trace two hearts out of the red towel.

I made a few attempts at getting this heart just right. One of the consequences of sewing on the fly is that you don't always do it the right way the first time. I'm going to try to show you the way I liked best but I didn't take many pictures of it.

I cut the two hearts out of the red towel. I stitched them right sides together almost completely around. Trim the excess, clip the corners, turn right sides out, press and topstitch around the whole thing, closing the open portion. I ended up with a nicely shaped lined heart pocket.
I pinned this to the center of the 14 x 14 square and stitched in place 3/4 of the way around, leaving the top open to make the pocket. Backstitch at the start and end to reinforce the pocket.
Yellow dotted line is the stitch line
Next I prepared the back. I serged one long edge of each rectangle to neaten it up a little. I sewed a 1/2 inch hem on one of the rectangles and topstitched close to the edge.
I pinned two pieces of Velcro in place on the hem and matched up the Velcro pieces on the serged edge of the other rectangle. I stitched the Velcro in place.

I laid the top piece down, right side up. I placed the back pieces on top, right sides together, lining up the Velcro strips and edges.
I pinned through all layers all the way around and stitched in place. Press, trim the excess, clip the corners and turn right side out. Press again and now it was ready for the pillow!
This was full version one, featuring heart version two. The heart is not exactly evenly shaped so I had to try it again.

Full version two, featuring heart version three--which I am completely happy with.

For comparison, version one on the left, version two on the right. Next to each other the lopsided-ness is much more obvious.

Total cost: $12 for two pillows--three shamrock towels, one red towel, two pillow forms

Total time: The first version took 1 & 1/2 hours, but since I had worked out a few kinks the second one was done in about 45 minutes.

Final verdict: I am going to give these to my boys on Valentine's day but I think I am going to have to replace the heart pocket on version one. My OCD-ness just will not allow that to stay when its twin is so much better looking. I know that my boys won't care in the least. The little lovebugs just adore anything I make for them.  I like her idea of sharing little messages but clearly missed the date on that one. These will be in season for at least another month, so maybe we will share messages from Valentine's day until St. Patrick's Day?  And now that I know how many dollar store towels it takes to make a cover, maybe I'll just whip a new one up for each season.


Wednesday, January 16, 2013

Pin 175

Original pin:
Pinned Image
http://styleawip.blogspot.com/2009_12_01_archive.html

Isn't that scarf beautiful?? I couldn't locate any details about who makes it, but the link mentions that it is $1,100!! Wow.  I had it pinned to my "I could make that" sewing inspiration board. Yesterday was gloomy, snowing, and cold. I took myself to the fabric store to create my interpretation.

I was looking for an easy replication that did not require hand sewing. I bought a quarter yard of lace and a quarter yard of some super soft knit fabric. In retrospect, I didn't do this in quite the right order, but I am trying to tell you what I think a more appropriate order would be. The pictures may not match up exactly to the directions. I measured off two cuts of eight inches of lace and applied some fusible web to the top two inches of each.

I trimmed the top along the lace pattern just to have a prettier edge than a straight line.
Then I removed the backing, and ironed it onto the bottom two-three inches of each end of the scarf.
Next, I sewed along the edges of the lace overlapping the fabric, just to secure it in place. I did not stick right along the cut lines.
My stitch line--more like an approximation of the edges.
The final step was to add a rolled hem to the edges of the scarf.
 
All done!
 
 
Time to wear it out to dinner with the girls!


Total cost: $5. Wow! I saved $1,095! Wait until my husband hears how thrifty I am.

Total time: 45 minutes--even with doing things a little out of order. I bet this could be done in 20-30 minutes next time.

Final verdict: It was sooo soft. It was fairly light weight too so it didn't feel bulky. I am not a fan of winter wear, but this didn't bulk me up and feel too wintry at all. It is very versatile and can easily be paired with lots! I am happy with the outcome!


Thursday, December 20, 2012

Pin 166

Original pin:

Pinned Image
http://sewlikemymom.com/the-great-cover-up/

This was labeled on Pinterest as a bath towel, but it is a tutorial for a swimsuit cover up. Either way it inspired me to make this cute bath gift for my niece's birthday last week. This pin was inspiration, er, pinspiration, only. I actually did not follow her tutorial--mostly because I didn't have any velcro. Great reason, huh? Since mine was for a little girl, I figured I would just make it pull over style. Here is how I made mine. . .

I started out with a regular sized bath towel. These things can be expensive, but I found a nice plush and soft one at Ross for just a few dollars. After washing, drying, and pressing it, I layed it out flat on the floor.
 I cut of each end of the towel on the innermost big line. I cut right along one of the small lines so that I left some of the flat edge in place to prevent fraying and general terrycloth mess. Then I serged along each cut edge.
I brought the serged edges together and stitched a 5/8" seam and pressed it open. Now I had a big tube towel.
I folded a large hem down along the top opening--around three inches. Pressed and pinned in place. I stitched nearly all the way around about 1/2 inch from the edge of the hem, leaving an opening for the elastic. Then topstitched entirely around the top, 1/2 inch from the fold. I measured a length of elastic that I felt would be large enough to easily stretch so she could pull it over her head, yet short enough that it would hold the towel up tight enough.
Finally, I followed the applique tutorial in Pin 70 and appliqued a "M" on to the lower edge of the towel. Here is the finished product:
I picked up a little basket of bath goodies from the dollar store to go along with it:
Body wash, bath soap, hand soap, shampoo/conditioner, mesh scrubbie, bath fizzles, hair detangler spray
I rolled it up and stuffed it down in the basket with everything else.
 
Total cost: $15

Total time: 1 hour

Final verdict: Cute and easy gift. Maybe a little practical for a 5 year old, but with some fun too. Poor kid comes from a practical family. Our side got her soap, an apron, a bike helmet. . . what can I say?

Here she is rocking her towel (or as 3-dub calls it--her cookie monster dress).

Wednesday, October 31, 2012

Pin 150

Original pin:
Pinned Image
http://www.etsy.com/listing/58441969/black-adult-tutu-long-black-skirt-sewn

This fun adult tutu is sold on etsy at the link above for $395.00. I attempted to recreate this skirt for my Halloween costume this year. . .

I did not do this the easiest way, I am certain of that. That is just one of the consequences that comes along with sewing without a pattern.  This is the way I did it:

First I created an underskirt from a cheap black sateen. I took a length that was 1 & 1/2 times my waist, finished the edges to prevent running, and sewed it shut along the short edge so that I ended up with a big circle of fabric.


Next I pressed about a two inch casing along the top edge. I pressed it with RIGHT sides together so that the casing would fold down over the front of the skirt.

I had estimated 25 yards of tulle to create a tutu this full. I didn't want to do the cut-into-sections-and-knot technique of tutu making that is common with kid tutu's. I just couldn't bear the thought of cutting 25 yards of tulle into strips. So instead I started by measuring the length I needed to reach the floor from my waist. I measured this out in tulle and then zig-zag folded the tulle until it was about four to six thickness. I cut it off from the bold and stitched along the top to hold the zig-zag together. Once I had folded and stitched the tulle I then started gathering  See Pin 147 so read how I did that. So I ended up with 6 or seven sections of tightly gathered, layered tulle.

I started pinning the sections around the top of the skirt, lining up the edges of the tulle with the pressed fold of the casing so that the casing would fold down over the top of the tulle.

Turns out, 25 yards was not quite enough.
So I ran out and bought 10 more yards to fill the gap. Once it was filled I basted all the tulle in place. Then I folded the casing down and stitched it into place. I tried a few techniques with the elastic but I am only going to share the one that worked!

I took black 2 & 1/2 inch elastic and sewed it along the top of the casing. I created a sash, from the same cheap sateen, that was ridiculously long--but that is the way I like it. Then I slipped the skirt on, wrapped the sash around my waist about a million times and tied it in a bow. Here is the final reveal!

(I had fun taking these pictures! Even more fun when I started playing with the effects!)


Channelling the original pin model


 At our first Halloween party I popped on a tiara, some cobwebs, and a spider and went as a Spider Queen.
My little mermaid and me
Total cost: 35 yards of tulle, 2 yards of sateen, and a dollar store t-shirt = $50-ish. A little more than I generally spend for a Halloween costume, but way, WAY cheaper than the etsy version.

Total time: I couldn't even guess! This was a lot of playing around to see what worked. And handling 35 yards of gathered tulle is no small feat! It got so thick that it wouldn't fit under my machine foot. I broke 3 needles on this skirt!

Final verdict: So fun for Halloween. . . but I may be wearing it for every Halloween for the next decade! Whew! This was a project. But what girl doesn't want a giant, fluffy tutu?

Wednesday, October 24, 2012

T-shirt Makeover

The other day I was wearing the Peasant Shirt I made back at Pin 16.
I was thinking how easy it was and it really is a very comfortable shirt to wear. Then, like a lightening bolt, it hit me. Jersey knit. Let's make it from a t-shirt. I love, love, love t-shirt makeovers!

My favorite place to buy cheap t-shirts is at my favorite local dollar store. Availability is scattered, so if I see one in a color or size I like I usually just grab it.

I dug a black 2XL sized t-shirt out of the stash and went to work.
I cut a wide scoop neck from shoulder seam to shoulder seam. I also put a rolled hem on the sleeves.
I don't know why this picture looks so wrinkly. It wasn't that wrinkly.
I finished off the edge of the neck and then folded and pressed it under to create a casing. I threaded some 1/4 in baby elastic through the neck line (around 28 inches) and sewed it shut. After trying it on, I added a rolled hem to the bottom. I put it on and started creating looks. Look at all the ways I came up with to wear it:
Just on it's own. Relaxed fit, soft comfy jersey.
Spicing it up with some off the shoulder action!

I grabbed a black sash (back from Pin 132) :
Sash low on the hips

Sash at the waist, off the shoulder sleeves

Highest, empire waist, sash tied in the back
 Ahh! So many things to do with this one!

Total cost: $1

Total time: 45 minutes

Final verdict: Easy, breezy and versatile. I just got 5 looks for a dollar!