Showing posts with label kitchen gadgets. Show all posts

Friday, July 12, 2013

Pin 209: Shredded Chicken in the Stand Mixer

Original pin:
???
I really thought I HAD pinned this but after using the pin search and conducting my own, apparently I didn't pin it. I must have just read it somewhere and let my vise-like memory retain it for future use. I searched it on Pinterest and there is a ton of different sources so I can't attribute this to one original.

Anyhoo. . .

One of my absolute favorite slow cooker meals is lime-chicken tacos. Incredibly easy, versatile, and the leftovers freeze amazingly well. The most time consuming part of the whole process is shredding the chicken after it is cooked. I usually use the old two-fork method and spend a good ten minutes or so shredding each piece up individually.

When I recently made this dish, I really did have to weigh the benefits of trying this one out. You may remember Mr. Pinspiration's deep dislike of dish work and I think he secretly believes that I intentionally use more dishes in meal preparation than necessary. He especially hates those "hand-wash only" items, such as my stand mixer bowl and accessories. Pulling this out really had to be worth it if I was going to suffer the sighs and grunts of Mr. Pinspiration at dish time. I figured I could try it once.

I placed my warm, super tender, cooked chicken breasts into the mixing bowl. They were starting to fall apart already!

Locked and ready, I turned the mixer on to watch the magic. 

Holy stand mixer, Batman!! The entire bowl was perfectly shredded in approximately 3 seconds!!


Back into the slow-cooker for the final preparations and then my meal was ready to eat. Just load it into some warm tortillas and dinner was served!


Total cost: $0

Total time: 1 min (It took a few seconds to put the chicken in the bowl, carry the bowl to the other side of the kitchen. . . )

Final verdict: I could not be more amazed at how quickly it all happened. I couldn't even get any in-action shots before it was done! And the shredding was much more uniform than my old fork-on-fork method. Was it worth the extra dishes to wash?? Absolutely! I will NEVER hand shred meat again! I can wash and put away the mixer in less time than I was hand shredding the chicken previously.

Tuesday, May 21, 2013

Pin 206: Whipped Body Butter

Before we get down to business I have a very important announcement for you! For months now, I have been talking about this certification test I am supposed to be preparing to take for work. This extensive studying (cough! cough!) has been keeping me from pinning as much as I would like. Well, my friends, I have booked a date to get this test over with!! Mid-June this nonsense will be over and I can get back to my pinning and blogging more regularly. WooHoo!!

Now on to business. . .

Original pin:

http://www.livingthenourishedlife.com/2012/02/homemade-whipped-coconut-oil-body

Whipped coconut body butter. Coconut oil seems to be the hottest ingredient lately. I see it in everything! I actually have four coconut body butter recipes pinned. I wanted to make some of this because I keep hearing about all the wonderful things it can do for your skin so I closed my eyes and just picked one of the pins. I ended up over at the Living the Nourished Life blog which has a super simple recipe. I had some coconut oil in the pantry but I wanted to give some of this as teacher gifts as well so I sent Mr. Pinspiration out to the market to pick up some more.

When I started this I noticed two different consistencies with my coconut oil. (I am going to stop here for a minute to clarify something--I am NOT a coconut oil expert. The extent of my coconut oil knowledge is as follows: Coconut oil comes from coconuts. When it is solid it can be very hard. Coconut oil has many different uses. The end.) Not sure if this was due to my different brands, one being fresher, or something totally unrelated.
The one on the left was my new jar, the right was the jar I already had.
The old jar was hardened and a little separated (as I expected) but the new one was so velvety soft and coconutty looking I almost wanted to put a spoonful in my mouth! It looked like the inside of some wonderful coconut dessert!
Extreme close up!!! See the difference in the textures?? The left was the new jar and the right I dug out of the older jar after chopping up the hardened part and stirring back with the oily part. 
I started with the more delicious looking fresher jar. I set my stand mixer to work and danced around singing the "Whip It" song because I couldn't resist.

My singing must have sent off some bad vibes because my body butter was looking nothing like I expected.
It was totally liquefied. I figured this had something to do with being here in sunny Fort Worth and in my comfy 78 degree house. (I can't afford to keep it any cooler here in Texas so my body has adjusted to this 78 degrees and I now find it perfectly comfortable. Except for in the winter when my husband insists we keep it more like a chilly 68. Brrrr. I am a Texas girl and the heat doesn't bother me.)

I poured this in a small jar and popped it into the fridge. Next I whipped up some from the older jar with similar results. I even packed ice packs around the bowl to keep it chilled while it whipped. Into a jar and into the fridge it went. Before I whipped the third, and last, batch, I chilled the coconut oil itself, just to see if I could get any different results. The chilled coconut oil initially whipped up like it was going to get that fluffy appearance as in the original pin, but even packed in ice, started to melt quite a bit after two minutes.

Just as an experiment, I re-whipped one of the original jars after it had chilled. Still not airy and fluffy, but it didn't quite liquefy as much.

After much experimentation, I ended up with three jars of similar consistency.  I tried fragrance with one of the batches, but the coconut scent was delicious and I didn't feel the need to overpower it with a different smell so I didn't add it to subsequent batches. Refrigerated, the mixture hardened to a consistency that was like cold real butter--hard but manageable.
A freshly chilled jar
Once allowed to reach room temperature, the body butter is very soft with a consistent texture. I haven't had any separation of ingredients or re-hardening of the oil. It isn't the fluffy, airy texture I expected, but it isn't unpleasant either. It melts really fast in my hand so I have to move quickly transferring it to wherever it is headed. There are tiny bits of coconut oil that I can feel when I smooth it over my skin, but they melt quickly. I compare it to those little beads that are sometimes in face wash that dissolve quickly.
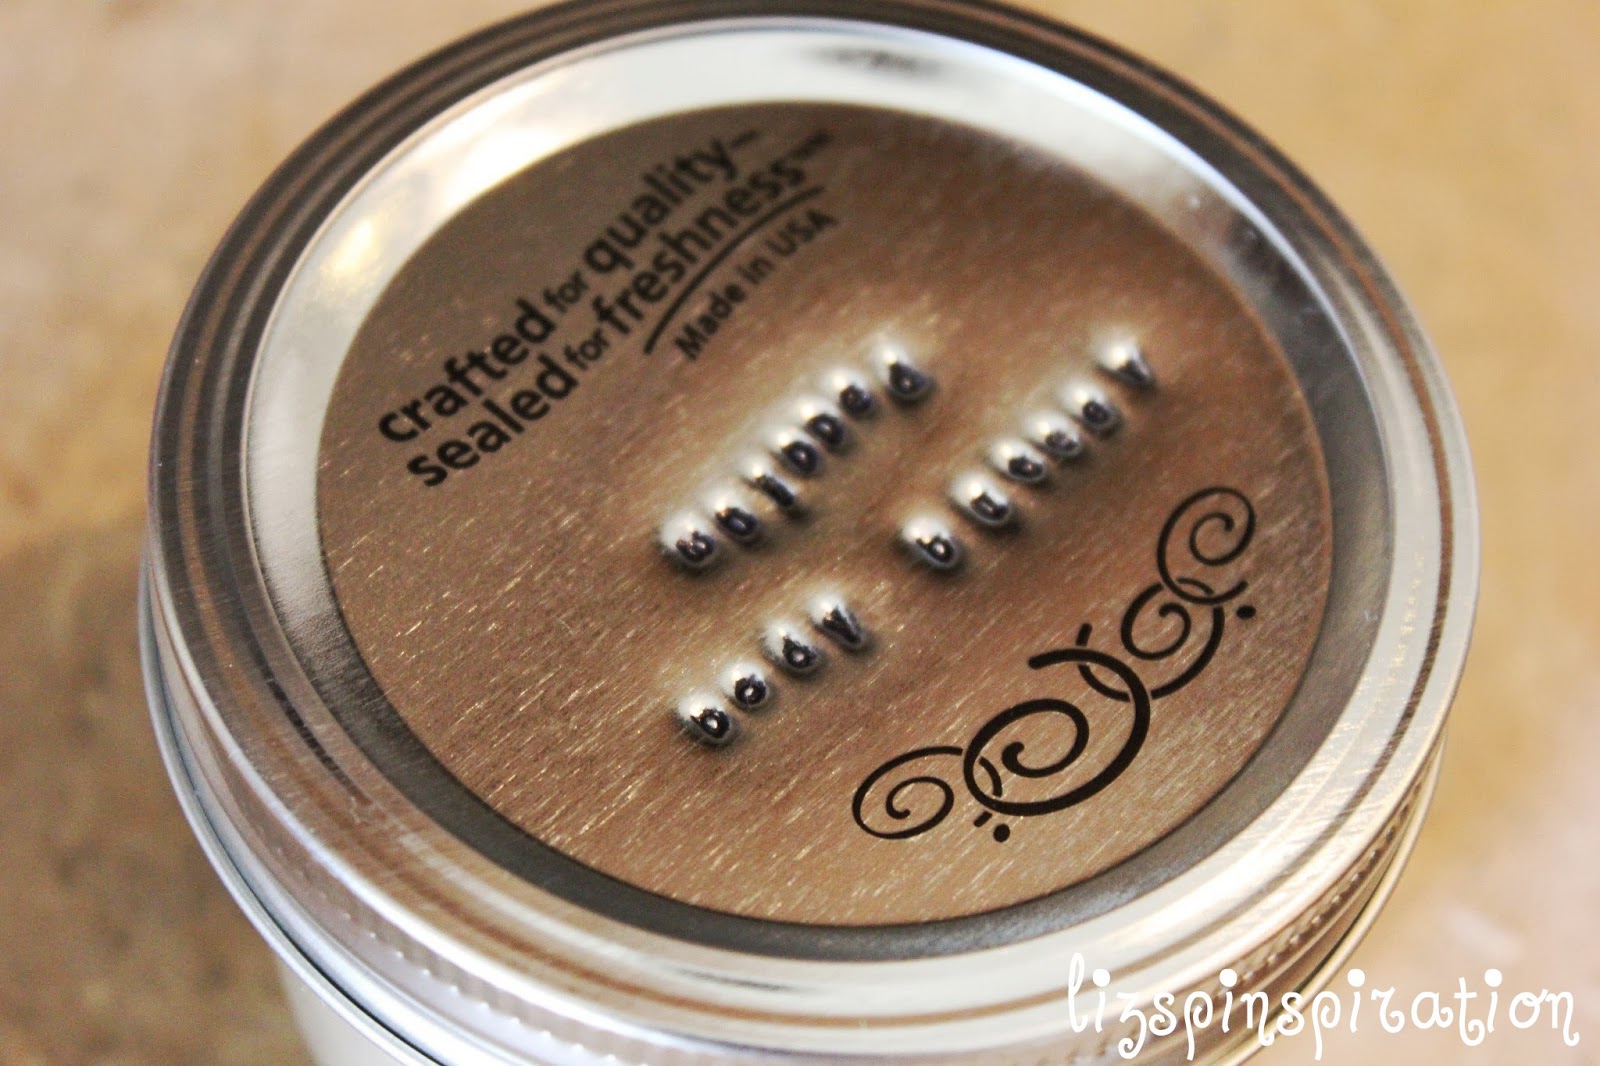
Two of these jars were for gifts, so I stamped up the tops to get them ready for the teachers. 


I wrapped them up in a 16x16 square of fabric with a little note and a quick bow and they were ready to gift! 

Total cost: I can't say, because these were gifts. I used about 1/2 jar of coconut oil for each jar and made three jars. 

Total time: After much experimentation, I would estimate you could make this in 10 minutes. I spent about 1 & 1/2 hours playing around. 

Final verdict: It is very indulgent to use! I love this and will be using it frequently. I hope the teachers liked it as much as I do. The recipe was surprisingly simple and uncomplicated. If your house is cooler than mine, you can probably achieve a less melt-y texture than I did. I have been keeping it in my bathroom and the consistency has stayed the same as it was originally in the butter rewarmed to room temperature. In the summer, it may be more enjoyable to have the butter chilled to apply. This pin was a winner for me, but next time I just may have to try out some of those other recipes. 


Sunday, April 21, 2013

Pinprovement! French Bread Recipe

I may have said this ad nauseum, but I just love making bread. You'll probably think I'm a total dork now, but I am going to admit something to you--sometimes, when I'm making bread and it is baking and making my whole house smell delicious, it makes me cry. Absolute tears of joy. I could never go carb-free.

In October I posted Pin 144, a recipe for one hour French bread. My family liked it in its original form but it was very dense and something was just not quite right for me. I tinkered around with the recipe a little bit and found a combination that I like a little better. It is no longer one-hour, but more like 1 and 1/2 to 2 hours. Still much faster than some other recipes I have tried. I make this recipe regularly and freeze the extra loaves. When I want one, I simply pop it in the oven and soon I have fresh, hot, homemade bread again.


As I mentioned in the original post, there were a few steps that I was just itching to change up. The first one of those was the yeast.

I swapped out the regular yeast for fast rising yeast. I was looking for a fluffier bread so I wanted to use maximize my yeast activity and rise time.

My recipe looks like this:

2 1/2 c warm water
2 packages of Fast Rise yeast
2 T sugar
1 tsp salt
3 T extra virgin olive oil
7 c flour

Add yeast and sugar to warm water and let sit for 5 minutes until you see lots of bubbles. When I first started making bread, my number one mistake was not getting my water warm enough or getting it too hot. It should be 105-110 degrees or as indicated on your yeast package. My advice to new bread makers is to actually measure the temperature of your water.
After 5 minutes--I have bubbles completely across the surface.  All the white is bubbles, you can see a bit of clear water at the edges. 
Add salt and oil. Stir to combine. I make this bread using my stand mixer with the dough hooks. If you don't have one, you can stir by hand until it is too thick and then knead by hand to combine all the flour.

Time to add the flour. I increased the recipe to 7 cups. I add flour 1/2 cup at a time and allow it to mix.  The original dough was really sticky and difficult to handle. Depending on your dough and your environment, you may need a little more or a little less flour. Here is my very scientific, expert method of how I determine when I have enough flour.

The poke test:

Gently poke a clean, dry finger into the dough:


Pull finger out. If it is covered in sticky dough, it is still too wet. Keep adding flour.


When you have enough flour, the dough is pulling away from the side of the bowl more and your poke test will look more like this:

Now it is time to let it rise. My poor husband usually gets dish duty. I try to keep the dishes down to a minimum so here is a little cheat step. Doing this cheat step saves me one large bowl from dish duty.

The right way to do it: Coat a large bowl in olive oil. Place the dough ball inside, turning over once to coat all sides.

The cheater's way: LIGHTLY spray the sides of your current bowl and the top of the dough with non-stick cooking spray (like canola spray).

I also spray the side of the plastic wrap that will come in contact with the dough.

Then I put the bowl in my warming cabinet. (heehee) If you didn't read Pin 144 about my warming cabinet I like to rise in, let me sum it here. Preheat the oven to 350 for 1 minute, then turn it off. Place your bowl of dough inside and let it rise. It is perfect! My dough always rises perfectly in there, it is undisturbed and warm no matter what the actual temperature of my kitchen is.

Allow the dough to rise 30 minutes to 1 hour. The longer you let it rise, the more air pockets you create for fluffier bread. However, keep your eye on it. After 30 minutes in the warming cabinet this is how tall my dough is:

Which is also why I spray every surface with cooking spray.

Next, I spray my working surface with cooking spray and dust with flour. Punch down the dough and divide the dough into four parts. You will see in the pictures that I can not divide evenly. My loaves are always a bit differently sized so do not stress if your loaves are not even.

Place one dough ball in the center of your workspace. Cover the remaining parts with your plastic.

Pat the dough ball into a flat, long oval. Do not overwork the dough. You will know you are overworking it if you can not get it to cooperate with you. If it won't pat out to an oval and keeps bouncing back, cover it with plastic and walk away for 10 minutes or so. Then come back and try again. Starting with the edge nearest you, roll in a jelly-roll fashion to create the loaf shape. I kind of roll with a little, teensy, stretch along the way.
This may be a good time to mention herbed breads. If you want four loaves of herbed breads, you can knead in your herbs after your flour, before your rise. If you don't want to knead them in, or if you want different kinds of loaves, you can do it here. I don't like to knead them in in this step--the bread seems to get too overworked. I sprinkle the herbs on top of my oval before I roll it and it bakes out pretty evenly.

Place on prepared baking sheet.

How I like to prepare my baking sheet for bread:
Spray sheet with cooking spray. Place parchment or wax paper on sheet. Spray parchment/wax paper with cooking spray. You can also dust with cornmeal, but I don't find that this recipe needs it.

Once you have all four loaves on the sheet, cut slits in the top of each loaf. I use kitchen scissors to snip the cuts or you can use a sharp knife. Cover with plastic until ready to bake. A second rise is not necessary. I usually just let it rest while the oven preheats.

Place in a oven, preheated to 375 degrees. Bake 30-35 minutes or until your desired brownness. I like to brush melted butter on the tops as it comes out of the oven.

For a crisper crust, place a dish of hot, steaming water in the oven below the bread pan during baking.

Thirty minutes later I had these beauties (see my little runt loaf? Nothing wrong with a runt.)


The final result is beautiful, isn't it? Here is the fluffier inside:
I hope you like my adjustments! If you want a denser bread, or if you want to try out the original, go check out the link from Pin 144

As I mentioned in the beginning, I freeze these loaves. Wrap in aluminum foil and pop in the freezer. When you are ready to eat it, pop it into the oven, still wrapped in the foil, at 350 degrees for 30 minutes or until heated through. I'm not sure how long these would keep in the freezer because we usually go through ours at about a 1 loaf/week rate. 

Good luck and Happy Bread Making!!

Thursday, March 14, 2013

Pin 194: Root Beer Crock Pot Roast

Original pin:

http://www.stockpilingmoms.com/2012/06/crockpot-root-beer-roast/

Last week while I was home with sick kiddos I needed an easy, no fuss dinner. Anything in the slow cooker sounded awesome.  My friend recommended this pin of Root Beer Crockpot Roast to me last week.  I popped this in the crock pot around noon and flipped it on. I did have some errands to run and kids to shuffle so we went on about our day.

It was kind of pretty with all the root beer fizz bubbling up around it. Just smelling the root beer made me thirsty!

So I took those really awesome "before" pictures, and then life happened. I'll spare you all the gruesome details, but this pin will have to be reviewed by the boys who where actually at the house for dinner. While I was sneaking cheese-its in the emergency room with a sick child, the healthy ones were at home eating every last bite of this. Every. Last. Bite.

Not only do I have no after photos for you, but I didn't even get a taste! I'm glad they enjoyed it, and by the time we did get home, I wasn't much hungry any more. Their review will have to suffice. Their official statement: "Yeah, it was real good."

Total cost: $10 for a medium roast and a couple root beers

Total time: Prep was done in minutes. I actually cheated a little and just rubbed some Lawry's seasoned salt on the roast. It cooked for about 7 hours.

Final verdict: Since it is completely gone, I am going to interpret that it was delicious. It got two thumbs up from my friend as well. Sometimes you can't beat the convenience of the slow cooker. Otherwise those boys would have been eating cracker crumbs and string cheese for dinner. I guess I'm going to have to try this one again for myself! And maybe make a few potatoes and vegetables to go along side. (I'm not really sure what those boys ate with it. . . possibly nothing. That might give a little insight into why they ate so much.)

Wednesday, January 23, 2013

The Stuck Jar

I don't have a pin for this. I don't recall seeing this on Pinterest, but that doesn't mean it is not out there. I don't think I came up with this on my own. I think I MUST have seen this or heard this somewhere and it was one of those thing that was just filed away in the dark, dark, recesses of my brain.

However. . . it. is. FANTASTIC!

Back story:

A long, long, time ago I used to have multiple jar openers. The rubbery disc kind, the weird wrench-like kind, a plastic circle with gear-like teeth. Then I got a husband and I didn't notice as much the gradual disappearance of these said jar openers. Lately, my jars have been so tightly sealed. Even Mr. Muscles has been having such a time opening a particular brand of peaches that I have just stopped buying them.

Yesterday as I was preparing dinner, I needed to open my new jar of minced garlic. It wouldn't budge. I tried tapping, running under water, and any other trick that has worked in the past with no success. I was fearful I was going to break a bone in my wrist as I struggled against the jar, half bent over, clutching it between my knees. Time to stop and think rationally.

Which missing jar opener was my favorite? The rubbery disc.

Why? The rubber really got a good grip on the lid.

How have I opened jars in the past? At work sometimes I use a glove to open tight lids.

What do I have that is rubbery? Well, those big cleaning gloves, but I don't really want those near my food. AHA! I have rubber bands!

So I dug out my rubber band ball (yes, I have a rubber band ball. I save all the rubber bands from my newspaper and stick them on my ball. It is reminiscent of my childhood--but these rubber bands aren't green.) I popped one around the lid and, magically, with almost zero effort at all, that lid gently popped right off. WHAT!?!?! Life changing. I had to try it on other jars--and it worked. Only thing is, I don't have any peaches to try it on! Guess what I'm buying at the store this week???


This is going to be really, really useful in the future! It may put Mr. Muscles out of a job--now he will have more time for those other household chores on his Honey-do list.

Tuesday, October 30, 2012

Pin 149

Original pin:
Pinned Image
http://www.ghoulfriday.com/terrifying_tortilla_chips

Make your own tortilla chips in fun Halloween shapes. The take away here was the cookie cutter fun shapes for Halloween.

I have been making my own tortilla chips for some time now. I finally perfected the recipe just the way we like it that wasn't too crispy and wasn't too soft and wasn't too burnt-tasting. I usually only make them when I am making chicken tortilla soup. Since that was on the menu tonight I decided to jazz up our chips with some fun Halloween shapes. Below is my recipe, adapted from many, many, many attempts at finding just the right technique:

Tortillas (I usually prefer corn. Tonight I only had flour. Here's the thing--I but these giant bags of corn tortillas and then stash them in the freezer because I really only use them for these chips. I assumed I had some there but when I opened the freezer I only had flour tortillas there. They were a little stale but I just tossed the top tortilla out. Stale is okay because you are going to bake them anyway. I digress, back to the recipe)
Cooking spray
Salt (I like to use a sea salt grinder--it makes me feel a little gourmet)

Preheat the oven to 375 degrees. Cut your tortillas to the desired shape. I usually just use a pizza cutter to make quick work of tortilla stacks into cute little triangles. Tonight I used the Halloween cookie cutters. This step definitely slowed me down here.

I'm not sure if it was because the tortillas were flour or because they were a little stale or a little frozen, but cutting them with my cookie cutters was not easy. Differently than dough or soft, fluffy bread, you can't really wiggle the cookie cutter to cut straight through the tortilla. This was going to take a long time to individually cut these chips for my whole hungry family. Time to get creative.

Hmmm. How can I solve this problem. I need some good, strong force. . . AHA! A hammer should do nicely. So I grabbed my meat mallet and gently pounded away at the edges of the cookie cutter with the smooth side of the mallet. I was careful not to use so much force as to crumple my cutters. (They are from the dollar store, you know.)

This technique worked so well I decided to save some time and pound through stacks of tortillas. I found that three-tortilla stacks were just the right size to cut multiple chips at once, yet still cut through all the layers. Four was too many and the bottom layer was never cut completely.
Oh the pounding drove my family crazy! My kiddos were trying to watch TV in the next room and they were fairly irritated by the pounding until they came to investigate what I was making. Then they got a little excited about it. If they were a little older I totally would have put them to work on this job.

That weird square one is a Frankenstein head.
Next I lined the chips on a cookie sheet and gave a light spritz of cooking spray followed by a few turns of the salt grinder. Into the oven they go! After 9-10 minutes I gave them a flip, a spritz of cooking spray, and put them back in. Watch carefully and bake an additional 3-7 minutes depending on your desired level of crispiness and browning.

Then I had to rush out the door to make it to a PTA meeting. I didn't get any fresh-out-of-the-oven pictures for you. However, I was lucky enough that my family saved some for me.

When I walked in the door an hour and a half later, the first thing my husband said to me was, "What did you do to those chips??" Uh-oh. Why? "They were the best batch you have ever made." I think it was because I used the flour tortillas instead of the usual corn tortillas. They were less like a chip and more like a cracker. Here's the thing with crackers--my boys (including my husband) love them.  I sometimes just don't buy them because they eat them up so fast and leave all those cracker crumbs EVERYWHERE! But these chips did have a nice flavor and the boys loved the Halloween shapes.

Here are a few after shots. You can see how they brown up nicely:


If you are here for the recipe, then I am sure that was the longest-winded recipe you have ever read. Let me remove all the commentary and just write it plain and simple for you here:

Tortillas (corn or flour)
Cooking spray
Salt

Preheat oven to 375 degrees. Cut tortillas to desired size and shape and place in a single layer on cookie sheet. Lightly coat with cooking spray and salt. Bake 9-10 minutes. Flip chips and lightly coat with cooking spray. Bake an additional 3-7 minutes, watch closely and remove at desired level of browning.

Do not be discouraged if it takes you a few batches to perfect this recipe. Tortilla brands and ovens are different. I recommend a hot oven. Preheat the oven and then let it sit an additional 10 minutes to allow it to get good and hot before you start baking these. I found that when I made multiple batches, the second and third ones were always better than the first because the oven temperature was more stable.

And if you don't like my recipe, go try the one at the link at the top--its a little different.

Remember the pin here was the Halloween shapes?

Total cost: $0 for stale, frozen tortillas and cookie cutters stashed away in the top of the cabinet

Total time: Cutting these out was time consuming--well compared to the old pizza cutter way. 20 minutes to cut enough to fill 1 & 3/4 cookie sheets

Final verdict: It was a fun way to add some holiday cheer. I wouldn't do this regularly. I do think that corn tortillas would cut much, much easier with the cookie cutters (and maybe fresh ones too??) I will probably do it again, but only around holidays! Cutting with cookie cutters always leaves scraps. I am not one to waste but since the tortillas were stale I didn't care too much. Baked chips are a great way to use up old tortillas before it is time to toss them!

Tuesday, September 11, 2012

Pin 130

Original pin:
Pinned Image
http://goodenessgracious.com/2011/11/cutting-up-potatoes-super-fast.html

Use an apple slicer to quickly cut up potatoes for mashed potatoes or fries.

Like so many times before, (when will I ever learn??) I did the pin BEFORE actually reading the link.

I was making some of my favorite crock pot baked potato soup last week and decided to use this trick to cut the potatoes faster. I had already enlisted my favorite potato peeler--because he is the fastest around. So when it came time to cut these bad boys up, he had to pitch in as well. Because I didn't read the link first, we went at the whole potato and for me it was pretty much impossible. But Mr. Muscles who lives here and is really fast at peeling potatoes is also pretty fast at cutting potatoes with my apple slicer.

Step one.

Step two
I decided to get all smart so I could get in on this potato cutting action and decided to cut the potato in half first. I was able to use the apple slicer on the half potatoes without too much difficulty. The original link actually does say to cut the potato in half first.

So I tossed all the potato chunks into the crock pot and cooked as normal. Mr. Muscles wanted the potato soup a little chunky so I didn't mash the potatoes all the way at the end. The big circle piece that is the "core" from the apple corer was a weird size and shape to have chunky in the soup. The original link actually says for mashed potatoes, which would be fine because you would smash all the weird shapes away.

Total cost: $0

Total time: 1 minute or less

Final verdict: I won't use this again for soup, and I think fries would be too large and a core shaped fry might be weird. But for mashed potatoes it would be great. Cutting them in half first definitely made them easier to cut and as a bonus they then stood flat on the cutting board. The pieces aren't uniformly sized however. Clever little trick, but in the long run, I don't know that it would really save that much time.

Friday, August 10, 2012

Pin 117

Original pin:
Pinned Image
http://www.weightwatchers.com/food/rcp/RecipePage.aspx?recipeid=71911&sc=11

A pinner before listed the ingredients as cool whip, fat free milk, and an oreo. The actual link uses frozen yogurt, milk, mint, and chocolate sandwich cookie.

I didn't have any oreos in the pantry today and was craving something sweet. I am also going to use this as an excuse to have some calcium in my diet. I present to you my rendition of this recipe, clocking in at under 200 calories per serving:

1/2 cup fat free cool whip
1/2 c milk
1/2 package of 100 calorie Right Bites Chips Deluxe

Tossed it all in the blender cup of my favorite immersion blender and whipped it together. Garnished with a few broken cookies. This was soooo good. Like milk and cookies. (Well, it is milk and cookies.) Yum, yum. I also drank it all by myself without the kids seeing because I was not planning on sharing.


Total cost: $0, everything already on hand.

Total time: 2 minutes

Final verdict: I will definitely be making this again. A woman has GOT to monitor her calcium intake and I clearly need more calcium--especially the kind that comes paired with chocolate. And I don't feel totally guilty about having a mid-afternoon milk shake. You could easily make this with whatever your favorite cookie is, or whatever you have in the pantry. There are so many varieties of the 100-calorie packs, it seems like your options here are endless.

Friday, July 13, 2012

Pin 102

Original pin:
Pinned Image
http://www.ladybehindthecurtain.com/?p=1724

Pizza made in the waffle maker.

I stole a waffle maker from my sister in our yearly family Christmas exchange. No, not very sisterly, I know, but I just couldn't hold back when it came to kitchen appliances. It's actually worse than that. . . I didn't steal it, I made my husband steal it. Dang, I guess I had better get her something really nice this year. I digress. I want her to know that it is being put to good use so I am cooking with it on a regular basis. This is a new one to me though.

The recipe called for pizza dough in a package. I am a teensy weensy bit of a pizza dough snob and I only use my own dough that I make from scratch. I just think it is so good--and just as easy as the pre-packaged stuff. We make homemade pizzas about once a month around here. It is one of the boys favorite dinners because I usually let them help build the pizza. 

Other than the pizza dough, I pretty much followed the directions. I folded up the edges and sealed them with a fork (like when you seal a pie crust.) I'll be honest. I was a little scared of this. I had visions of the horrible mess this was going to make with burnt, baked on cheese and sauce.
Ready to close, here goes nothing. . .
This image didn't help out my fears any.


Holy cow! It was smoking and sizzling and soon started dripping.

But when I opened it up I was relieved.
This little baby popped out cleanly.

This one was intended for the boys, so it was a bit smaller than the rest. Theirs was just sauce & cheese, the one chock full of veggies for me, and Daddy got pepperoni.


After the fear of the burning mess was out of the way, I cooked the rest of them without fear. They didn't always come out pretty, but none of them burned.


The very last one, though, I learned something. Don't close the waffle maker all the way. The last one was so stuffed full of pepperonis and cheese that I couldn't close it. This gave the dough a little room to expand, it didn't lose as much sauce & cheese, and just tasted better overall.

The taste? It was kind of chewy inside the waffle squares, the thinnest parts. The kids did not go for it at all. Torn between his love for waffles and his love for pizza, W just kept asking when he was going to get his pizza.

The fluffy one with no leakage.

Side view of a cheesy inside
Total cost: $4 for pepperoni and cheese. My crust is from flour, yeast, oil, and sugar--all which I keep steady supply of

Total time: 1 1/2 hours starting with the dough.

Final verdict: This was a little messy, although not as bad as I had predicted. My husband liked it. I thought it was just okay.  I admitted to my pizza dough snobbery and I just didn't get the delicious crust that I am used to.  The kids were totally disappointed by it. A cute idea, but it didn't save me any time or mess than a traditional pizza or pizza pocket. It would be a great idea for a meal for one or two, or maybe if you were cooking without an oven. I probably won't do this again. I would rather have an oven baked kind. We threw the leftovers away.