Showing posts with label snacks. Show all posts

Monday, August 26, 2013

Pin 212: Crunchers (aka Scottish Chocolate Caramel Bars)

Original pin:
Crunchers - A Swirl of chocolate, brown sugar, peanut butter, butterscotch and crackers
http://www.twirlandtaste.com/2011/01/crunchers-addictive-chocolate-brown.html

In July, (yes, I am way behind around here) I needed a dessert to take to our family reunion. I don't make a ton of sweets but my sweets board on Pinterest is full of delicious-looking things. I used the occasion to try something out. I pulled up this recipe for "crunchers." Club crackers layered with a caramel-y filling and topped with a butterscotch/chocolate layer. Yumm.

While this dessert definitely does NOT fall into my just-whip-together-something-amazing-as-you-glide-out-the-door category, it was not difficult. Just time consuming, and as far as Mr. Pinterest is concerned, uses far too many pots and pans to pull together.

I started with layering the crackers but I couldn't fit as many in the dish as the recipe said I should, so I switched to a larger dish. I could almost squeeze the right amount into this dish but my final dessert was not as thick as the original posters. When it came time for topping, I was certain the called for amount would not cover my dessert completely so I just added a few extra handfuls of chocolate chips and butterscotch and then ended up with a nice thick chocolaty layer.

All chilled and out of the fridge ready for cutting:
I popped it out of the dish and off the foil--surprisingly easy and smooth. Time to cut into bars. I wasn't sure what to expect while cutting--if it was going to be difficult or not, but it was really easy to cut.
So my layers are not perfect, my chocolate is pretty thick, but the bars themselves were pretty darn tasty. Not exactly what I expected, but a nice little combo of salty and sweet. I packed the bars up and took them to the family reunion. One of our cousins took one taste and declared them exactly like this dessert they fell in love with on a trip to Scotland. I guess that gives me "International Chef" status.

Total cost: umm. I forgot. It was July. Sorry folks.

Total time: Thirty minutes plus chill time.

Final verdict: They were easy enough and tasty enough that I will probably make them again, but I might wait for a special occasion--maybe Christmas parties or the next family reunion. I might also stick with a smaller dish and less crackers to have a thicker bar like in the original photo.


Saturday, May 4, 2013

Pin 202: Chocolate Peanut Butter Marshmallow Bars

Original pin:

http://dessert.food.com/recipe/chocolate-peanut-butter-and-marshmallows-287376

L picked out these delicious little bites a few weeks ago at a potluck and he picked well. These were so delicious we had to go back for seconds.  When the event was over I ran home and searched for the recipe. Luckily I found it quickly and I just had to make them this week for our mom's group.

These could not be easier. Even my "junk builder grade" microwave whipped these together fast. It actually took the exact time called for in the recipe to melt the chocolate chips and peanut butter together.  I didn't have quite the amount of chocolate chips called for but I did have semi-sweet baking chocolate. I used a combined amount of chips and squares to equal the weight called for.
I also did not have the called for size of pan so I improvised with my 9 inch round cake pan. Guess I wasn't too prepared for this one!
I whipped this together the night before and tossed it into the fridge to cool overnight. In the morning I pulled it out ready to cut. It was well hardened to the pan so I dipped the bottom of the pan in a sink of warm water to loosen them up a little bit. Next time I will line the pan with parchment paper sprayed with cooking spray for some easy release.

Because it was round, I cut it into nice little pie slices.

Due to my larger pan size, my chocolate was not layered up quite as thick as the one in the original pin's picture but they were still delicious! They are soft and creamy and oh, so yummy! I had this burst of inspiration after I tried the first slice and here I bestow the greatest gift on you: 

Grab something to write this down because you are going to want to remember this. 

Get close to the screen so you will be able to read this important information well. 

Ready??

Cut the bars into squares and put them on a graham cracker. Ahhhhh! (Chorus of angels singing!) Like a s'more with peanut butter!  Do it!

If you leave these out of the refrigerator they will start to soften a little. You can either re-chill them or just start eating them with a spoon. 

Total cost: $0   I had all these items in my pantry.

Total time: 2 minutes!! 

Final verdict: Delicious. This is one of the easiest, fastest recipes I have found on Pinterest yet. It is my new go-to recipe for work potluck nights. I will be squishing these between a couple of graham crackers though. 

Friday, February 15, 2013

Pin 184 and Pin 185

Original pin:
Pinned Image
This is not the link I had originally pinned, but the blogger has updated her site and the best post is here http://eclecticallyvintage.com/2013/02/cupid-float-valentine-drink/#

I needed a fun drink for the Kindergarten Valentine's Day party. I thought these were super cute and would be a real treat for the kids at their party. I bought all the supplies (I actually had a leftover jar of unopened cherries from Pin 163) and bought some fun party cups.

In planning my transportation logistics, I was thinking about getting the ice cream up to the school, keeping it frozen, dipping, dripping, sticking, melting. . .   Back to Pinterest I go. I had this pin filed away:

Original pin:
Pinned Image
http://www.realsimple.com/holidays-entertaining/birthdays/serving-cake-ice-cream-like-pro-10000001189696/page4.html 

Real Simple suggested pre-dipping ice cream and freezing in paper cups to serve at birthday parties. I modified this suggestion a teensy bit to fit my situation.  The morning of the party, I dipped two scoops into each (clean--I ran them all through the dishwasher the night before) cup.

I packed them into my largest aluminum cake pan (aluminum helps keep things cold).

And then I covered the whole top and sides with aluminum foil. I put it back in the freezer. A few hours later, just before I left the house for the party, I put the whole tray in my large cooler on ice. I left everything in the cooler until just before the kids arrived in the classroom for their party. We set out the cups and, with help from the other mom's, added soda, whipped cream, straws, and, of course, a cherry!


Total cost: I served 22 kids. I used almost two 2-liter bottles of soda and about half a gallon of ice cream. A little over one bottle of whipped cream and a half-jar of cherries. Including the cost of the cups, it was about $12.

Total time: Less than 20 minutes. I think it took around 10 minutes to dip all the cups and maybe 5 to top them off in a team effort.

Final verdict: I love floats! It is such a childhood memory treat for me so I thought it was a fun idea for a classroom party. The pink color was just the icing on the cake for me! Most of the kids seemed to like them--I know mine did! Lucky boy, I have leftovers waiting for him after school today. The predipping trick was awesome. I didn't have to worry about dripping ice cream, forgetting a scoop, or melting leftovers. I just may start doing this for all my parties! And I will probably do floats for school parties again because it was so easy!

Wednesday, October 31, 2012

Pin 151 & Pin 152

A trick AND a treat for Halloween!

First, the trick:
Pinned Image
http://becomingbetty.blogspot.com/2011/03/crock-pot-ravioli-casserole.html

Crock pot ravioli casserole.

I have totally over-thought this one. First--where is the ravioli??  This is farfalle. But it looks good and the recipe sounds good. I thought a crock pot dinner on Halloween would be the way to go to avoid the rush that comes in the evening. But when I started reading the directions I had to change my plan. You brown the ground beef and onion and then put it in the crock pot with the canned tomatoes and tomato sauce for 7 to 8 hours?? And you have to precook the pasta too??  That just seems excessive--and a little pointless. What is the crock pot for then if not just to keep it warm? I just couldn't bring myself to chop onion and brown ground beef at 8 this morning so I took a sharp detour on this one.

Ditch the crock pot. I started boiling water for the pasta in one pot and browning the onion and ground beef in the skillet. The pasta and beef finished almost simultaneously. I drained the pasta and added the beef and onion mixture to the pasta. I added the herbs, tomatoes and tomato sauce to the pot with the intent of simmering it together to develop some flavors. There was no where near enough liquid. I only used 1 lb of meat (recipe calls for 1 and 1/2 lb) and 12 oz of pasta (recipe calls for 16 oz) so I can't possibly imagine how this doesn't burn after 7 hours in the crock pot. I even had a little extra tomato sauce I had tossed in since I had two 8 oz cans (recipe calls for 15 oz).  I added an additional can of stewed tomatoes to try and spread the sauce a little. Due to the small amount of sauce, I couldn't really simmer it much so I just left it on the stove on medium-low long enough to heat it through. My grocery store was out of frozen spinach this week so I omitted it. I tossed in the cheese just before serving it up--on special Halloween plates, mind you.

I know that sounds like a lot of negatives for this recipe, but really, it was fairly tasty. I would put this in the category of kid food because it is pretty kid friendly. Not unlike a Hamburger-Helper sort of meal, but with better ingredients (i.e., no powder to mix sort of ingredients).  Both the boys ate it--which you probably know by now means it is a keeper. And it wasn't hard at all. Here is what I would change next time: While the beef and noodles are cooking in their separate pots, I would simmer the tomatoes, tomato sauce, and herbs together in a separate pot so the flavors can mingle before mixing them all together. I would use diced tomatoes instead of stewed tomatoes--mostly for their bite-sized quality and I would increase the tomatoes to at least two cans, if not three.

Total cost: $8 for 6-8 generous servings

Total time: Without using the crock pot I pulled this together in about 30 minutes.

Final verdict: It was an easy weeknight meal. I can't imagine how it would pull together in the crock pot. It just doesn't seem like there is enough liquid. However, it had a good flavor and I think if you allowed the sauce to cook on its own you really could get some nice flavors out of it. When our neighbor came trick-or-treating he said, "mmmm! Smells like spaghetti in here!" to which my husband replied, "Not spaghetti. Almost spaghetti." And this meal may be forever known as almost spaghetti. It's pretty accurate. . . if you changed the farfalle to spaghetti noodles, what would you get?

And now the treat:
 Pinned Image
http://www.navywifecook.com/2012/10/halloween-week-candy-corn-fruit-cups.html

A little "candy corn" dessert. This just looked so refreshing to me! I dished up the pineapple and oranges into cups while the "almost spaghetti" cooked. When the boys saw them they just went gaga over the fact that I was making a dessert! Oh poor deprived children whose mother never makes dessert. Sir Lancelot's eyes lit up, he clapped his hands, and he cried out with glee, "Oh, momma! It's a HEALTHY dessert!!"  Wow. All this and they didn't even know about the whipped cream yet.

So after they gobbled up their plates of "almost spaghetti" with peas they were served up these little delicious items--now topped with whipped cream. Seriously, they were gone in 45 seconds. Before I had even had time to top my serving with a little whip and sit down Sir Lancelot was drinking the juice from the bottom of the glass.


Total cost: For four servings (two child sized, two adult sized) I used two medium sized cans of oranges, one large can of pineapple chunks. $3

Total time: 3 minutes to drain and dish

Final verdict: These were so good. And I don't feel guilty one bit for eating them. Winner. Sir Lancelot, you'll see these again, my dear. We've got a whole can of whipped cream to finish off.

Saturday, October 6, 2012

Pin 141

Original pin:
Pinned Image
http://smittenkitchen.com/blog/2008/09/raspberry-breakfast-bars/

Raspberry breakfast bars.

Don't they look delicious?? I decided at the beginning of the week I was going to make these but I kept putting them off until today. It was a chilly day and after freezing the morning away at t-ball the boys and I decided to stay home. While they caught a movie I put these together.

They were not my typical baking recipe--mostly because it has a lot of steps.  Turns out I had to take a few shortcuts, too. First, I didn't have enough butter so I had to sub 1/3 of the butter with butter-flavored shortening.  Next, my dark brown sugar was hard as a rock so I had to give it a moisture treatment in the microwave. Then, due to the untimely demise of my food processor after it leapt from the cabinet a few weeks ago, I had to process this in my chef's chopper. The chopper is about half the size of the processor so I had to make the crust in two batches.  The boys got interested when I got the chopper out and they came to the kitchen for a while to pulse the button for me. I didn't have quite a full pound of raspberries so when I put the filling in I kind of smushed the berries to spread them out a little.

I baked them as directed and they smelled so good.  I knew these would have to cool and set a while so I didn't even try to taste them warm.  After 30 minutes or so I lifted them from the pan by the parchment and set them on a cutting board to cool further. I used a knife to gently pull the parchment from the edge of the gooey bars while they were still warm. (After that bread fiasco with the parchment I wasn't taking any chances.)
Look at that delicious side view of the filling. Gorgeous.


When they were about 45 minutes out of the oven we just couldn't stand it anymore and had to try some. I was a little nervous about the stability of the bar. In my head I had envisioned more like a cereal bar (think: Nutrigrain style sturdiness) but these were pretty crumbly and fairly fragile. But I was eating from the edge that didn't have as much of the bottom crust. They were delicious, just as I had suspected they would be. More dessert-like than breakfast food. Eating them slightly warm and gooey was almost like a cobbler-style dessert.

After they were well cooled and set I cut them into bars. Now the crust was sturdier--not Nutrigrain sturdy, but able to handle without falling apart. The topping is still pretty crumbly. I will probably eat these on a plate with a fork--not handheld.

Total cost: $5 for raspberries. Clearly could have spent more if I had planned better and replenished my staples--butter, brown sugar, etc.

Total time: With all the extra steps I took it was around 45 minutes to assemble everything and then an additional 45 minutes for the final baking (which has to be babysat and turned every 15 minutes.)

Final verdict: I just think they are so gorgeous. They would make a terrific gift as they have such a great presentation. They are very tasty but I will probably eat/serve them as a dessert rather than a breakfast. Prep was easy but time consuming. This is NOT a just throw it all together type recipe. Try it if you love baking. Would be easy to sub with any other berry or even apples and cinnamon.

Sunday, August 26, 2012

Pin 125

Original pin:
Pinned Image
Original source unavailable.

The pinner said "Flatten a slice of wheat bread, cover it in peanut butter and roll it around a banana. Slice like sushi and drizzle with honey!" I thought this would be perfect for the kiddos.

I am always searching for lunch to serve the boys other than pb & j's or spaghetti o's. This was a cute idea and actually came in very handy when I had only a few slices of bread left and a couple of bananas that only had one or two good days left in them.

I skipped the honey drizzle, but I did put a tiny dab of marshmallow cream in the roll with the peanut butter. 

Either my bread was small or my bananas were large, but I had trouble getting the bread to wrap all the way around the banana. See in the picture above where the bread tore a little as I tried to stretch it around the banana? Also, it needs to be cut very delicately. I would suggest a serrated knife because the smooth one started to squish the banana out!


This one got a little mangled in the process.
Total cost: $0. It made the last few slices of bread stretch a little farther.

Total time: 5 minutes

Final verdict: These were delicious! The eating boy ate two whole rolls (equivalent of two slices of bread and one banana) and the non eating boy almost finished one roll. I had to deny the request for more because we were out of bread! We called it banana sushi and L thought it was "Yum, yum, yummy!" If you've been reading along, you may remember we have been helping L cope with effects of his asthma medication by making sure he has appropriately timed and filling, nutritious snacks. This one is a winner and will be a good one to put in our rotation. Easy enough to pack for school as well!  If you banana is too ripe to hold its shape, it would still be yummy to smash it up and layer it on top. It might help it all fit together too. Might have to try that one next time.

Monday, August 13, 2012

Pin 118

Original pin:
Pinned Image
http://picky-palate.com/2010/05/13/fluffernutter-cookies-3-ingredients/

Fluffer. Nutter. Cookies.

I bought the marshmallow creme for these weeks ago but hadn't gotten around to making them. Yesterday we were getting ready to leave the house to head to the neighbors for dinner and swimming when I decided to whip these babies up. They are seriously the easiest things to make. In less than 20 minutes they were mixed, baked, and on a plate headed down the street.

I love peanut butter with all my heart and soul. These were fantastic. I haven't stopped talking about them all day today. It wasn't just me who loved them, though. The kids loved them, the grown-ups loved them, even the man who doesn't like marshmallows loved them. They are truly that awesome. And it can't get any easier than three ingredients and one bowl. These are the new go-to for a quick treat.

I forgot to use a scooper and just plopped them down with a spoon. Didn't hurt the taste one bit.

Close up of the ooey gooey marshmallow swirlies!
Total cost: I had to buy marshmallow creme-$3

Total time: 15 minutes total.

Final verdict: We ate the entire batch in about 10 minutes after dinner. I have been thinking about them all day and can't wait to make them again. You have to try these! 14 thumbs up from last nights swimming crew! You're going to need some milk to wash these down.

Wednesday, August 8, 2012

Pin 115

Original pin:
Pinned Image
No source available.

A sweet, gooey concoction of popcorn, marshmallow, brown sugar, and butter. How could this go wrong?

After receiving a rave recommendation from a Pinterest friend, I decided to whip this up for a snack this afternoon. My boys love popcorn and marshmallows. We've never mixed them together, but I figured they would love this.

It was easy to prepare and I had all the ingredients available without going on a store run.


The eldest was interested, my baby wanted nothing to do with the stuff. Serious crying, thrashing, fist pounding refusal.
This was sweet, very, very sweet. Neither myself or L wanted more than 1 cup of it. It was good, but sickeningly sweet, which is probably good since there is an entire stick of butter in this! The boys were also very concerned with the stickiness so I had to give them each a wet washcloth next to their cup of popcorn. W wouldn't even try it when I offered to feed it to him. He has such a sweet tooth I thought he might change his mind if he got a taste.

Total cost: $0, everything already available

Total time: 5 minutes including popcorn popping time

Final verdict: Great if you are looking for something sweet, but too sweet for us. Would make some yummy popcorn balls or good party food. We probably won't make this again, but it wasn't bad. There is still 3/4 of the bowl waiting to be eaten that will probably end up trashed later.

Wednesday, August 1, 2012

Pin 111

Original pin:
Pinned Image
http://bamkapowxo.tumblr.com/post/13597111267/crafts-activities-future-family-octopus

I was throwing together lunch for the boys today when I realized I had two hot dogs and only one bun. Little man will ask for a bun, and big brother will want one when he finds out there is only one. I had to do something to distract them from the lack of bun. Octopus hot dogs it is.

I sliced each hot dog in half. For the legs I just cut through, lengthwise, the bottom half of each half, turning 1/3 each time. (Three cuts total.) Yeah, I only had six legs, but no one counted.

I didn't like my toothpick created eyes, so I used some of those long skinny chocolate sprinkles. Ketchup for a mouth, drawn on with a toothpick. Some of the mouths were more blob than smile. Great for the boys because then they had "an angry octopus" and "the happy one." They loved this. It was easy and fun.

The angry one and the happy one


Time for battle of the octopi!!
Total cost: $0 for two leftover turkey dogs

Total time: 2 minutes

Final verdict: They absolutely LOVED it. No one even noticed they didn't have a bun. And sprinkles for lunch!! (Yes, two measly sprinkles, but that counts!)  Don't do this if you don't want your kids to play with their food.

Wednesday, July 11, 2012

Top Ten Favorite Pinterest Pins

As I promised yesterday, here are my top 10 pins.  These are MY favorite either because I have used them over and over again, or because they were just awesome to begin with.

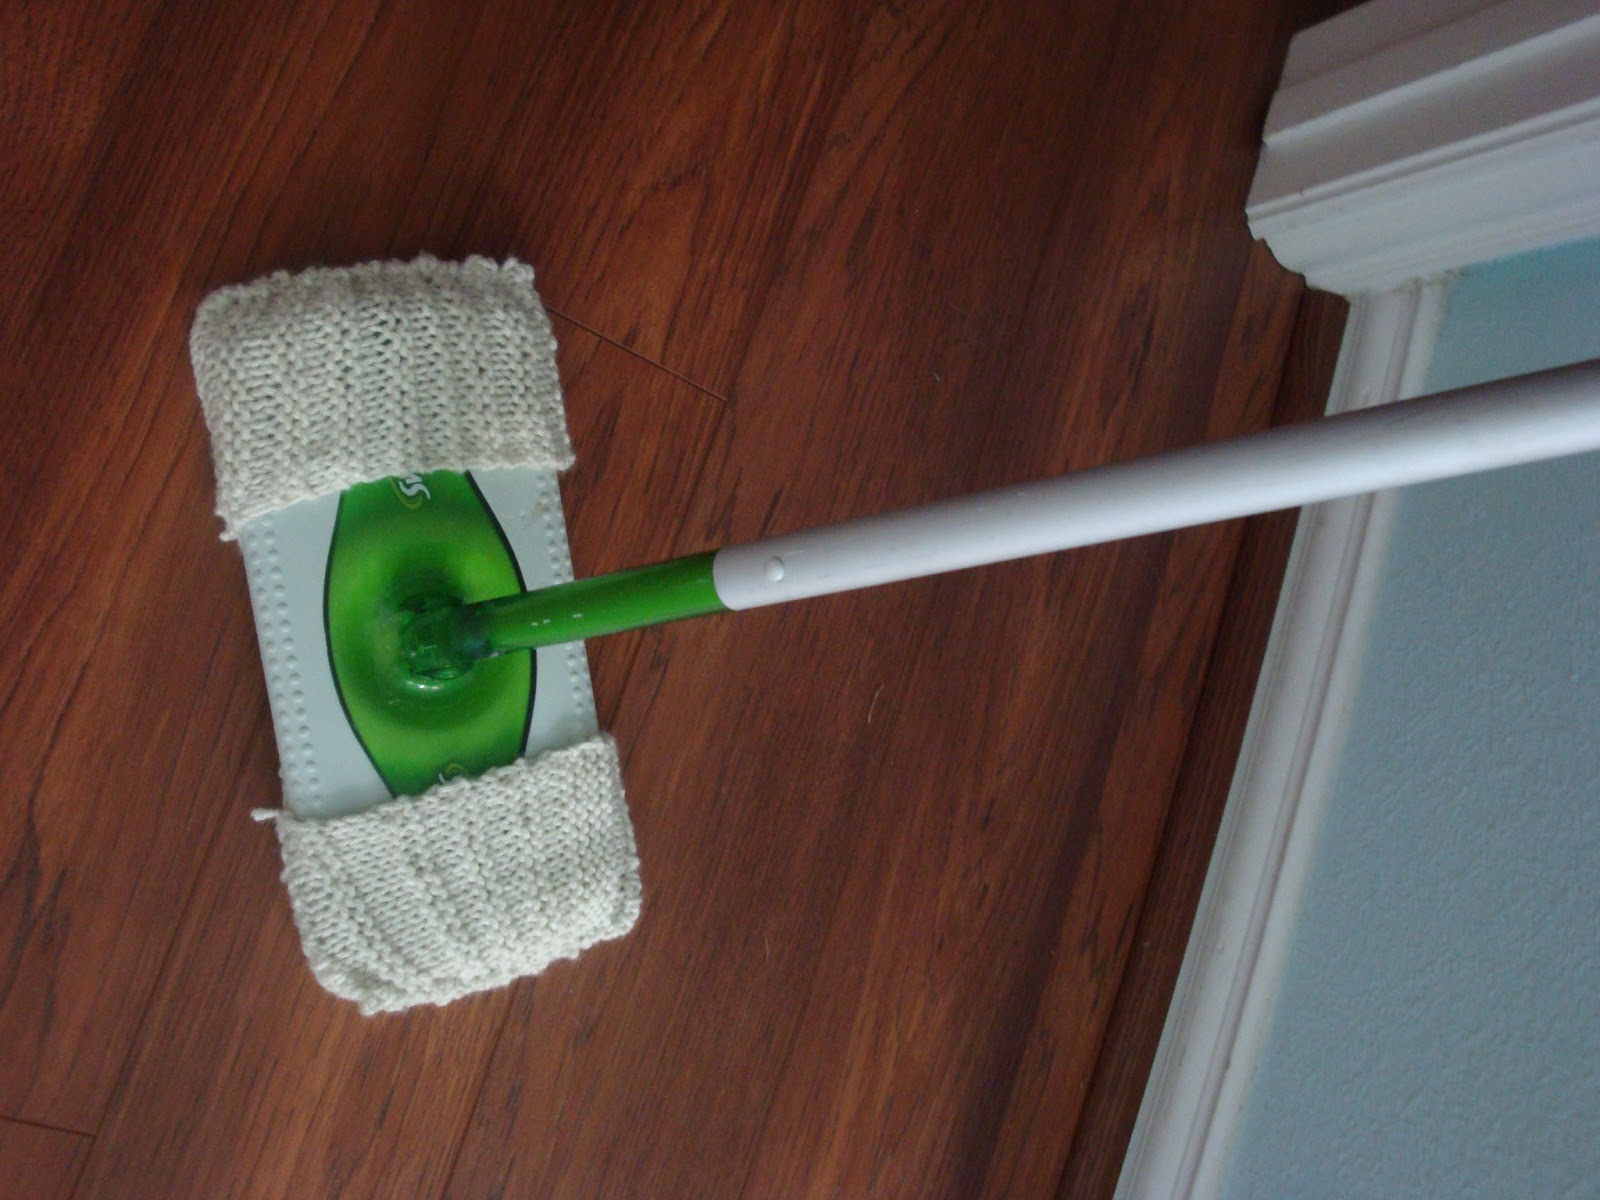
10. Pin 80: Knitted swiffer cover. I have already received requests for these for Christmas gifts. Better get started now!
9.  Pin 49: Mommy dress.  I wear this all the time and always get compliments on the color combo. I did go back and fix the sleeves, just in case you were wondering.

8.  Pin 31: Frozen yogurt dots. We can't walk by the yogurt at the grocery store without my kids asking to make these.
7. Pin 71: Lemon slices and daisies. I am still amazed at how long these flowers stayed beautiful and fresh. Weeks.
6.  Pin 53: Homemade pita bread. Simple and delicious. So many ways to stuff the leftovers never last long. But best right as they are coming out of the oven hot.
5.  Pin 35: Honey Almond Sugar Scrub. I love this as a facial scrub and use it nearly every day. I have used this basic formula to create other varieties by using flavored teas and different extracts.


4.  Pin 23: Sock bun. A pinterest legacy. I don't get super awesome curls but I think it is a fun way to wear my hair up and out of the way. A change from the boring ponytail, a comfortable way to sleep, and a great way to hide hot-mess-mommy hair. I still think its weird when people know I'm wearing a sock on my head though.
3. Pin 12: Glow bath. My kids ask for this all the time. I use it as a reward for good behavior or as a trick to get them into a bath when I am just too exhausted to fight.
2.  Pin 5: Make your own foaming soap. Genius. I will never buy foaming soap for my children ever again. You can create this for pennies.
1. Pin 37 & Pin 90: Technically two projects but they came from the same pin so I am considering them one. The tank maxi and short dresses. I always get compliments on these when I wear them out.


My top five posts based on YOU! Ranked by popularity & views:

5. Pin 69: Microwave corn to remove silks & husks lickety-split


4.  Pin 89: Cafe Rio Chicken: Made in the slow cooker with so many uses.

3.  Pin 92: Classic Baby Blanket Crochet Tutorial. Almost done with number 2.


2.  Pin 90: Short tank dress
1. Pin 91: Jillian Michaels Detox Drink. Aren't we all looking for a quick way to lose weight?