Showing posts with label housekeeping. Show all posts

Tuesday, April 30, 2013

Pin 201: Baking Soda Mattress Refresher

Between working, illness, baseball, not to mention a zillion other things, I haven't been doing much pinning lately. Lucky me--this weekend I will be zooming off to a relaxing crafting retreat with some of my favorite crafting ladies. I'm hoping to have a slew of posts for you in the coming weeks. (Teacher Appreciation is coming up. . . hint, hint!) Meanwhile. . .


Original pin:

http://www.onegoodthingbyjillee.com/2012/05/the-countless-uses-for-baking-soda-besides-baking.html

Let me tell you, Jillee over at One Good Thing is one smart lady. She has a long list of great uses for baking soda. This one that I tried was a method to refresh your mattress.

Spring is in the air around here. Nothing gets me more in a cleaning mood than a cool spring day where I can throw open the windows and air the house out. Last week I did just that. I stripped the beds bare and laundered all the bedding (it was due). While they washed, I put together this concoction and went to work.

I recently bought this bottle of scent for use in another project (still looking for the final ingredient before I can try that one.) I figured there was enough here to spare a couple drops for this one.
I used about 8 drops per cup of baking soda. I whisked the scent into the baking soda so that I had a light, fluffy powder. There were a few baking soda clumps to break up.

An extreme close up of my powder!
I was staring at this trying to determine the best way to sprinkle it onto the mattress when I remembered some glass spice jars I had tucked away after they were empty. I funneled the powder into the jars and was able to fill three. I sprinkled a little more than one jar over my queen sized mattress.

An hour or so later I came back to vacuum it up. My whole room smelled delicious and fresh. I don't have any fancy attachment for the vacuum so I just climbed up there with the whole vacuum and went to town. My three year old thought I had lost my marbles.

When all the sheets and bedding were clean and dry and it was time to put the bed back together I grabbed my shaker again. Growing up, my mother would always put talcum powder on the bed when making it. It lends a nice smell and absorbs moisture. I decided this would work great for this purpose so I sprinkled the top of the mattress pad before I put the bottom sheet on. It left a nice scent and really refreshed my room.

I have a little more than a jar and a half left and I will keep sprinkling this on with my sheet changes until it is gone. I don't have carpet any longer, but if I did, this would be a good carpet deodorizer.

Total cost: I had both of the items on hand, but baking if I were guessing, it was probably less than $.30 worth of baking soda and fragrance.

Total time: 5 minutes to mix up

Final verdict: My room was so fresh! I loved it. The original calls for essential oils which I didn't have, but I did have this fragrance that worked great. I can't wait to use it again and again. The fragrance oils were so cheap that it would be easy to make a few different scents to go with the seasons.

Wednesday, January 23, 2013

The Stuck Jar

I don't have a pin for this. I don't recall seeing this on Pinterest, but that doesn't mean it is not out there. I don't think I came up with this on my own. I think I MUST have seen this or heard this somewhere and it was one of those thing that was just filed away in the dark, dark, recesses of my brain.

However. . . it. is. FANTASTIC!

Back story:

A long, long, time ago I used to have multiple jar openers. The rubbery disc kind, the weird wrench-like kind, a plastic circle with gear-like teeth. Then I got a husband and I didn't notice as much the gradual disappearance of these said jar openers. Lately, my jars have been so tightly sealed. Even Mr. Muscles has been having such a time opening a particular brand of peaches that I have just stopped buying them.

Yesterday as I was preparing dinner, I needed to open my new jar of minced garlic. It wouldn't budge. I tried tapping, running under water, and any other trick that has worked in the past with no success. I was fearful I was going to break a bone in my wrist as I struggled against the jar, half bent over, clutching it between my knees. Time to stop and think rationally.

Which missing jar opener was my favorite? The rubbery disc.

Why? The rubber really got a good grip on the lid.

How have I opened jars in the past? At work sometimes I use a glove to open tight lids.

What do I have that is rubbery? Well, those big cleaning gloves, but I don't really want those near my food. AHA! I have rubber bands!

So I dug out my rubber band ball (yes, I have a rubber band ball. I save all the rubber bands from my newspaper and stick them on my ball. It is reminiscent of my childhood--but these rubber bands aren't green.) I popped one around the lid and, magically, with almost zero effort at all, that lid gently popped right off. WHAT!?!?! Life changing. I had to try it on other jars--and it worked. Only thing is, I don't have any peaches to try it on! Guess what I'm buying at the store this week???


This is going to be really, really useful in the future! It may put Mr. Muscles out of a job--now he will have more time for those other household chores on his Honey-do list.

Sunday, January 6, 2013

Pin 172

Original pin:
Pinned Image
http://www.whooga.co.uk/Cleaning-Ugg-Boots

How to clean Ugg boots.

I've had my Uggs a long time. I think I've had them for somewhere around four years. I protected them with water & stain repellent when they were new, but other than that, I haven't done any sort of maintenance care to them. In the cooler months, I wear them a lot--pretty much anytime I think I can get away with it. After wearing them out in the Christmas Day snow we had I decided it was time to give them a spa treatment.


I pulled this up and started reading. My first thought was that I though it was odd that a company which seems to be a competitor for Ugg boots would be offering a guide to cleaning them. Is this trustworthy? After a little further investigation I offer you this bit of worldly information: The word "ugg" is a generic word. It refers to any type of fleece-lined sheepskin boot. The word happens to be trademarked in over 70 brands. So this particular company is only offering advice on how to care for their boot, also referred to as an ugg.

Okay. Confusion cleared and I can move forward. Many moons ago, when I received my Uggs, my thoughtful husband also bought me the tools to maintain them. For the first time ever, I dug them out.
cleaner and protectant
suede brush


More before pictures for you. My boots weren't terribly dirty. Some noticeable spots on the top of the foot and some dirty areas on the heels and around the top of the calf.


Oddly enough (which I would have known if I had ever pulled out the cleaner bottle) the directions on the cleaner bottle were very similar to the directions on this website. Step one was to brush. I noticed a big change just after a little brushing so I took a few pictures for you.

WOW! Did I even need to continue? I was a little worried about getting them so wet. Just for a little insurance, I asked my husband if he would replace them if this ruined my boots. Both the directions told me to so I jumped right in.  I soaped them up following the dilution instructions on my bottle and rinsed them off. Found a nice spot for them to dry and went to bed.
all wet.
In less than 24 hours they were completely dry and ready for the next round of brushing. All the spots had not been removed. There were lots of warnings on the tutorial and the cleanser bottle about scrubbing too hard so I went a little easy on them. The dirtiest spots on the heels and calves are pretty much gone. The spots remaining are on the top of the foot. They are not water spots or anything identifiable. I don't have a clue what they could be. Probably something sticky one of my kids drooled on me. There are a few tips on the tutorial for removing stains if you know specifically what they are--ink, blood, oil, etc. I just left them since I don't have a clue. Here they are all clean--well, cleaner, at least--and brushed:


Total cost: Currently, zero. At some point, long, long ago, someone spent some money on the cleanser. I looked it up on amazon and it seems that you could spend around $8 for a bottle of cleanser or up to $25 for a whole kit.

Total time: 1 1/2 hours plus drying time. It took me a while to brush these puppies. At least they dried faster than I would have expected.

Final verdict: It seems to me that brushing them may be the most effective step for me. I'm not tromping through much mud and snow. Maybe now I will brush them more often, or at least when I start to notice they are dirty. It is probably a good idea to clean them as the cold weather moves on before they get put away for the summer. Seems that the original repellent has done its job since these still look pretty good after four years. Off to re-apply that repellent to keep these babies happy.


Wednesday, September 19, 2012

Pin 133

Original pin:
Pinned Image
no source available

Smart idea! Write on the washer lid with a dry erase marker to remind you not to toss your "do not dry" items into the dryer.

I grabbed a dry erase marker on laundry day and went to work. Now, I don't have just a whole lot of fine items that can't be dried, but this week I found at least three.  First item into the washer. . .

I actually wrote instructions on the washer just in case someone else in my house might feel like moving laundry to the dryer. Riiiiggghhht. . .  keeping the dream alive. But, guess what didn't go in the dryer? You got it, that white button up shirt with lace, that's what! I hung that shirt up and wiped off the dry erase with a damp cloth.

Here I am. Feeling so awesome and smart that I find just the right spot to store my dry erase marker in the laundry room where I can reach it and remember it. Next up, two sweaters I picked up a the thrift store for some upcycling later this week. Into the washer you both go! Green sweater, brown sweater scrawled across the top of the washer.

Guess what. Neither of them go in the dryer either! Touchdown dance! Now to just wipe it off. . . maybe this cloth isn't wet enough. . . maybe some Windex? . . . soak for an hour with bleach??!?!?!
After all that I still have this reminder:


Here is my theory:

While I do try to keep a tidy home, I probably only clean the washer top every six months or so. There was probably some degree of build up of lint and detergent, and who knows what else on the top of the washer. The first time I wrote on it the ink stayed on the build up gunk. Then I cleaned it all off. The second time it went straight on the top and apparently soaked in! I can't get it off yet. Same marker, same spot.

Total cost: $0

Total time: 20 minutes if you add in the attempted clean up. (plus one hour soak)

Final verdict: I thought I was smart and clever, but I guess I won't be trying this one again. I'll have to stick to post-it notes. Although, any brown and green sweaters may be safe for life around here.


Tuesday, August 14, 2012

Pin 119

Original pin:
Pinned Image
http://www.thethriftyhome.com/2009/05/power-of-vinegar.html

"Soak paper towels in vinegar and wrap around faucets. Wait an hour and wipe off. Cleaning power of vinegar!" says the previous pinner.

We've got some hard water out here in funky town. I have tried all sorts of products to remove it and some work a little more than others. Nothing has removed them completely.  I was in a major kitchen cleaning funk this morning--seriously, I was climbing up on things to dust the tops of cabinets, the refrigerator top was disinfected, I even cleaned the vents on the front of the oven with alcohol and q-tips. I thought this would be easy enough to set and let it work while I obsessed over other things.

The kitchen faucet before:

I wrapped it with soaked paper towels and then just dumped more vinegar on top for good measure.

One hour later:
Still some small spots left.
So I rewrapped it with the same paper towels, dumped a little more on and then let it continue to soak.

Three hours later:


This is probably as good as it will ever get. It is the best I have been able to get with any cleaning product so far. In the middle picture you can see some leftover rings, but you can only see them well up close. I was pretty happy with the results. Maybe if I had grabbed some of those q-tips and started scrubbing I could get those pesky rings off.

Total cost: $0, I keep that vinegar around here in bulk.

Total time: 5 minutes hands-on, total soak four hours.

Final verdict: Easy enough and did a good job. I will do this again when the water stains have built back up. Oh, vinegar. Is there nothing you can't do?

Wednesday, July 11, 2012

Top Ten Favorite Pinterest Pins

As I promised yesterday, here are my top 10 pins.  These are MY favorite either because I have used them over and over again, or because they were just awesome to begin with.

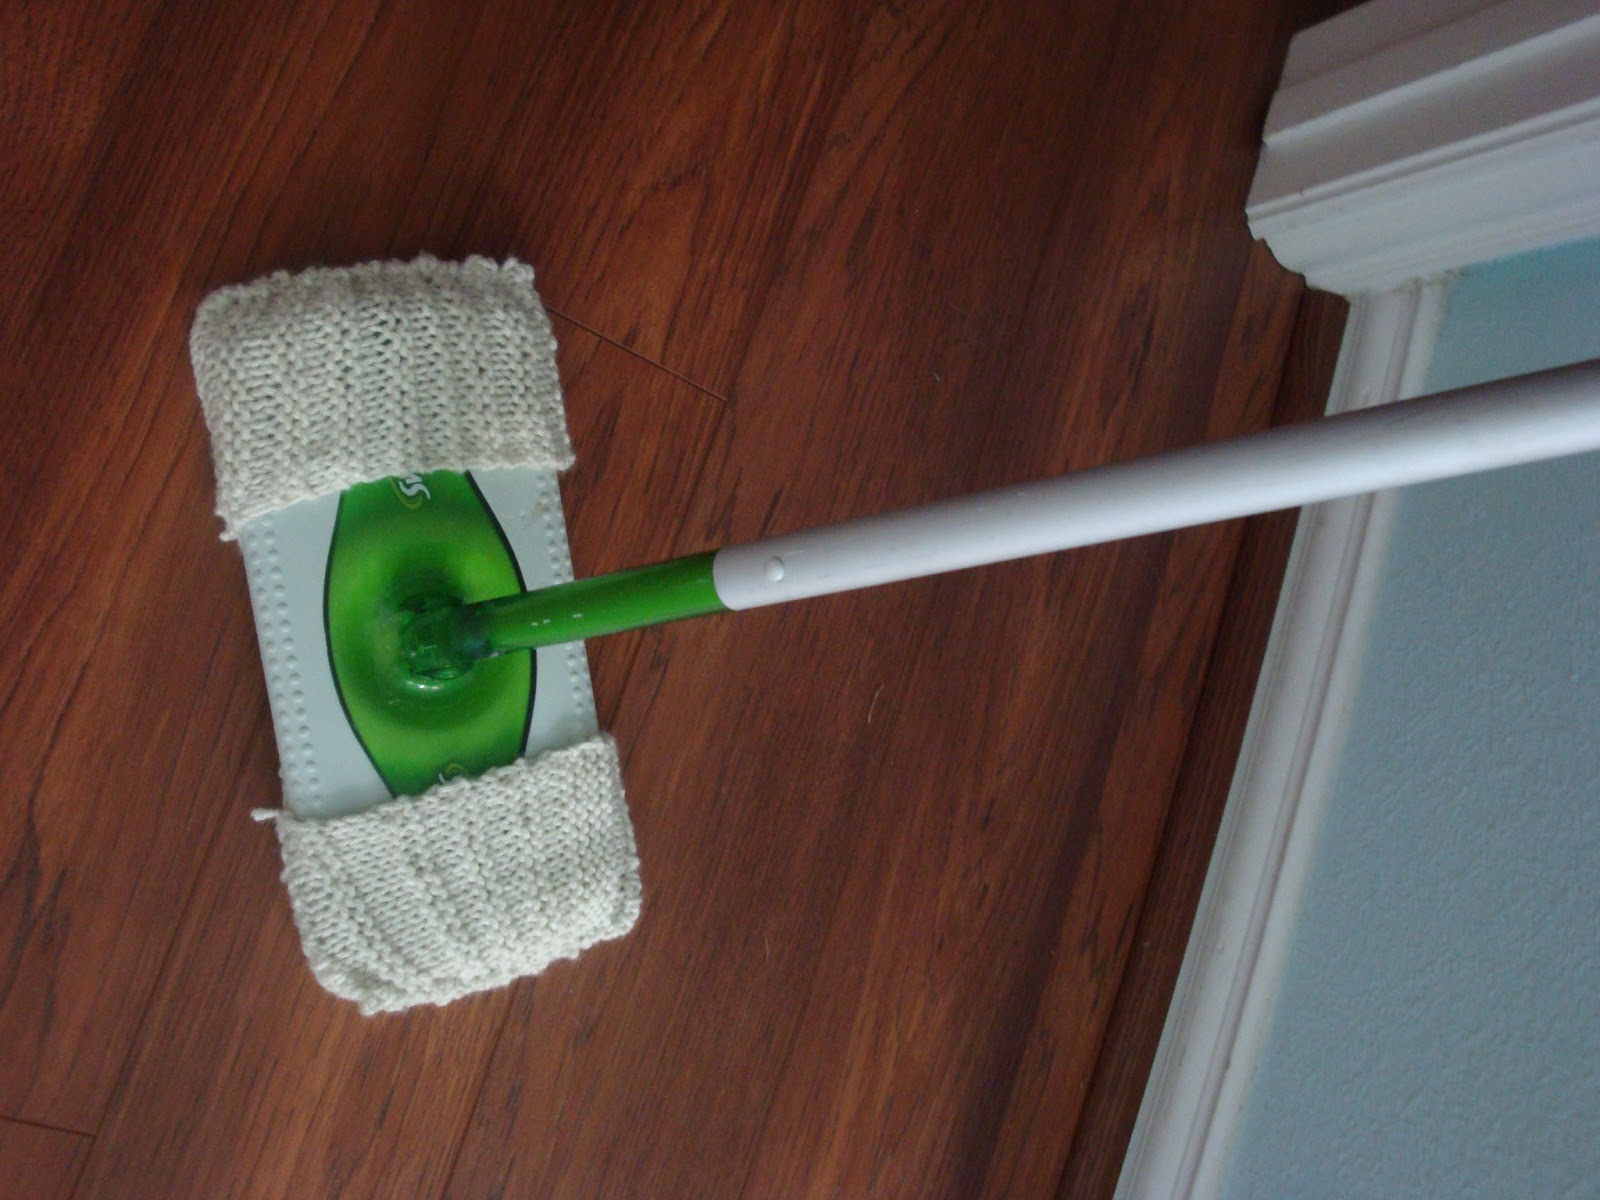
10. Pin 80: Knitted swiffer cover. I have already received requests for these for Christmas gifts. Better get started now!
9.  Pin 49: Mommy dress.  I wear this all the time and always get compliments on the color combo. I did go back and fix the sleeves, just in case you were wondering.

8.  Pin 31: Frozen yogurt dots. We can't walk by the yogurt at the grocery store without my kids asking to make these.
7. Pin 71: Lemon slices and daisies. I am still amazed at how long these flowers stayed beautiful and fresh. Weeks.
6.  Pin 53: Homemade pita bread. Simple and delicious. So many ways to stuff the leftovers never last long. But best right as they are coming out of the oven hot.
5.  Pin 35: Honey Almond Sugar Scrub. I love this as a facial scrub and use it nearly every day. I have used this basic formula to create other varieties by using flavored teas and different extracts.


4.  Pin 23: Sock bun. A pinterest legacy. I don't get super awesome curls but I think it is a fun way to wear my hair up and out of the way. A change from the boring ponytail, a comfortable way to sleep, and a great way to hide hot-mess-mommy hair. I still think its weird when people know I'm wearing a sock on my head though.
3. Pin 12: Glow bath. My kids ask for this all the time. I use it as a reward for good behavior or as a trick to get them into a bath when I am just too exhausted to fight.
2.  Pin 5: Make your own foaming soap. Genius. I will never buy foaming soap for my children ever again. You can create this for pennies.
1. Pin 37 & Pin 90: Technically two projects but they came from the same pin so I am considering them one. The tank maxi and short dresses. I always get compliments on these when I wear them out.


My top five posts based on YOU! Ranked by popularity & views:

5. Pin 69: Microwave corn to remove silks & husks lickety-split


4.  Pin 89: Cafe Rio Chicken: Made in the slow cooker with so many uses.

3.  Pin 92: Classic Baby Blanket Crochet Tutorial. Almost done with number 2.


2.  Pin 90: Short tank dress
1. Pin 91: Jillian Michaels Detox Drink. Aren't we all looking for a quick way to lose weight?


Saturday, May 12, 2012

Pin 71

Original pin:
Pinned Image
http://www.allyou.com/budget-home/easy-decorating/backyard-party-ideas-00411000067578/page5.html

Our theme for the teacher's appreciation luncheon was yellow, so I did not go with the red bandanna runner, just the lemon & daisies motif.

So many things right about this. I just don't know where to start.

First, I think it is sweetly simple and pretty.

Secondly, and I didn't know this before, but the lemons help the flowers stay fresher, longer. I was a little worried making these that the lemons would make the water too acidic for the flowers. I was arranging them the night before and I didn't want them to die overnight. A little google action later, I learned that the lemon was actually great for the flowers.

I just went with white daisies. I wanted to but them in bulk because I did not need the extra greenery that comes with arrangements. I tried to order them from a wholesale club in our area but there seemed to be some communication difficulties. Next, I called a local florist. He said he could do it, but that I could get a better deal if I went to Fort Worth Flower Market on 7th. Thanks for the advice! If you are in Hurst, support Cooper's Florist! Since they were so helpful and honest, I will be buying my next arrangement there! As for bulk, 7th street was definitely the way to go!

As I gathered my supplies to pull it all together, I realized I only had 6 mason jars instead of the 9 I thought I had. I had to scramble for some extra vases at the last minute but the eclectic grouping just pulled it all together perfectly.

The next morning, the flowers were fully opened and absolutely gorgeous. I added some color-coordinated ribbons and they were beautiful!
My eclectic grouping of jars, pitchers, and vases.

I threw some white Asters in the tall glass. A parent brought a dish in this picnic basket that worked perfectly with the theme so we pulled it into the decor!


The teachers loved them!

Total cost: $5 worth of lemons, $37 of flowers. Random assortment of already owned jars & vases made 11 arrangements

Total time: 1 1/2 hours of arranging

Final verdict: I love the way they turned out and we got lots of compliments. Super cute! And I feel smart knowing that adding a little lemon to the water will keep the flowers fresh. The flowers are nearly five days old now and still look gorgeous. Not one has wilted yet.

And just a few extra flower pictures. I just couldn't stop taking pictures of them. I don't think I have ever had this many gorgeous flowers in my house at one time!