Showing posts with label kid fun. Show all posts

Tuesday, September 22, 2015

How to Make Wall Decals Stick

Hello again faithful followers! Long time, no see. . . I MISS YOU!!! Life with three boys is crazy! Crazier than I could every imagine, but I love it nonetheless. Here is a little gift for you. A post I have been working on for, oh, about 19 months or so (!!!) Seriously, how do moms have time to do anything for themselves? It took me almost two years to get this gem ready for you guys!

Shortly before number three's arrival, I put his nursery together. (And shortly is an understatement. This was literally days before his arrival. Welcome to your life little brother.)  Sometime around midnight one night I decided to put up the wall decals that came with his nursery set. You know, those stickers that are supposed to go on the walls to decorate, but claim to be removable and repositionable and still stick.  I didn't think our walls were necessarily "highly" textured, but I could not make those darn things stick! I would put them on and mere seconds later they would slowly peel free and crumple to the ground. I searched online for tips and tricks but all I found were people with the same problem as me. Not one to be defeated, I figured out how to make those suckers behave against their will.


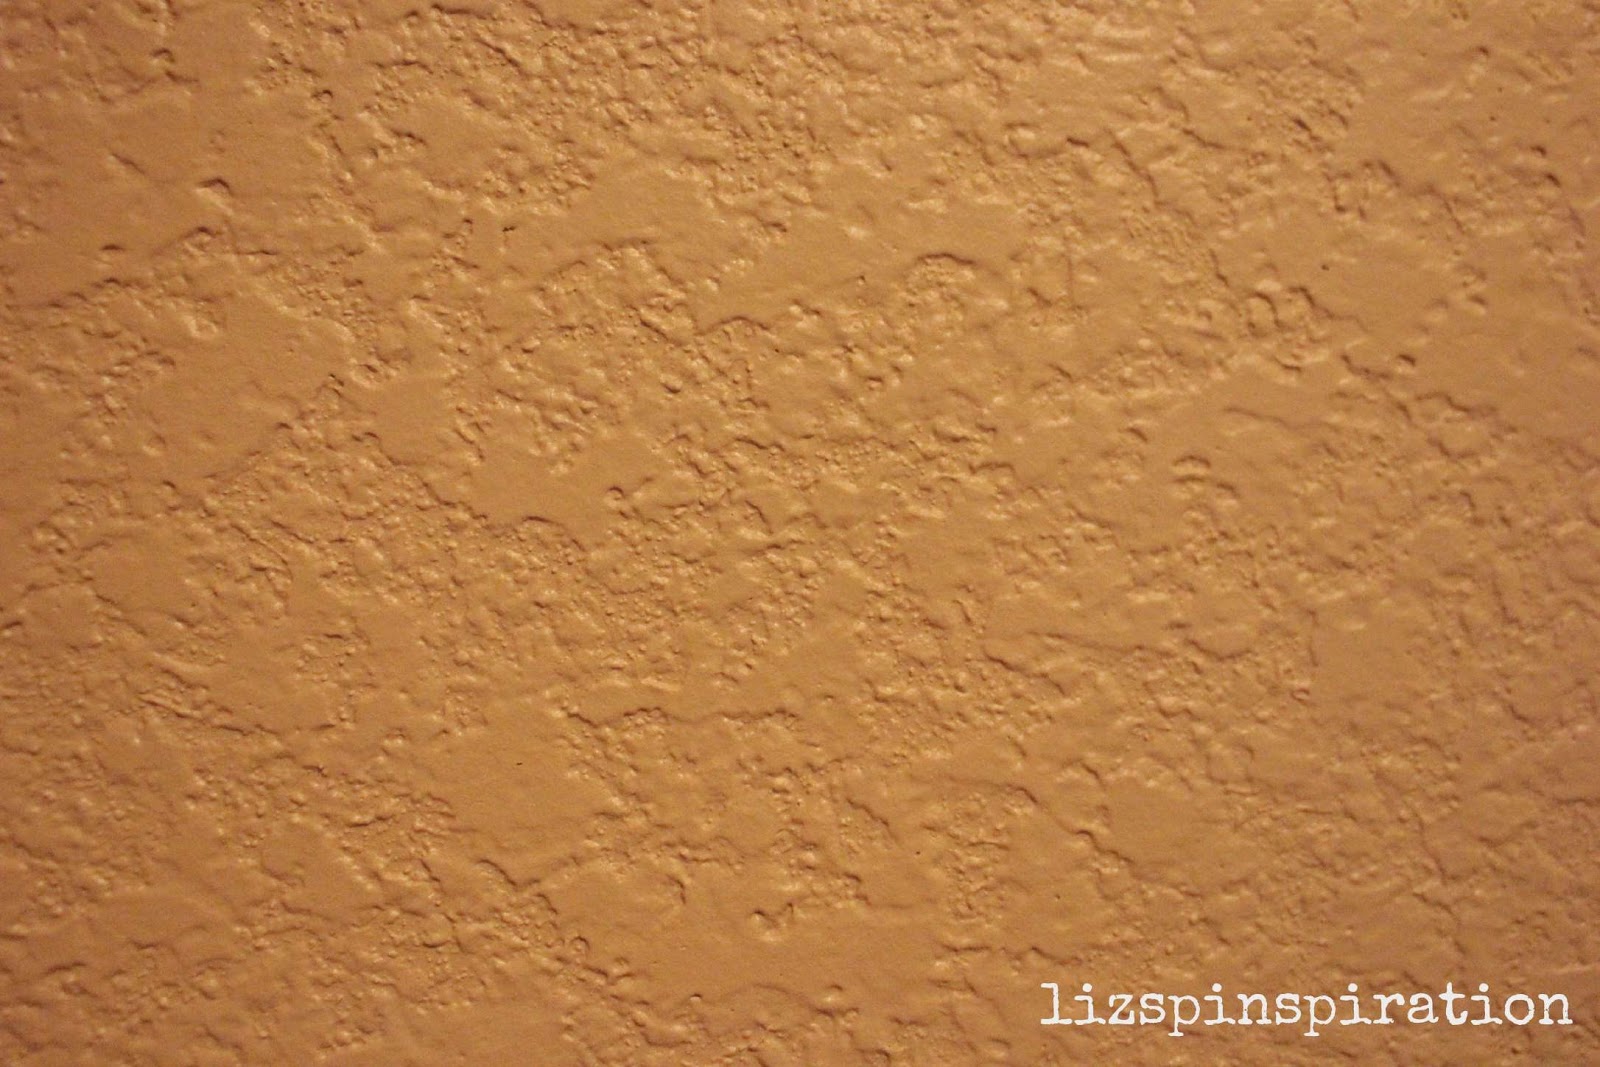
Let me backtrack a little bit. So, these particular stickers are Skip Hop brand, but this trick can apply to any of the vinyl stickers out there. Here is a close up shot of the texture on my wall, which is also covered in a semi-gloss latex paint.


After fighting with the ornery stickers for an hour or so, finding no help from my friend the internet, I was all in. I decided that these were going to stick where I wanted them even if I had to glue them up there with super glue (which is NOT what I ended up doing, so try this method first.)  Disclaimer: The following process didn't damage MY walls. I can't guarantee that this won't damage your walls so do a little patch test in an inconspicuous spot first. However, throughout this, my stickers have remained fully removable, repositionable and have stayed put for the 19 months they've been there. The photos here are not of the actual process when I put them up--because I was only blogging in my brain at the time, but I have used this process to repair decals that have come off thanks to sweetie pie's help. This decal I'm repairing is above his changing table and he has ripped it with his toes while fighting against his diaper changes, sweet little angel of destruction.


What you need--an iron and a presscloth. If you don't have a press cloth, just use a scrap of cotton fabric or a towel. Something to be a barrier between the iron and the decal.)  Set your iron to no steam and the heat to low-medium low to start. You may have to turn the heat up depending on how hot your iron gets and the thickness of your presscloth, but start low. You can always go up.

Position your decal on the wall where you want it. Place the presscloth over the decal.

Iron over the decal and presscloth with medium pressure making small circles for 10-15 seconds at a time. You are basically trying to soften the vinyl. Note--if you touch the actual vinyl with your iron you will most likely melt the vinyl to your iron thus ruining both your decal and your iron--so watch out!

Once you have sufficiently softened your decal, remove iron and presscloth. Run your hand along the decal using your fingers to really press the decal down into the texture grooves on your wall.


You may have to repeat the process a few times to really get a feel for how soft your vinyl needs to get and how hard to smooth the decal down so don't get discouraged if it doesn't work immediately. My decals were pretty big so I just worked it in sections around and around until all the edges were smooth against the wall. Other than that, its pretty simple. My husband did come in in the middle of the night to find me ironing the walls and he certainly gave me a crazy look. I just blamed it on the crazy pregnancy hormones and that lovely pregnancy insomnia and shooed him out of the room.

The top picture is the finished product of the original application. Here is the finished repair job:
Zoomed in. You can see a tiny crack where the decal had been ripped. 

But from a few feet back you don't even notice it. 
Hope this helps you! I would have loved to find this when I was in the middle of my frustration with the peeling decals. Happy wall-ironing!

Hope to see you again soon--I'll be back blogging regularly again just as soon as I finish running the boys to school, cello lessons, gymnastics, reading academy, Bible camp, doctor's appointments, Dayschool, tennis lessons, reviewing their homework, practicing spelling lists, returning library books, editing the school yearbook, selling 800 cases of fundraiser chocolate, feeding the masses, working my REAL job, kissing on all the boys, training for my next half-marathon, taking my husband out on a date here and there, PTA meetings. . . .

Tuesday, August 6, 2013

Pin 211: Homemade Ice Cream in a Baggie

Original pin:
How to Make Homemade Ice Cream in a Bag by familyfun #Ice_Cream_in_a_Bag #KIds #familyfun
http://myroyalkitchen.com/2011/12/homemade-icecream-in-a-baggie/

The boys and I decided we were ready to take on this challenge today--homemade ice cream in 5 minutes using plastic baggies. Seems a perfect summer activity for kids. I had some 1/2 & 1/2 leftover from a soup recipe last week so the only thing I had to buy was rock salt. Fabulously for me, the rock salt was on sale at the grocery today!

After dinner tonight we decided to whip these up. Things did NOT go as smoothly as I had planned. The basic idea is that you put the ice cream ingredients in a small baggie.  Then the small baggie goes inside the larger baggie with ice and salt. Shake a few minutes and, voila! you have ice cream. First problem was when I turned my back for one minute, little bit decided to shake his bag upside down. You can probably guess that ice and rock salt when absolutely everywhere. Refilled his and when I grabbed my camera to get an action shot, we found problem number two. (Thus no action shots.) The ice baggie was getting torn and leaking. Quick fix--double bag the ice bag.  Back to work when almost immediately, the ice cream baggie was ripped and leaking into the ice!
milky, icy, salty mess

Double bagged the ice cream bag and changed strategies.  I sat the boys down in chairs, wrapped the double bagged double bags in a towel and we went for more of an agitation/massage motion than shaking to avoid any more trauma to our baggies.


This strategy did not result in any more tears, no leaking, and we actually did end up with some ice cream eventually. It took longer than five minutes and my kids didn't have the arm strength/endurance to do this alone. I took turns with them agitating there bags. Maybe about 10 minutes after we had fixed all our problems and changed our strategies we decided our ice cream was solid enough to sample.


It probably could have gone an additional few minutes, but it was pretty ice-cream like. The taste was really good--much better than I anticipated. The boys dressed theirs up with sprinkles and I just kept thinking of the delicious candy mix-ins I didn't have.  We made two batches per the recipe. It easily made four servings (two servings per baggie).

Total cost: $2.49 for rock salt

Total time: It took us 25 minutes to solve all our problems and end up with a mostly frozen ice cream. Next time I predict it will be more like 15 minutes.

Final verdict: We will make this again. One of my favorite soups calls for a small amount of half-and-half and the remainder always goes bad in the fridge. This is a perfect solution to using up that left over bit. My recommendations (and plan for next time) double bag from the beginning. Double bag the mixture and double bag the ice. Also, I will stick with the agitation/massage action. It worked and just took a bit longer. The kids were really bummed they didn't get to eat their ice cream out of the bag like the kids in the picture.


Monday, April 1, 2013

Pin 196: April Fool's Day Prank

Original pin:

http://mrsgoffskinders.blogspot.com/2012/03/best-april-fools-joke.html

A fun little April Fool's Day prank--a homemade batch of "brown-e's"!! Love it! (And by the way, this blog it is from has some really cute ideas for the pre-school/early elementary crowd. I'm going to have to spend a little more time digging around out there.)

I spent last night at work (my "real", paying-sort of job) so this morning and early afternoon were spent sleeping. Big El was at school and Lil' Dub was off at Grammy's house for the day. After I picked Big El up from the school bus, we hopped in the car to head out to pick up the brother. We were talking about April Fool's Day and what sort of funny things we could do when I remembered this fun idea. I LOVE a good pun. I hadn't intended on making any stops, and money has been tight the past month (thanks to birthdays, dental work, home repair, more birthdays, more dental work, more home repair. . . ), so I didn't have any cash on me. I have strictly forbidden myself from charging or debiting anything other than true necessities. However, one of my favorite dollar stores was on our way and we started digging change out from all the little storage spaces in the car.

We managed to pull together a few dollars and stopped in for our supplies. With our change, we bought foil, a brownie pan, some brown lunch sacks, and an Orange Crush (because hard work made us thirsty and we had a couple extra coins.) As any good crafter (or nurse), I always have a few tools with me, so I pulled out my suture scissors and went to work making some "E"s while Big El went to work on the Orange Crush. Moments later, we had a pan full of Es ready to present to Grammy and Pops.

He was so excited as we met them at the door bearing our special holiday brownies. When Grammy peeked inside and found the surprise, Big El burst into giggles.


We were able to pull it again on Pops and then again on Daddy. Good clean April Fool's Day fun!

Total cost: $3 (unless we add in the Orange Crush.) I could have put this together for $0 if I had had the clear brain to think of it before we left the house. Oh, the woes of working the night shift.

Total time: 5 minutes (plus baking time. . . hehehe)

Final verdict: I love it because it is a good pun. The kid's loved it because it was fun to play a prank on April Fool's Day. Now how are we going to top this next year??

Sunday, March 31, 2013

Candy Free Easter Baskets!

I am not a huge promoter of holiday candy. I like baking around Christmas, I like Thanksgiving pies. What I dread is the endless bucket of SweetTarts, Jolly Ranchers, Skittles packages, etc., that come home by the handful around the holidays. I throw them all in a bucket and try to ration them out to my children--who have proven to me many, many times just how wild a little sugar will make them. My littlest literally starts spinning around after a little sugar rush. In a month I usually end up tossing a lot of the candy. I am actually tossing the Valentine candy this week. I don't think it will be missed in the excitement of Easter.

I am not all bah-humbug, though. I did take them to our church Easter egg hunt today. I will have more eggs for them to hunt tomorrow--some with actual candy in them! Those without candy are usually stuffed with animal crackers, Goldfish crackers, pretzels, Cheerios, or other items with a little less sugar.

Our budget is tight this year. I did not really want to spend a lot of money on candy that would get tossed in a month or on trinkets that will break easily. I don't have a ton to spend on big ticket items. I thought it through and decided to buy stuff on my grocery list (or a near future grocery list) and make them a bit more festive and fun than usual. That way I am buying items I will need anyway and will get used.

Here they are followed by a list of what is inside. There are a few little indulgences in there. The whole basket contains only one sugar-y item which clocks in at 4 grams of sugar per serving.


Contents:
I recycled our Easter baskets from a previous year.


Easter themed Goldfish crackers: Since they got them in their baskets this year I didn't put them in the eggs.
Bunny-shaped Macaroni and Cheese: Total splurge! My kids usually get the store brand or homemade.
Toothbrush and toothpaste: To fight decay from the candy they do get!
Book: From the under $4 price range
Got Milk milk straws: My friend mentioned to me that she had picked these up for her son's basket and I thought they were a great idea! They are straws filled with a little flavoring (this is my sugary treat for them) that are used to drink milk. They flavor the milk as you drink. I figure the milk drinking balances the sugar out a bit.


Flip-flops: Spring is upon us and flip-flops are a summer necessity around here.
Squeezable applesauce: My kids love this stuff but it is not on our normal list. They are usually stuck with the jarred kind.
Mr. Bubble foam soap: They needed bath soap anyway.
8-Pack of new crayons: My oldest has realized the wonderfulness of a fresh pack of crayons complete with perfectly pointed tips. Ahhh, a boy after my own heart!

Total cost: About $23 each. Yes, that is a bit more than I would have spent filling their baskets with dollar-store treasures, but now I don't have to buy all these necessities on top of that. The crayons, milk straws, and books were the three items that wouldn't have been purchased at all. Those together were $6.50. I guess you could look at it from that perspective that the baskets were only $6.50 on top of our normal spending.

Final verdict: When I list out loud what I got them (toothbrush, soap, shoes) it sounds kind of lame. One day my kids may look back and think this was a lame basket, but I think its actually pretty great. I think they will love it!

Friday, February 15, 2013

Pin 184 and Pin 185

Original pin:
Pinned Image
This is not the link I had originally pinned, but the blogger has updated her site and the best post is here http://eclecticallyvintage.com/2013/02/cupid-float-valentine-drink/#

I needed a fun drink for the Kindergarten Valentine's Day party. I thought these were super cute and would be a real treat for the kids at their party. I bought all the supplies (I actually had a leftover jar of unopened cherries from Pin 163) and bought some fun party cups.

In planning my transportation logistics, I was thinking about getting the ice cream up to the school, keeping it frozen, dipping, dripping, sticking, melting. . .   Back to Pinterest I go. I had this pin filed away:

Original pin:
Pinned Image
http://www.realsimple.com/holidays-entertaining/birthdays/serving-cake-ice-cream-like-pro-10000001189696/page4.html 

Real Simple suggested pre-dipping ice cream and freezing in paper cups to serve at birthday parties. I modified this suggestion a teensy bit to fit my situation.  The morning of the party, I dipped two scoops into each (clean--I ran them all through the dishwasher the night before) cup.

I packed them into my largest aluminum cake pan (aluminum helps keep things cold).

And then I covered the whole top and sides with aluminum foil. I put it back in the freezer. A few hours later, just before I left the house for the party, I put the whole tray in my large cooler on ice. I left everything in the cooler until just before the kids arrived in the classroom for their party. We set out the cups and, with help from the other mom's, added soda, whipped cream, straws, and, of course, a cherry!


Total cost: I served 22 kids. I used almost two 2-liter bottles of soda and about half a gallon of ice cream. A little over one bottle of whipped cream and a half-jar of cherries. Including the cost of the cups, it was about $12.

Total time: Less than 20 minutes. I think it took around 10 minutes to dip all the cups and maybe 5 to top them off in a team effort.

Final verdict: I love floats! It is such a childhood memory treat for me so I thought it was a fun idea for a classroom party. The pink color was just the icing on the cake for me! Most of the kids seemed to like them--I know mine did! Lucky boy, I have leftovers waiting for him after school today. The predipping trick was awesome. I didn't have to worry about dripping ice cream, forgetting a scoop, or melting leftovers. I just may start doing this for all my parties! And I will probably do floats for school parties again because it was so easy!

Thursday, February 14, 2013

Pin 183

Original pin:

No source available. If this is your sweet creation, let me know so I can give you credit!!

Happy Valentine's Day! I caved at the last minute and decided to craft up some Valentines for the kids. I had already even spent my $1 for the easy boxed kind. I'm not against those, I have used them plenty. It was just when you pair my crafty heart with my new camera obsession and mix in a little holiday spirit, I couldn't resist the urge to create.

I pinned this image a loooooonnnnggg time ago. Possibly over a year ago. I think it is a cute and clever idea.

Getting the picture was a bit more difficult than I anticipated. I showed the kids what we were looking for and they were so excited to create and shoot that they were wiggling around like they had ants in their pants. There was much jumping and twirling and superhero-style posing. I had trouble with them getting the fist rotation and placement (i.e., not directly in front of their face) just right. As I was editing I was thinking about a way to make this easier. They need something that they would normally hold upright. I thought about maybe a clear juice glass. They would naturally be inclined to hold this upright, create the right shape with their hand, and have more of a natural "handing-off" pose. It could be easily edited out, cut out after printing for the lollipop, or just obscured when the lollipop was in place. I have these small glasses I found in the dollar spot that would have been absolutely perfect--had I thought of it before hand.

It took me three separate sessions (I don't get much time with these crazy boys) to end up with two mostly workable shots. Here is what I started with:

Hmm. One of those superhero poses. He was alternating between superheroes and rock star.

I finally got his placement right after I pinned him down on the floor. It slowed him down just long enough and kept his fist forward. His eyes are a little diverted, but maybe he's looking at the lollipop?
After a little editing magic I had these ready (minus the pinspiration marks, of course):

names obscured to protect their superhero identities
I printed these out at one of those store kiosks that print them while you wait. I don't have a good photo printer so I just loaded them on a thumb drive and ran to the store.

I made the mistake of stepping into a craft store while I was out and I stumbled across the most perfect cardstock. I had to buy it to mount the photos. I cut the cardstock a little bigger than the picture, used an exacto knife to cut some holes in the appropriate places, and started assembling.  When L got home from school, I sat him down with a sacred adults-only sharpie marker to write in his classmates names. W's school specifically asks for generalized cards to make it easier for the kids to pass their own.  In the middle of assembly we had to make an impromptu trip to urgent care for the world's worst nosebleed--ugh.

Sometime around midnight, I finished them up. They were not difficult, nor really time consuming to assemble, it was just so late thanks to our 4 hour urgent situation. Here are the final results!

We just couldn't get the cute face and the right fist on this wild man. This will do.


Total cost: $14 without the cardstock, I bought a big pack for $10 and used 20 sheets of it. Somewhere less than $20 for 40 Valentines.

Total time: Really the actual photo taking was the hardest part. Assembly took maybe two hours because I had to cut all the cardstock to size. These would have been perfectly fine without the cardstock, but I like the look and it made them a little more sturdy.

Final verdict: I think they turned out pretty cute. Minus the funky hand position on L, but his friends will never notice that. They are going to notice the lollipop. I spent a little more than I planned, and way more than in years past where I use the dollar store box split between them both. I am happy with them. The boys had an absolute blast shooting them and getting them ready. I have honestly never seen my boys so excited to pass out their Valentines. We just may get in a tradition of photo Valentines. Also, while editing, I googled something about photo Valentines, and there are a ton of versions of this. Check out the image search for more ideas on posing and staging the shots. Another note, when you buy your lollipops, consider the wrapping. These had a lot of wrapping which limited areas of the photo that were visible when the lollipop in place so I had to account a large empty area in the picture.

And Happy Valentine's Day from Pinspiration!!

Tuesday, February 12, 2013

Pin 182

Original pin:
Pinned Image
http://dollarstoremom.com/2012/02/our-valentine-tradition-14-days-of-little-love-surprises/

I love this cute idea to help get in the holiday spirit. I pinned this a long before Valentine's Day and have been keeping my eyes out for some cheap Valentine-themed towels. Did I mention that this pillow is made out of towels? Like dollar-store-kitchen-two-per-pack towels? That is so my style. The idea behind the pillow is that there is a pocket on the front, and for the fourteen days of February leading up to Valentine's Day you leave sweet little notes and surprises for each other.

Unfortunately, I never came across said Valentine's day towels at the many dollar stores I frequent. I did, however, come across some St. Patrick's day towels. Put that together with a little red and voila! The "Lucky in Love" pillow is born.

Since I am making these for my two little boys who are notorious for sticky hands and snotty noses, I wanted to make sure these were washable. Pillow forms were on sale for half-price last weekend, so I picked up a couple of 12 x 12 pillows so that I could make these covers to slip on and off for washing.

I cut one 14 x 14 inch square and two 14 x 8 inch rectangles out of the shamrock towels.
Next I needed a pocket. I wanted to make my pocket out of the red and I wanted it to be heart-shaped. I needed to make a sturdy heart-shaped template. I keep a few empty cereal boxes in my craft stash because the thin cardboard is always coming in handy. I went to grab one off the shelf and found a Cheerios box in my hand. Looking down at it, I realized exactly how perfect it was.
It already had a giant heart on the box! What luck! It was the perfect size and now I didn't have to fuss with trying to get a perfectly shaped heart template. I cut out the heart and used it to trace two hearts out of the red towel.

I made a few attempts at getting this heart just right. One of the consequences of sewing on the fly is that you don't always do it the right way the first time. I'm going to try to show you the way I liked best but I didn't take many pictures of it.

I cut the two hearts out of the red towel. I stitched them right sides together almost completely around. Trim the excess, clip the corners, turn right sides out, press and topstitch around the whole thing, closing the open portion. I ended up with a nicely shaped lined heart pocket.
I pinned this to the center of the 14 x 14 square and stitched in place 3/4 of the way around, leaving the top open to make the pocket. Backstitch at the start and end to reinforce the pocket.
Yellow dotted line is the stitch line
Next I prepared the back. I serged one long edge of each rectangle to neaten it up a little. I sewed a 1/2 inch hem on one of the rectangles and topstitched close to the edge.
I pinned two pieces of Velcro in place on the hem and matched up the Velcro pieces on the serged edge of the other rectangle. I stitched the Velcro in place.

I laid the top piece down, right side up. I placed the back pieces on top, right sides together, lining up the Velcro strips and edges.
I pinned through all layers all the way around and stitched in place. Press, trim the excess, clip the corners and turn right side out. Press again and now it was ready for the pillow!
This was full version one, featuring heart version two. The heart is not exactly evenly shaped so I had to try it again.

Full version two, featuring heart version three--which I am completely happy with.

For comparison, version one on the left, version two on the right. Next to each other the lopsided-ness is much more obvious.

Total cost: $12 for two pillows--three shamrock towels, one red towel, two pillow forms

Total time: The first version took 1 & 1/2 hours, but since I had worked out a few kinks the second one was done in about 45 minutes.

Final verdict: I am going to give these to my boys on Valentine's day but I think I am going to have to replace the heart pocket on version one. My OCD-ness just will not allow that to stay when its twin is so much better looking. I know that my boys won't care in the least. The little lovebugs just adore anything I make for them.  I like her idea of sharing little messages but clearly missed the date on that one. These will be in season for at least another month, so maybe we will share messages from Valentine's day until St. Patrick's Day?  And now that I know how many dollar store towels it takes to make a cover, maybe I'll just whip a new one up for each season.


Friday, December 28, 2012

Pin 169

Original pin:
Pinned Image
http://amazingmae.blogspot.com/2009/06/road-trip-pillow-cases.html

Road trip pillow. What a cute idea! I love this idea to have a pocket on the pillow case for carrying around all your things. Especially helpful for road trips and slumber parties, but fun around the house as well!

The original AmazingMae has a tutorial to create the entire thing from fabric, but I stumbled across some white plain pillowcases at the dollar store and decided to take a little shortcut. I thought about how I could attach the handle and came up with three solutions:

1. Rip out a bit of the seam on each end, insert ribbon, stitch closed.

2. Finish edges of ribbon and just sew in place.

But since I had some pretty plain pillowcases to start with, I decided to jazz them up a bit and go with option number three:

3. Full length ribbon on each side.

I didn't take any pictures as I went, so these directions may not make any sense at all--but I'll try. Maybe if you read the instructions and look at the finished pictures together you can make sense of it.

I cut two lengths of ribbon that were twice the width of the pillow case with a little extra for the handle. I layed the case out as a long, flat, rectangle and, starting at the bottom of the pillow case, pinned the ribbon up one side. (Only pin through one side.) I left a length for the handle and then pinned the ribbon down the other end of the pillow case. In essence, the ribbon was making a giant upside down "U". I sewed the ribbon in place. Then I flipped the case over and did the same thing with the second length of ribbon.

For the pocket I used 1/4 yd fabric. I folded it right sides together lengthwise and pressed. I trimmed the edges to make a neat rectangle. I sewed the three open sides shut and left an inch or so to turn. I turned right side out and pressed. Then I topstitched along the top edge of the pocket. I appliqued the initial in place using the same process as in Pin 70. I pinned the pocket in the center of the case and sewed the sides and bottom in place.

I had picked up a two-pack of new pillows at an after-Thanksgiving sale for $10. I put the pillows in and stuck a little stuffed lovey in the pocket and they were ready to gift!


Total time: 1 and 1/2 hours each

Total cost: Including the inside pillow and the lovey they were around $15 each. Dollar store pillow case, less than $1 worth of fabric pocket and a spool of ribbon.

Final verdict: My boys wanted their own when they saw them. The girls loved them and they were great to have on Christmas Eve once the kids went off to watch the Polar Express.