Wednesday, October 17, 2012

The Fort Worth-Austin Road Trip Hat

The hubs and I took off to Austin for a few days (and nights) to celebrate making it past the 7 year itch. On Monday we marked 8 years of marriage. Woohoo!

I took off Pinterest-ing for the trip as well. However, my hands are always itching to create something and I needed something to fill the time down. We had to fight through all that UT traffic going home from the TX-OU game and I knew we could be in for a looonnngg drive.


Lately I've been looking for a cute hat that was not necessarily a "team" hat to wear. I hadn't found anything I liked so I decided to just make one. I was strolling around JoAnns the other day when I came across a plain utility cap. I thought for sure I'd be able to find you a picture of it plain, but I was unlucky. You'll just have to use your imagination.

Saturday night before we left I worked on some crochet flowers at girl's craft night. I did a little more talking than crocheting, so these flowers took a bit longer, but I did use the same tutorial as I did back at Pin 113. Then when we hit the road, I worked on the edging piece and then sewed all the pieces on. By the time we hit Austin proper I was sporting this fine fashion:


Total cost: I had to buy some extra yarn because I didn't have that dark gray color I wanted so I spent around $10 total

Total time: 6-ish hours. Remember, I started the flowers while chatting and drinking wine, so time wasn't really important.

Final verdict: I am happy with my new hat. It is a bit more feminine than just a plain team-style ball cap. The bill is shorter and the hat has a different style shape to it. I used it a lot because we had wind, rain, and an early morning departure today.

Stay tuned for the Austin-Fort Worth return trip. . .

Friday, October 12, 2012

S'mores Yogurt Parfait


I'm always looking for after-school snacks that are healthy-ish, and more importantly, filling. But I can only feed my kids vanilla yogurt so many times before they start eyeing the cookie jar. I have tried to distract them with things like banana "ice cream" and frozen yogurt drops. Here is what I came up with today.

Ingredients for 2 servings:
3 full graham crackers
1 cup low calorie vanilla yogurt
2 tbsp chocolate chips

I put the graham crackers in the food processor and pulsed it a few times to make coarse crumbs. I put about 1/4 of the crumbs in the bottom of each glass. Then I put a 1/4 cup yogurt on top of that. Next I layered 2 tsp chocolate chips in each of the cups. Topped the chips with an additional 1/4 cup of yogurt each. Split the remainder of the graham crackers between the two cups on top of the second yogurt layer. Garnished with the remaining chocolate chips.


I am getting a round of applause over the head with a mouth full of snack!
 They gobbled these up happily and ran off to play. I did not hear one "I'm hungry" or "When is dinner?" or "Can I have a snack" for three hours! At three hours, my answer was, "Dinner's ready! Yay!"
 

Thursday, October 11, 2012

Pin 144

Original pin:
Pinned Image
http://keephomesimple.blogspot.com/2010/05/quick-french-bread.html

Quick french bread. The Pinterest comment said one hour.

I know I have mentioned this a lot, but I like bread. I like homemade bread. I like to make homemade bread. Tonight I wanted to make some fresh french bread to go with our spaghetti dinner but I was running around this afternoon and didn't get my usual recipe started early enough. It takes about 4 hours all together with boiling milk, kneading, two risings, etc. I decided to try this one out.

I'll be honest here. I was real skeptical. I just wanted to keep changing little things up here and there. For instance, I wanted to use quick rise yeast instead of regular yeast. Really, would it rise enough in one hour?? I wanted to knead it longer. I wanted to let it rise longer. I wanted to add more flour. But I didn't. I usually try recipes as written once before I start making changes or substitutions. As much as it pained me, I did it almost exactly. Here are the changes I made:

1. I made the whole dough in the stand mixer with the bread attachment.
Proofing in the mixer bowl

2. I did NOT create a warming cabinet in the microwave. The author doesn't go into much detail except stating to run the microwave for 2 minutes before you put the dough in to rise. Um, I was always taught to NEVER run a microwave empty. I do often, almost always when making bread, create a warming cabinet in my oven. I run the oven at 350 for 1-2 minutes then shut it off. Then I put the bowl in the turned-off oven for rising.
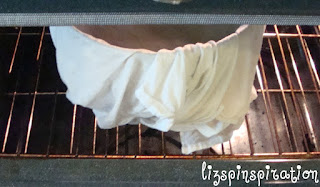
My warming cabinet

3. The dough was so sticky it was almost impossible to handle to shape. I gave it a good dusting with flour before tossing it on the counter. Patted it to a flat rectangle, then rolled it--jelly roll style, to put on the pan. My second loaf was prettier than my first because of the stickiness.

4. I lined my pan with a piece of parchment paper, sprayed with cooking spray. Sticky dough has burned me before.
Two loaves, ready to go in the oven. See that little ball on the left end of the bottom loaf? That's my tasting biscuit. So that when its fresh out of the oven I can pull that little ball off and taste it without cutting into the whole thing. Can't let the scraps go to waste. :)
So no real ingredient changes or huge method changes.  Meanwhile, as the bread was cooking I was tending to a couple busted lips with Popsicles. I was trying to assess the damage and determine if I could let the bread cook or needed to turn it off and head into the ER. Luckily, the Popsicle fixed him up enough. It's a little ugly though.

Ding! It's ready!
My major dusting of flour really shows here. How to fix this? Butter. Butter fixes everything, right? I just brushed on some melted butter and lookee here:
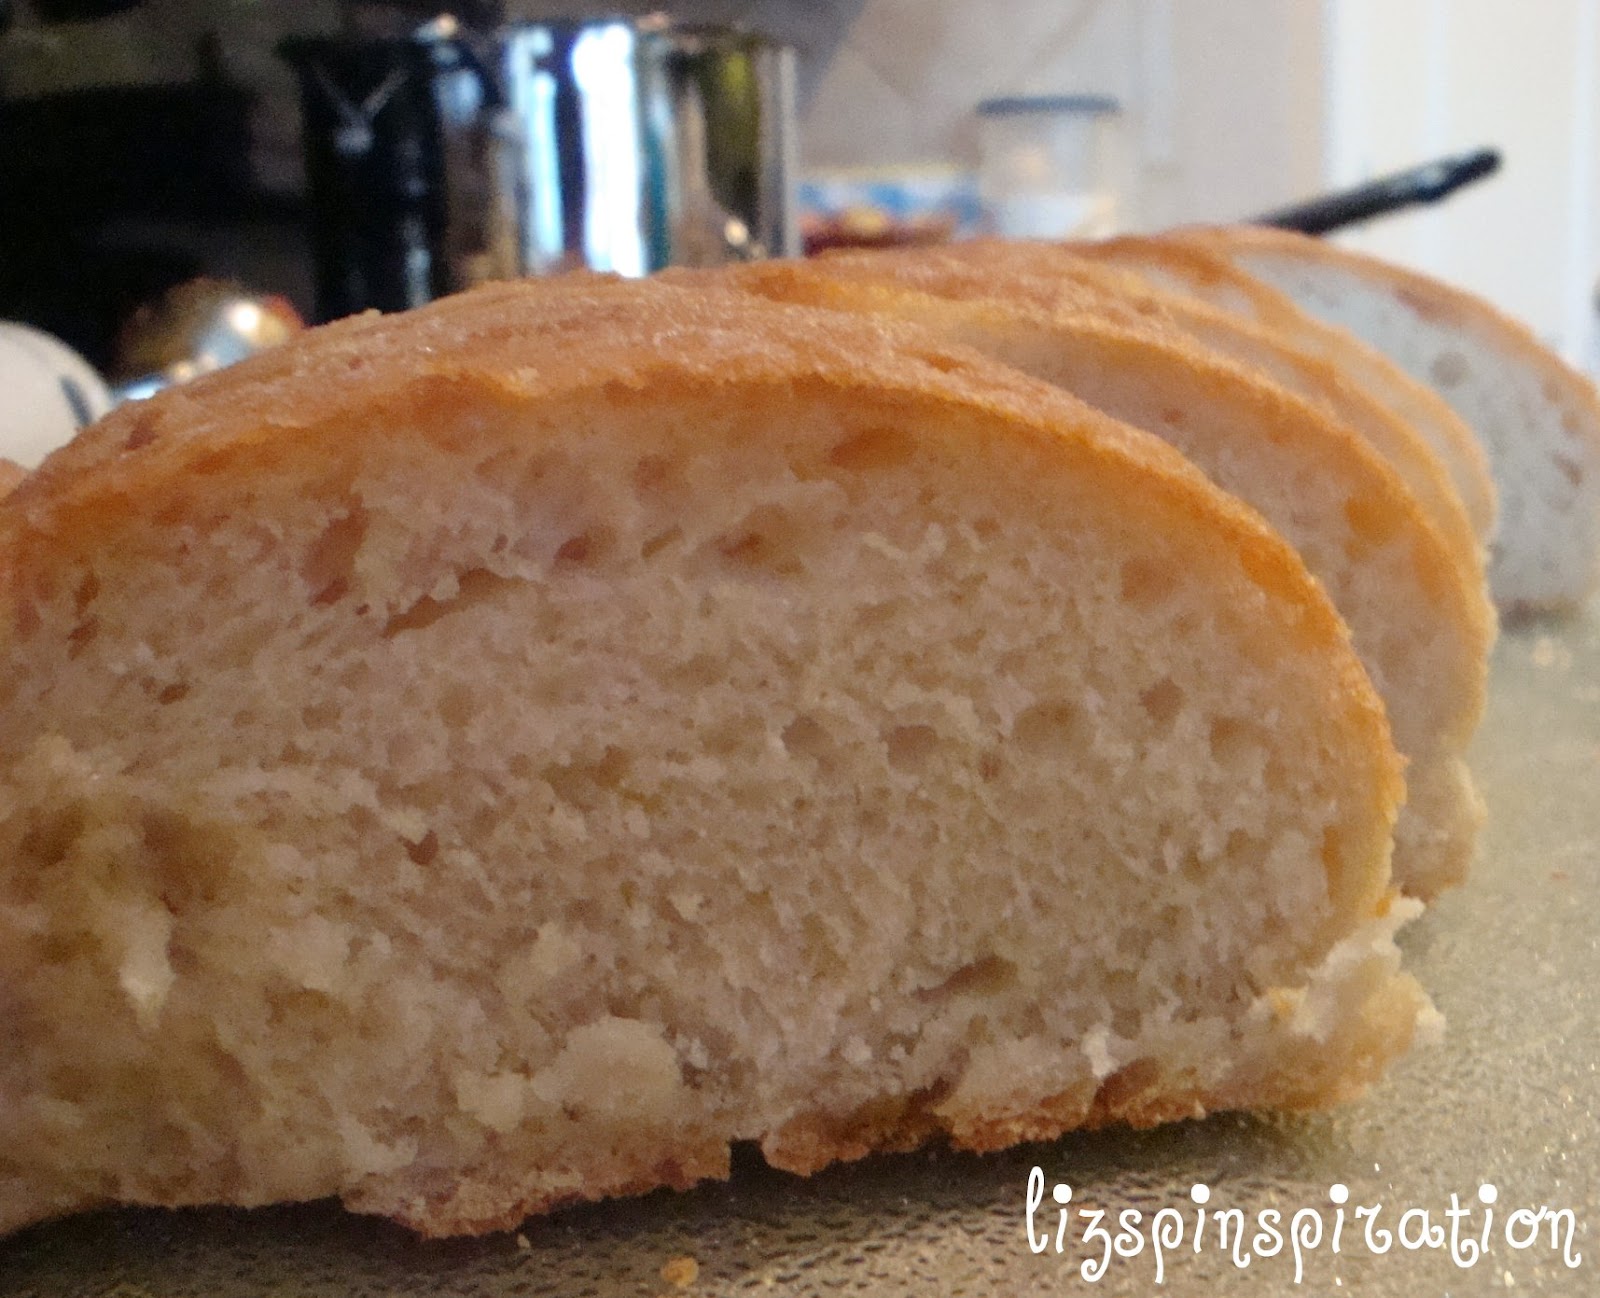
Gorgeous. Paula Deen would be so proud. And now my little tasting biscuit is in my belly. Here are some other pretty shots of the bread.

The golden crust was just beautiful. The bread inside was very soft. As was mentioned in the comments on the author's post, it is a dense bread. It is very soft and the crust has a slightly sweet taste to it. I wouldn't immediately classify it as "french bread" though. It is not the same texture and doesn't have as much of the thick chewy crust as French bread usually does. I think allowing more time to rise would create more air pockets and move it closer to what I think of as French bread. (Although when I looked it up the definition said "white bread in a long thin loaf" so I guess technically it is.) My husband loved it. We ate the whole loaf tonight. I sent the other home with my sister.

Total cost: $0. I had everything already on hand.

Total time: It's called one-hour French bread. It took about 35 minutes to prepare and then 35 minutes to cook. Just over one-hour. Maybe I'll get it under an hour next time.

Final verdict: Next time. There is a next time. It might be tomorrow. So good. I will definitely use this one again. With the sweetness to the crust, I think it could truly make some excellent French toast in the morning--if there were any left.


Wednesday, October 10, 2012

Pin 142

Oops! Looks like I can't count lately. I skipped 142!

Original pin:
Pinned Image
http://www.healthylivinghowto.com/1/post/2012/01/detoxification-part-i-healing-waters.html

How to draw a detox bath.

I actually had pinned two different sites for detox bath. Both were the same directions. I guess I think I need a lot of detoxing! Lets explore this. What exactly is a detox bath? From what I can find, it is a bath that draws out toxins from your skin, can help with aches, and can improve sleep and energy patterns.

I love a relaxing bath. My plan was to soak in the bath, candles lit, sipping champagne. Sounds relaxing, right? Then I started reading the directions. Apparently you aren't supposed to take IN toxins (ahem, champagne) while you are detoxing. You are supposed to drink lots and lots of water. Dang. Who would have thought detox would be alcohol-free? Oh. . . never mind. No champagne so I gave up on my candles too.

Instead I gathered my detox supplies.
 And read all the safety warnings. Uh oh. I hope not.
Well, here goes nothing. . .
This was hard. I didn't expect it to be hard. For the first 10 minutes or so it was relaxing. And then it got really, really hot. I was sweating--which is the point. But I still had 30 minutes to go! It was like sitting in a sauna. I drank every drop of my 32 ounces of ice water I had taken in with me.  Due to all the warnings on the website, I had jokingly given my husband a heads-up about this pin. "Ha, ha. If you hear a loud crash you might come check on me. Ha, ha, ha."

When I started whining about the time he came to check on me. At 20 minutes left my husband came in and fanned me with a magazine. This is when I started thanking myself for not drinking alcohol and lighting candles. All that extra heat! No, thank you.

At 10 minutes left he brought me a washcloth with ice cubes to put on my forehead.

At 5 minutes left he gave me minute by minute countdown. It was like he was cheering me on through the finish line of a marathon. And, I DID need help getting out. I was lightheaded after all that heat. Warnings noted.

So did I feel detoxified? I don't really feel any different. I don't know what I was expecting, really, but there were no visible toxins in the water. My skin doesn't look or feel significantly different. I didn't lose any weight. My energy level didn't change noticeably from yesterday. My sleep pattern didn't change.

Total cost: $2

Total time: 40 minutes, to the second.

Final verdict: Unless I notice something dramatic in the next day or so, I won't be wasting my time or energy doing this again. Have you done it? Do you notice anything different?  (And in case you were wondering--no laxative effect. Guess that only works if you DRINK the water you're soaking in. . . )

Tuesday, October 9, 2012

Pin 143

Original pin:
Pinned Image
http://www.melskitchencafe.com/2009/09/crispy-southwest-chicken-wraps.html

Crispy southwest chicken wraps.

Don't these look delicious? All that gooey cheese. Yummmm.

This was a quick and easy dinner to throw together tonight. It even says on the original post to use whatever variations sound good to you so I didn't follow the recipe exactly. I cheated and used a ton of canned stuff. Here is what I put in mine:

1 can chicken breast, shredded
1 can diced tomatoes, drained
1 can green chilies, drained
1 can black beans, rinsed & drained
1 cup cooked white rice
1/2 green bell pepper, chopped
1 tsp cumin
1 tsp garlic salt
1 tsp chili powder

shredded Colby jack cheese & sour cream per each person's preference

I used the smaller, fajita sized tortillas because that is what I had already in the pantry, so I couldn't stuff mine as full as Mel over at Mel's Kitchen Cafe. And, I'll admit, my tortillas weren't even really that fresh. I followed Mel's directions and rolled them up before placing in the skillet and the first one tore a little because it wasn't fresh. Oops.


See the torn corners. Didn't hurt the taste.
After that I just warmed the tortillas in the skillet first to soften them up a bit. Pulled them off, loaded them and rolled them, and then popped them back in the skillet. Problem solved. Also, I only completely folded the four sides for the boys wraps. I wanted mine to be stuffed full!


Side view

Served up with a little corn and sliced avocado
Total cost: I don't really know. The only thing I had to go out and buy was the green bell pepper. All the other ingredients are staples in my pantry. (Including the avocado. Have I told you before how much I LOVE avocado? My day isn't complete unless I have had some delicious avocado.)

Total time: These were fast to make. I did make the rice the traditional way, but you could easily buy some of that microwavable or minute rice. Once the rice was cooked, the rest of the meal went together in about 10 minutes.

Final verdict: They were good. They were not unlike some other dinners we have eaten. We are burrito loving folk around here. My husband, until I told him, didn't even realize this was a new recipe. I would never added the bell pepper on my own and I would usually use either a Tex-Mex rice or my favorite for burritos--Cilantro Lime rice. However, the surprise here was that BOTH the boys ate them AND liked them. Even non-eating-child ate them--he actually ate more than boy-who-eats-anything! And, the real reason this is a winner: Non-eating-child, also known as boy-who-never-sleeps-and-never-stays-in-bed, after eating this, went to bed and to sleep. Immediately. Didn't even get up once. This must have magical powers. I am going to have to try this again and see if it works the same.

Saturday, October 6, 2012

Pin 141

Original pin:
Pinned Image
http://smittenkitchen.com/blog/2008/09/raspberry-breakfast-bars/

Raspberry breakfast bars.

Don't they look delicious?? I decided at the beginning of the week I was going to make these but I kept putting them off until today. It was a chilly day and after freezing the morning away at t-ball the boys and I decided to stay home. While they caught a movie I put these together.

They were not my typical baking recipe--mostly because it has a lot of steps.  Turns out I had to take a few shortcuts, too. First, I didn't have enough butter so I had to sub 1/3 of the butter with butter-flavored shortening.  Next, my dark brown sugar was hard as a rock so I had to give it a moisture treatment in the microwave. Then, due to the untimely demise of my food processor after it leapt from the cabinet a few weeks ago, I had to process this in my chef's chopper. The chopper is about half the size of the processor so I had to make the crust in two batches.  The boys got interested when I got the chopper out and they came to the kitchen for a while to pulse the button for me. I didn't have quite a full pound of raspberries so when I put the filling in I kind of smushed the berries to spread them out a little.

I baked them as directed and they smelled so good.  I knew these would have to cool and set a while so I didn't even try to taste them warm.  After 30 minutes or so I lifted them from the pan by the parchment and set them on a cutting board to cool further. I used a knife to gently pull the parchment from the edge of the gooey bars while they were still warm. (After that bread fiasco with the parchment I wasn't taking any chances.)
Look at that delicious side view of the filling. Gorgeous.


When they were about 45 minutes out of the oven we just couldn't stand it anymore and had to try some. I was a little nervous about the stability of the bar. In my head I had envisioned more like a cereal bar (think: Nutrigrain style sturdiness) but these were pretty crumbly and fairly fragile. But I was eating from the edge that didn't have as much of the bottom crust. They were delicious, just as I had suspected they would be. More dessert-like than breakfast food. Eating them slightly warm and gooey was almost like a cobbler-style dessert.

After they were well cooled and set I cut them into bars. Now the crust was sturdier--not Nutrigrain sturdy, but able to handle without falling apart. The topping is still pretty crumbly. I will probably eat these on a plate with a fork--not handheld.

Total cost: $5 for raspberries. Clearly could have spent more if I had planned better and replenished my staples--butter, brown sugar, etc.

Total time: With all the extra steps I took it was around 45 minutes to assemble everything and then an additional 45 minutes for the final baking (which has to be babysat and turned every 15 minutes.)

Final verdict: I just think they are so gorgeous. They would make a terrific gift as they have such a great presentation. They are very tasty but I will probably eat/serve them as a dessert rather than a breakfast. Prep was easy but time consuming. This is NOT a just throw it all together type recipe. Try it if you love baking. Would be easy to sub with any other berry or even apples and cinnamon.

Thursday, October 4, 2012

Pin 140

Original pin:
Pinned Image
No source available.

I have a couple of people in my life right now that are in need of some cheering up this week.

With a little message tweaking I thought this would be a cute, cheerful gift. I got to the store, though, and couldn't decide between peanut or plain. So I just got both.

Step one: Make a cute little saying and modge podge it to the lid of a mason jar.

I used my favorite alphabet stamps to spell it out on some scrapbook paper. I cut out the circle and mod podged it straight on to the inner lid.

While that was drying, I went on to step two--sorting m&m's by color. I also had some tough decisions to make--one jar of plain, one jar of peanut or mix the two? I decided to keep them separate. Once they were all separated I had to decide on color order. Rainbow was best, but what about brown? Where is brown in the rainbow?? I did the plain first and put brown on the bottom.
Then for peanut I put brown on the top. I like the brown on the top best but I wasn't about to pour all those candies out and resort them just to put brown on top!
 
Side by side compairison of brown on bottom or top.
 
Shortly after sorting my mod podge was dry and I popped those lids on, tied a bright, cheery bow, and these puppies are ready to go.


Next step is delivery. One is for someone I don't know terribly well, but I do know she's had a rough week. I think I'll random-act-of-kindness her and just drop it off at her work's front desk. Come to think of it, I might just random-act-of-kindness both of them. I don't think either of them are following me here, so if you see these around town don't let my secret out!

Total cost: $5 total--two jars, two bags of m&m's. By the way, these are pint sized jars and they fit exactly the 12.5 ounce bag (labeled Medium) of m&m's. I was hoping for a few leftovers for me, but I needed every one to fill up the jar!

Total time: 45 minutes

Final verdict: These were easy. You could do this even if you can't craft at all! The lid without a label would still be cute. I think these would be really cute with Skittles too! For holidays, you could by the holiday colored m&m's and layer them. There are endless possibilities! I didn't trust my kids enough to help out and not eat them, but if you trust your kids you could totally put them to work on the sorting part.