Tuesday, September 22, 2015

How to Make Wall Decals Stick

Hello again faithful followers! Long time, no see. . . I MISS YOU!!! Life with three boys is crazy! Crazier than I could every imagine, but I love it nonetheless. Here is a little gift for you. A post I have been working on for, oh, about 19 months or so (!!!) Seriously, how do moms have time to do anything for themselves? It took me almost two years to get this gem ready for you guys!

Shortly before number three's arrival, I put his nursery together. (And shortly is an understatement. This was literally days before his arrival. Welcome to your life little brother.)  Sometime around midnight one night I decided to put up the wall decals that came with his nursery set. You know, those stickers that are supposed to go on the walls to decorate, but claim to be removable and repositionable and still stick.  I didn't think our walls were necessarily "highly" textured, but I could not make those darn things stick! I would put them on and mere seconds later they would slowly peel free and crumple to the ground. I searched online for tips and tricks but all I found were people with the same problem as me. Not one to be defeated, I figured out how to make those suckers behave against their will.


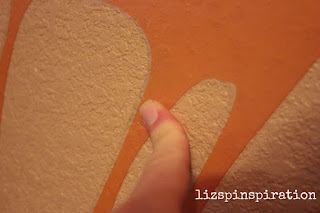
Let me backtrack a little bit. So, these particular stickers are Skip Hop brand, but this trick can apply to any of the vinyl stickers out there. Here is a close up shot of the texture on my wall, which is also covered in a semi-gloss latex paint.


After fighting with the ornery stickers for an hour or so, finding no help from my friend the internet, I was all in. I decided that these were going to stick where I wanted them even if I had to glue them up there with super glue (which is NOT what I ended up doing, so try this method first.)  Disclaimer: The following process didn't damage MY walls. I can't guarantee that this won't damage your walls so do a little patch test in an inconspicuous spot first. However, throughout this, my stickers have remained fully removable, repositionable and have stayed put for the 19 months they've been there. The photos here are not of the actual process when I put them up--because I was only blogging in my brain at the time, but I have used this process to repair decals that have come off thanks to sweetie pie's help. This decal I'm repairing is above his changing table and he has ripped it with his toes while fighting against his diaper changes, sweet little angel of destruction.


What you need--an iron and a presscloth. If you don't have a press cloth, just use a scrap of cotton fabric or a towel. Something to be a barrier between the iron and the decal.)  Set your iron to no steam and the heat to low-medium low to start. You may have to turn the heat up depending on how hot your iron gets and the thickness of your presscloth, but start low. You can always go up.

Position your decal on the wall where you want it. Place the presscloth over the decal.

Iron over the decal and presscloth with medium pressure making small circles for 10-15 seconds at a time. You are basically trying to soften the vinyl. Note--if you touch the actual vinyl with your iron you will most likely melt the vinyl to your iron thus ruining both your decal and your iron--so watch out!

Once you have sufficiently softened your decal, remove iron and presscloth. Run your hand along the decal using your fingers to really press the decal down into the texture grooves on your wall.


You may have to repeat the process a few times to really get a feel for how soft your vinyl needs to get and how hard to smooth the decal down so don't get discouraged if it doesn't work immediately. My decals were pretty big so I just worked it in sections around and around until all the edges were smooth against the wall. Other than that, its pretty simple. My husband did come in in the middle of the night to find me ironing the walls and he certainly gave me a crazy look. I just blamed it on the crazy pregnancy hormones and that lovely pregnancy insomnia and shooed him out of the room.

The top picture is the finished product of the original application. Here is the finished repair job:
Zoomed in. You can see a tiny crack where the decal had been ripped. 

But from a few feet back you don't even notice it. 
Hope this helps you! I would have loved to find this when I was in the middle of my frustration with the peeling decals. Happy wall-ironing!

Hope to see you again soon--I'll be back blogging regularly again just as soon as I finish running the boys to school, cello lessons, gymnastics, reading academy, Bible camp, doctor's appointments, Dayschool, tennis lessons, reviewing their homework, practicing spelling lists, returning library books, editing the school yearbook, selling 800 cases of fundraiser chocolate, feeding the masses, working my REAL job, kissing on all the boys, training for my next half-marathon, taking my husband out on a date here and there, PTA meetings. . . .

Wednesday, July 9, 2014

Pin 215: Watermelon Sticks

Original pin:
Watermelon sticks, perfect for little hands.  A finger food perfect for picnics or potlucks #Watermelon, #KitchenTips, #Summer, #Food, #Clea...
http://athriftymom.com/watermelon-sticks-perfect-for-little-hands-kids-fingerfoods-picnic-diy/

My boys LOVE watermelon. We found a cute seedless one at the store that they begged for. I gave in. Today, when I was getting dinner ready, I decided to cut it up for them to snack on.


I started by cutting the melon in half. That part wasn't too hard. It was step two I was more worried about. I was certain I'd end up with quite a few odd sized pieces and waste a lot of the melon. 


 My first half was a bit rough.  I was REALLY REALLY REALLY worried I was going to cut a finger off. I had my big serrated knife out and the watermelon was sliding around a little bit and I was trying to hold it all together for the cross cuts.  While I did end up with sticks, they were fairly large. Fortunately, I did not end up with all the odd sized pieces I was afraid I'd have.

About 16 sticks


I called the boys in to test them out. They were so excited I could not get a good picture out of them. Here is the best one:

silly boys

They loved the sticks instead of the wedges, or as L referred to them, "the smiles." They plowed through about three each before returning back to whatever it was they were doing before watermelon time. W actually ate most of his cookie-monster-style--shoving it in as fast as he could with juice dripping everywhere. They did a much better job of eating it down to the rind than they usually do with the wedges.

My second half turned out a little better as I made a more concentrated effort to make thinner cuts. I also turned the melon halfway, working from right to center, turn 180 degrees and work right to center again. Then do the same method for the cross cuts.

More than 24 sticks
These packed up easily into a large storage container. Again, easier than wedges to pack them in tightly. And easy for the boys to grab one out on their own.


Cost: $3 for the watermelon

Time: 5 minutes

Final verdict: I may never cut a watermelon any other way again. This was easy to do, convenient, and the boys loved it. With practice I may even get good at it. It would probably be even easier to make straight, even cuts if you used an electric knife. Oh, and in case you were worried, I did not cut any fingers off.


Tuesday, July 8, 2014

Pin 214: Painting Tips (aka How to Paint While Caring for a Newborn)

We've been in our house over eight years now and there are a few walls that are in desperate need of a fresh coat of paint. One problem. . . I hate painting walls. When we were first married we owned a small home that was formerly my husbands bachelor pad. It was covered in blinding hi-gloss white paint on nearly every surface--walls, ceilings, cabinets. Pretty much only the carpet escaped the previous owner's paint sprayer. Before I moved in, we spent hours and hours painting everything in that house. After that, I swore I would never paint again. The first coat of paint that went up in our current house was done by someone we paid to do it.

Besides being eight years old, the paint has been at the mercy of two boys and has crayon, pencil, handprints, spaghetti sauce, and who knows what else smeared on many walls. The nice eggshell finish is not favorable to cleaning this mess off. Our lightswitches are a bit high, so under each switch is this long smear of boy, where they plant their hand and then jump to switch the light on.

Finally, finally, finally I got the motivation to start taking action on these walls. My motivating forces--I am having a baby shower for my sister next month and I just don't want one more round of guests to endure that mess on the walls. Secondly, I have a friend who LIKES to paint. Seriously, if it weren't for her I might have curled up and cried on the bathroom floor for a day or two before actually cracking open the paint can.

My husband and I discussed strategy on painting for a few days before starting. One of the worst parts of painting is the prep work--the taping, and drop cloths, and working around the mess of plastic sheeting. He was certain that we could do this without taping. I, however, was not so sure. But, again, thanks to my paint-loving friend, I forged ahead, sans tape, sans drop cloths.

So my friend and I knocked out the painting job in the boys bathroom in just a few hours--without drop cloths or tape, thankyouverymuch. How did we do it?? Well, first we were just really, really careful. If we smudged an edge it was immediately wiped off. We started out the edges cutting in with angled brushes. Then I remembered I had this edging tool out in the garage. I had tried it before on another painting job but remember it not working so well. I was feeling just brave enough to try it again this day.

Here it is:


So it is this little rectangle thingy with a handle and a couple of wheels on the top. The other side is this super soft pad. 


I was careful not to overload it with paint and rolled the wheeled side along the edges of the ceilings, doors, baseboards, etc.  It worked AMAZINGLY. Using this puppy saved us soooo much time. Apparently the trick I must have missed last time is that you can't get paint on the wheels or you get a big mess on the other side. You can see the old paint on the wheels in the first picture. You can get your own for just a few bucks by clicking here. It was so easy that when my helper had to leave, I was motivated enough to tackle the hallway all by myself. With the baby home. And this is where the pin comes in. . . well, sort of.

I know I had this pinned somewhere but I can't find it now. It was probably under one of those pins with about 8,000 tips to make my life easier--can't get enough of those (who doesn't need an easier life???) Or maybe it was one of those mysterious pins that gets deleted by Pinterest due to some sort of copyright infringement. . .

Original pin:
No image available, since I can't even find the original pin, but the idea behind the pin was that when you are painting, you can put your brush and paint tray in plastic bags to keep them from drying out while you take a break.

The hallway I was about to attack has high ceilings and seven doorways to cut around. No fear here with my edging tool! But, again, I was home alone with my baby who needed to eat frequently, bathe, and be lovingly snuggled back to sleep.


I worked in between these tasks and when I needed to stop I simply stashed my brush or edger or roller in a grocery sack to keep it wet.

My paint tray double bagged

It worked well all evening. I bagged all my different tools as I switched between the brush, the edger, and the roller.  Unfortunately, I didn't have time/energy to finish the whole hallway that first night. I decided to take a gamble on that pin and see if the trick would work through the night. I only had a little paint left in the tray but I bagged the tray and the roller up for the night just to see how long I could push it. 

The next day when I was ready to paint again I pulled everything out and did a little finger test:


While the roller was mostly dry, the paint in the tray was perfect. I had another roller brush so I popped it on and went back to work. I finished the hallway in a few hours and am sooo happy to have it all done.

Total cost: $0 for the plastic bags

Total time: Mere seconds in the midst of a big painting job. Overall I probably spent 6-7 hours painting the bathroom and hallway, but saved so much time by not painting or dragging around drop cloths--not to mention having the big kids traipse around the dropcloths!

Final verdict: Fabulous. I could never have done it with the kids around if I hadn't been able to stop frequently to tend to baby and big kid needs. I would totally use this again. For overnight storage, I would wrap the roller in its own bag to prevent drying out, I had just left it propped on the tray. Now I'm motivated to keep painting the rest of the house, although I need my friend to come back for the living room. The ceilings in there are way too high and intimidating. 

Tuesday, July 1, 2014

Pin 213: How to Cut Grapes

This video has been all over my facebook feed this week. I decided to try it out during lunch for the boys one day.


Original pin:
Genious!  How to: cut a bunch of grapes in half in less than 10 seconds.
http://www.scarymommy.com/cut-grapes-in-half/ (check out the video at this link)

According to these folks, I've been cutting grapes all wrong. I didn't really know there was another way! The idea seems simple enough--sandwich a handful of grapes between a pair of plates and slice away.

I grabbed me a plate of grapes . . .

 . . . sandwiched them in there real nice. . . 


and sliced away with my longest serrated bread knife. 

While I was doing this, my eldest looked at me all wild-eyed and said, "ummmm. . . WHAT are you DOING?!?!?!" Mr. Type A can't handle change well.  Apparently this is not an appropriate way to cut grapes. 

I was all ready to awe him with this new trick and I whisked the top plate away to reveal . . . 


this. This plate of half untouched grapes and the other half randomly sliced. Most no where nearly in half. Quite a few I had just barely skimmed off their tops. Never one to be discouraged, I decided that the problem must be that I have too much lip to my plate and it prevented the knife from going through the centers. So I dug out my flattest plates and a plucked a new batch of grapes and tried again. 


This time at least all the grapes had some sort of damage to them. They worked just fine for our fruit salad. 

Total cost: $0

Total time: 5 minutes, mostly because I had to trouble shoot the first time and start over. 

Final verdict: I definitely think you need to use the flattest plates you have. My grapes in round one were sitting much too low inside the rim of the plate to be reached in the middle by the knife. While round two's grapes weren't perfect, with practice I could probably make that work. Will I use this trick again or just stick with the old way?  The future is unclear right now. Since it didn't save me any time this day and it is a skill I'm going to have to hone, I may just stick to the old way (you know, not really cutting them and just practicing my Heimlich skills. I kid. . . well, sort of. I cut them when I send them to school, okay??) Kudos to the people who do this well. 


Friday, May 23, 2014

I have a secret. . .

It has been nine months since my last post, and even before then it was getting a little erratic. I can explain it. . .

I was nauseous. And tired. And huge.

Pinspiration was something I did in the time after my kids went to bed. Now all I wanted to do after my kids went to bed was eat a bowl of Bluebell as big as my head and pass out in the recliner as quickly as possible. So I did.

But, come St. Patrick's Day, I was done with all that business.


After almost 41 weeks on team green, we welcomed our third beautiful, bouncing, (BIG) baby boy. I spent all of 20 minutes in labor to deliver him.  Twenty painful, unmedicated, hard minutes in labor to deliver this 10 lb 2 oz miracle. He broke his collar bone and I broke my tailbone in the process.

We are both healing up now and I have been thinking about Pinspiration a lot lately--not that I really have ANY time to do some pins, but just that I miss it and I miss y'all. So I wanted to stop in and say hi and thank you to the people out there who have sent me sweet messages telling me they miss the blog. I do too!!

I'm going to do my best to get back to it this summer, although there will definitely NOT be five pins a week at this point. I do have some baby lessons to share. Funny, its my third AND I am a professional baby carer (NICU Nurse) and I am still learning new tips and tricks with this one.

One of my friends once told me something about her third child that really stuck with me. She said that the third time around, she finally threw out everyone's advice and did everything the way SHE wanted to do it, from pregnancy, to labor, to newborn care, and it was the best thing she ever did. I chose to do that too, but that's for another post because I have a lot to say about that!

Thanks for sticking with me through this. Love and miss! xoxo lizzy

Monday, August 26, 2013

Pin 212: Crunchers (aka Scottish Chocolate Caramel Bars)

Original pin:
Crunchers - A Swirl of chocolate, brown sugar, peanut butter, butterscotch and crackers
http://www.twirlandtaste.com/2011/01/crunchers-addictive-chocolate-brown.html

In July, (yes, I am way behind around here) I needed a dessert to take to our family reunion. I don't make a ton of sweets but my sweets board on Pinterest is full of delicious-looking things. I used the occasion to try something out. I pulled up this recipe for "crunchers." Club crackers layered with a caramel-y filling and topped with a butterscotch/chocolate layer. Yumm.

While this dessert definitely does NOT fall into my just-whip-together-something-amazing-as-you-glide-out-the-door category, it was not difficult. Just time consuming, and as far as Mr. Pinterest is concerned, uses far too many pots and pans to pull together.

I started with layering the crackers but I couldn't fit as many in the dish as the recipe said I should, so I switched to a larger dish. I could almost squeeze the right amount into this dish but my final dessert was not as thick as the original posters. When it came time for topping, I was certain the called for amount would not cover my dessert completely so I just added a few extra handfuls of chocolate chips and butterscotch and then ended up with a nice thick chocolaty layer.

All chilled and out of the fridge ready for cutting:
I popped it out of the dish and off the foil--surprisingly easy and smooth. Time to cut into bars. I wasn't sure what to expect while cutting--if it was going to be difficult or not, but it was really easy to cut.
So my layers are not perfect, my chocolate is pretty thick, but the bars themselves were pretty darn tasty. Not exactly what I expected, but a nice little combo of salty and sweet. I packed the bars up and took them to the family reunion. One of our cousins took one taste and declared them exactly like this dessert they fell in love with on a trip to Scotland. I guess that gives me "International Chef" status.

Total cost: umm. I forgot. It was July. Sorry folks.

Total time: Thirty minutes plus chill time.

Final verdict: They were easy enough and tasty enough that I will probably make them again, but I might wait for a special occasion--maybe Christmas parties or the next family reunion. I might also stick with a smaller dish and less crackers to have a thicker bar like in the original photo.


Tuesday, August 6, 2013

Pin 211: Homemade Ice Cream in a Baggie

Original pin:
How to Make Homemade Ice Cream in a Bag by familyfun #Ice_Cream_in_a_Bag #KIds #familyfun
http://myroyalkitchen.com/2011/12/homemade-icecream-in-a-baggie/

The boys and I decided we were ready to take on this challenge today--homemade ice cream in 5 minutes using plastic baggies. Seems a perfect summer activity for kids. I had some 1/2 & 1/2 leftover from a soup recipe last week so the only thing I had to buy was rock salt. Fabulously for me, the rock salt was on sale at the grocery today!

After dinner tonight we decided to whip these up. Things did NOT go as smoothly as I had planned. The basic idea is that you put the ice cream ingredients in a small baggie.  Then the small baggie goes inside the larger baggie with ice and salt. Shake a few minutes and, voila! you have ice cream. First problem was when I turned my back for one minute, little bit decided to shake his bag upside down. You can probably guess that ice and rock salt when absolutely everywhere. Refilled his and when I grabbed my camera to get an action shot, we found problem number two. (Thus no action shots.) The ice baggie was getting torn and leaking. Quick fix--double bag the ice bag.  Back to work when almost immediately, the ice cream baggie was ripped and leaking into the ice!
milky, icy, salty mess

Double bagged the ice cream bag and changed strategies.  I sat the boys down in chairs, wrapped the double bagged double bags in a towel and we went for more of an agitation/massage motion than shaking to avoid any more trauma to our baggies.


This strategy did not result in any more tears, no leaking, and we actually did end up with some ice cream eventually. It took longer than five minutes and my kids didn't have the arm strength/endurance to do this alone. I took turns with them agitating there bags. Maybe about 10 minutes after we had fixed all our problems and changed our strategies we decided our ice cream was solid enough to sample.


It probably could have gone an additional few minutes, but it was pretty ice-cream like. The taste was really good--much better than I anticipated. The boys dressed theirs up with sprinkles and I just kept thinking of the delicious candy mix-ins I didn't have.  We made two batches per the recipe. It easily made four servings (two servings per baggie).

Total cost: $2.49 for rock salt

Total time: It took us 25 minutes to solve all our problems and end up with a mostly frozen ice cream. Next time I predict it will be more like 15 minutes.

Final verdict: We will make this again. One of my favorite soups calls for a small amount of half-and-half and the remainder always goes bad in the fridge. This is a perfect solution to using up that left over bit. My recommendations (and plan for next time) double bag from the beginning. Double bag the mixture and double bag the ice. Also, I will stick with the agitation/massage action. It worked and just took a bit longer. The kids were really bummed they didn't get to eat their ice cream out of the bag like the kids in the picture.