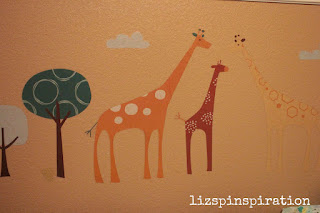
Shortly before number three's arrival, I put his nursery together. (And shortly is an understatement. This was literally days before his arrival. Welcome to your life little brother.) Sometime around midnight one night I decided to put up the wall decals that came with his nursery set. You know, those stickers that are supposed to go on the walls to decorate, but claim to be removable and repositionable and still stick. I didn't think our walls were necessarily "highly" textured, but I could not make those darn things stick! I would put them on and mere seconds later they would slowly peel free and crumple to the ground. I searched online for tips and tricks but all I found were people with the same problem as me. Not one to be defeated, I figured out how to make those suckers behave against their will.
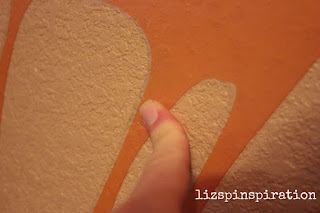
Let me backtrack a little bit. So, these particular stickers are Skip Hop brand, but this trick can apply to any of the vinyl stickers out there. Here is a close up shot of the texture on my wall, which is also covered in a semi-gloss latex paint.
After fighting with the ornery stickers for an hour or so, finding no help from my friend the internet, I was all in. I decided that these were going to stick where I wanted them even if I had to glue them up there with super glue (which is NOT what I ended up doing, so try this method first.) Disclaimer: The following process didn't damage MY walls. I can't guarantee that this won't damage your walls so do a little patch test in an inconspicuous spot first. However, throughout this, my stickers have remained fully removable, repositionable and have stayed put for the 19 months they've been there. The photos here are not of the actual process when I put them up--because I was only blogging in my brain at the time, but I have used this process to repair decals that have come off thanks to sweetie pie's help. This decal I'm repairing is above his changing table and he has ripped it with his toes while fighting against his diaper changes, sweet little angel of destruction.
What you need--an iron and a presscloth. If you don't have a press cloth, just use a scrap of cotton fabric or a towel. Something to be a barrier between the iron and the decal.) Set your iron to no steam and the heat to low-medium low to start. You may have to turn the heat up depending on how hot your iron gets and the thickness of your presscloth, but start low. You can always go up.
Position your decal on the wall where you want it. Place the presscloth over the decal.
Iron over the decal and presscloth with medium pressure making small circles for 10-15 seconds at a time. You are basically trying to soften the vinyl. Note--if you touch the actual vinyl with your iron you will most likely melt the vinyl to your iron thus ruining both your decal and your iron--so watch out!
Once you have sufficiently softened your decal, remove iron and presscloth. Run your hand along the decal using your fingers to really press the decal down into the texture grooves on your wall.
You may have to repeat the process a few times to really get a feel for how soft your vinyl needs to get and how hard to smooth the decal down so don't get discouraged if it doesn't work immediately. My decals were pretty big so I just worked it in sections around and around until all the edges were smooth against the wall. Other than that, its pretty simple. My husband did come in in the middle of the night to find me ironing the walls and he certainly gave me a crazy look. I just blamed it on the crazy pregnancy hormones and that lovely pregnancy insomnia and shooed him out of the room.
The top picture is the finished product of the original application. Here is the finished repair job:
 |
| Zoomed in. You can see a tiny crack where the decal had been ripped. |
 |
| But from a few feet back you don't even notice it. |
Hope to see you again soon--I'll be back blogging regularly again just as soon as I finish running the boys to school, cello lessons, gymnastics, reading academy, Bible camp, doctor's appointments, Dayschool, tennis lessons, reviewing their homework, practicing spelling lists, returning library books, editing the school yearbook, selling 800 cases of fundraiser chocolate, feeding the masses, working my REAL job, kissing on all the boys, training for my next half-marathon, taking my husband out on a date here and there, PTA meetings. . . .


